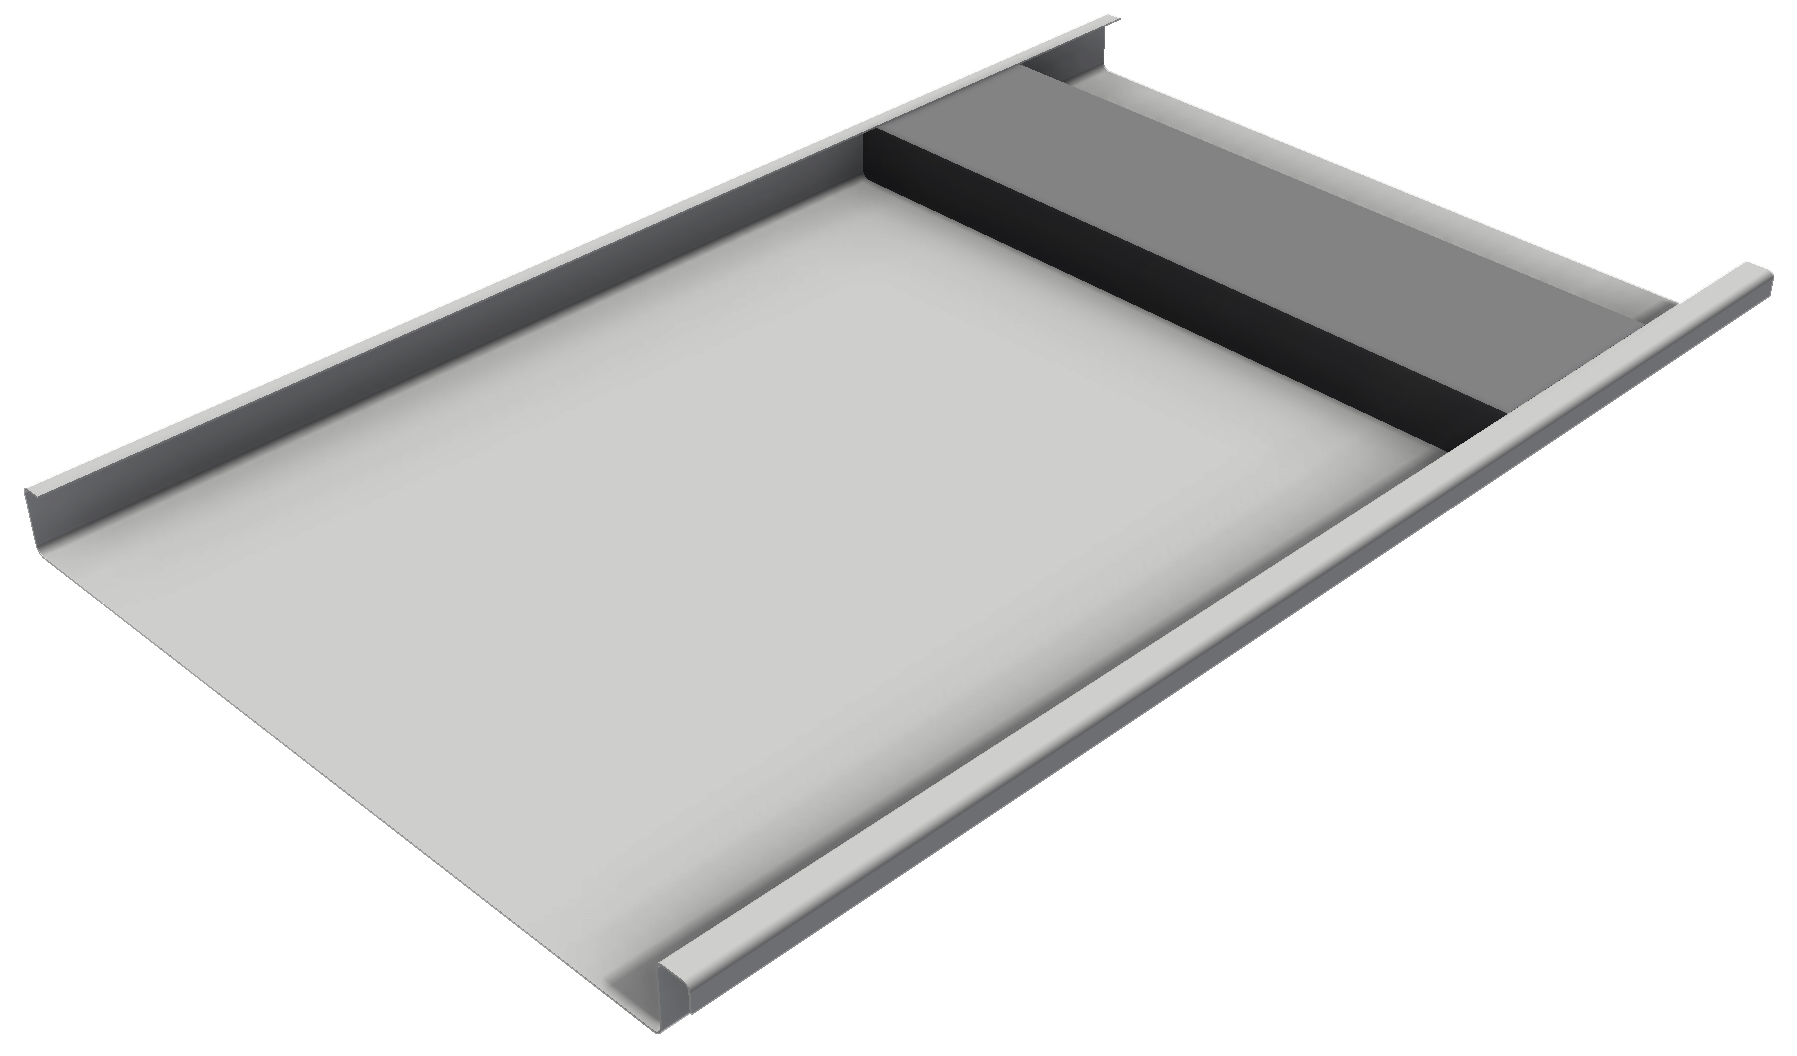
About Grandeur®
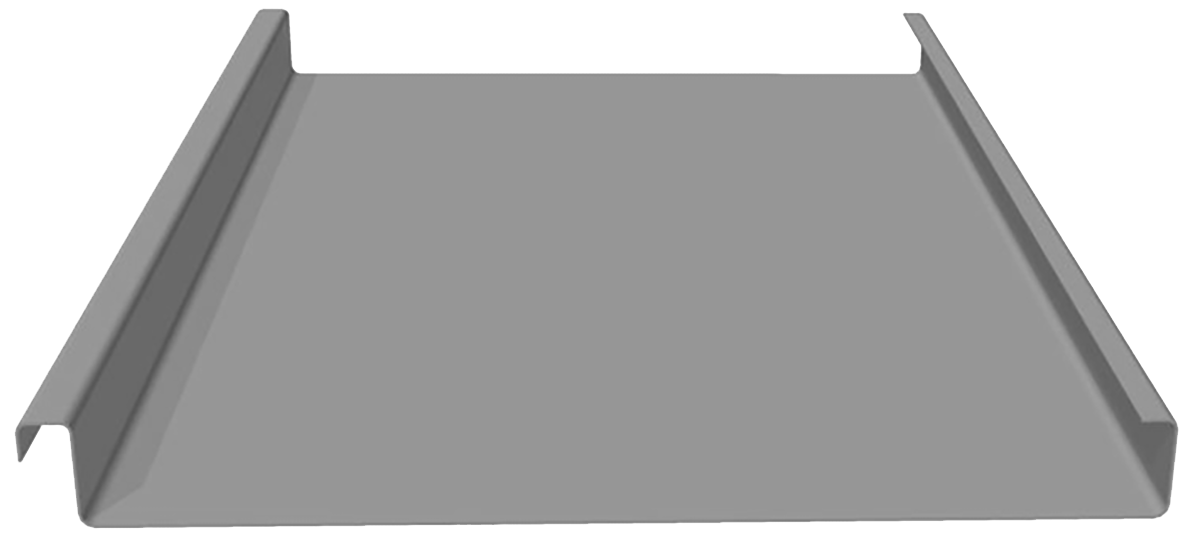
The Grandeur® profile is a classic, versatile solution for both stylish and elegant design. Grandeur® has a curving capacity, not easily achieved with all cladding profiles, allowing for exceptional results. Clean lines for a striking finish, Grandeur® is available in a wide range of colours and finishes to separate your next project from the rest. Grandeur® can be smooth curved to a radius of 1.5m in steel and to 0.6 in aluminium.
Grandeur® is offered on traditional supporting substrates, plywood and fibre cement panels, and now with comprehensive testing, can be offered on cost effective steel battens.
Material Specifications - Steel
| Property | 325mm Pan width | 525mm pan width | Notes | |||||
| Base Metal Thickness (mm) | 0.55 | 0.70 | 0.75 | 0.55 | 0.70 | 0.75 | BMT | |
| Total Coated Thickness (mm) | 0.60* | 0.75* | 0.80* | 0.60* | 0.75* | 0.80* | TCT | |
| Mass / Unit Length | ZINCALUME® steel | 1.78 | 2.25 | 2.41 | 2.67 | N/A | 3.61 | kg/m |
| COLORBOND® steel | 1.79 | 2.29 | 2.42 | 2.69 | N/A | 3.63 | ||
| Mass/Unit Area | ZINCALUME® steel | 5.48 | 6.92 | 7.42 | 5.09 | N/A | 6.89 | kg/m2 |
| COLORBOND® steel | 5.52 | 7.06 | 7.46 | 5.13 | N/A | 6.92 | ||
| Coverage (mm) | 325 | 525 | mm | |||||
| Minimum Yield Strength (MPa) | G300 | MPa | ||||||
| Tolerance | Sheet length ±3mm Cover width ±2mm |
|||||||
| Thermal Expansion | 2.9mm average per 5.0 metre @ 50˚C change |
|||||||
Notes:
- The COLORBOND®; and ZINCALUME® material is in accordance to AS 1397, AS 1365 and AS 2728.
- *is based on Standard COLORBOND®; single-sided material. For other painted steel options please contact a Fielders® representative.
Material Specifications - Aluminium
| Property | 325mm pan width | 525mm pan width | Notes |
| Base Metal Thickness (mm) | 0.90 | 0.9 | BMT |
| Total Coated Thickness (mm) | 0.96 | 0.96 | TCT |
| Coverage | 325 | 525 | mm |
| Minimum Yield Strength | 180 | MPa | |
| Tolerance | Sheet length ±7mm Cover width ± 4mm |
||
| Thermal Expansion | 5.9mm average per 5.0 m @ 50˚C change |
||
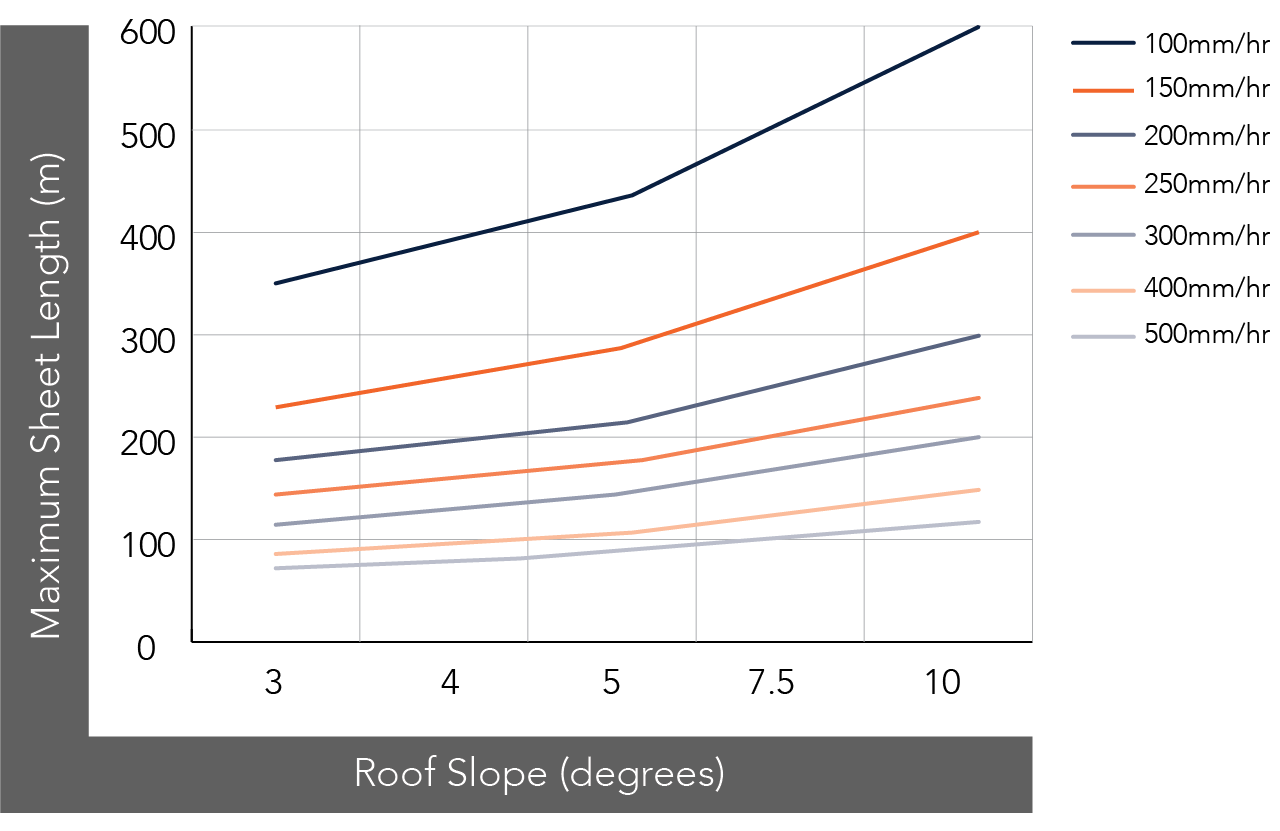
Maximum Roof Length (m)
| Roof Slope (degrees) | Rainfall Capacity (mm/hr) | |||||
| 100 | 150 | 200 | 250 | 300 | 400 | |
| 3 | 348 | 232 | 174 | 139 | 116 | 87 |
| 4 | 392 | 261 | 196 | 157 | 131 | 98 |
| 5 | 433 | 288 | 216 | 173 | 144 | 108 |
| 7.5 | 516 | 344 | 258 | 206 | 172 | 129 |
| 10 | 593 | 395 | 296 | 237 | 198 | 148 |
Note:
- Minimum recommended slope is 3˚.
- Sheet lengths greater than 24m are not recommended due to thermal expansion and contraction.
- For slopes under 7.5 degrees the use of box gutters is recommended
Non-Cyclonic Load Span Tables
The design pressures, allowable spans and design data for Grandeur® have been determined from tests carried out in accordance with on the following Australian Standards:
- AS 1170.2:2011 Structural design actions Part 2: Wind actions
- AS 1562.1-2018 Design and installation of sheet roof and wall cladding Part 1: Metal
- AS 4040.0-1992 Methods of testing sheet roof and wall cladding Part 0: Introduction, list of methods and general requirements
- AS 4040.1-1992 Methods of testing sheet roof and wall cladding Method 1: Resistance concentrated loads
- AS4040.2-1992 Methods of testing sheet roof and wall cladding Method 2: Resistance to wind pressures for non-cyclone regions
- AS4040.3-1992 Methods of testing sheet roof and wall cladding Method 3: Resistance to wind pressures for cyclone regions
- AS4055:2012 Wind Loads for Housing
SA HB 39: 2015 Handbook - Installation code for metal roof and wall cladding National Construction Code of Australia.
Wind Pressure Capacities - 0.55mm BMT - Grandeur®
| Width of pan (mm) | Clip Spacing (mm) | Plywood | Steel Batten | ||
| Serv. (kPa) | Strength (kPa) | Serv. (kPa) | Strength (kPa) | ||
| 325 | 350 | 0.78 S/F | 4.93 S/F | 0.78 F | 4.59 F |
| 700 | 1.16 S | 4.15 S | 1.17 F | 2.58 F | |
| 525 | 350 | 0.32 F/S | 2.37 F/S | 0.32 F | 2.42 F |
| 700 | 0.45 S | 1.45 S | 0.45 F | 1.45 F | |
Legend:
S = Sliding Clip
F = Fixed Clip
Note:
- 525mm wide pan only suited for walling applications.
- Plywood options:
15mm F11 Structural CD grade plywood to be supported at 450mm centres maximum for roofing applications, or supported at 600mm centres for walling applications.
19mm F11 Structural CD grade plywood to be supported at 600mm centres maximum. - When 19mm (roofing) or 15mm (walling) plywood substrates are utilised the plywood substrate should be fastened to the building subframe in accordance with plywood manufacturers recommendations for flooring ply. Screws shall comply with AS 3566 Class 3 as a minimum.
- Steel Battens to be 40mm x 0.55mm BMT G550 minimum, supported at 1200mm centres maximum fixed to 0.75mm BMT G550 steel supports (minimum).
- Serv. denotes serviceability
Installation
Fielders® Grandeur® profile is a concealed fixed cladding system that is sound for both direct installation onto steel battens, or conventional plywood backing. For ply substrate installations, a minimum of 15mm thick plywood must be used and fixed with 10g-16x40mm wing-teks with countersunk rib heads at 150 centres. Screws located at the end of the plywood panel need to be a minimum of 50mm from the edge. Alternatively, Grandeur® can be installed directly onto 40mm x 0.55 BMT G550 steel battens with a maximum span of 1200mm.
Stainless Steel Clips
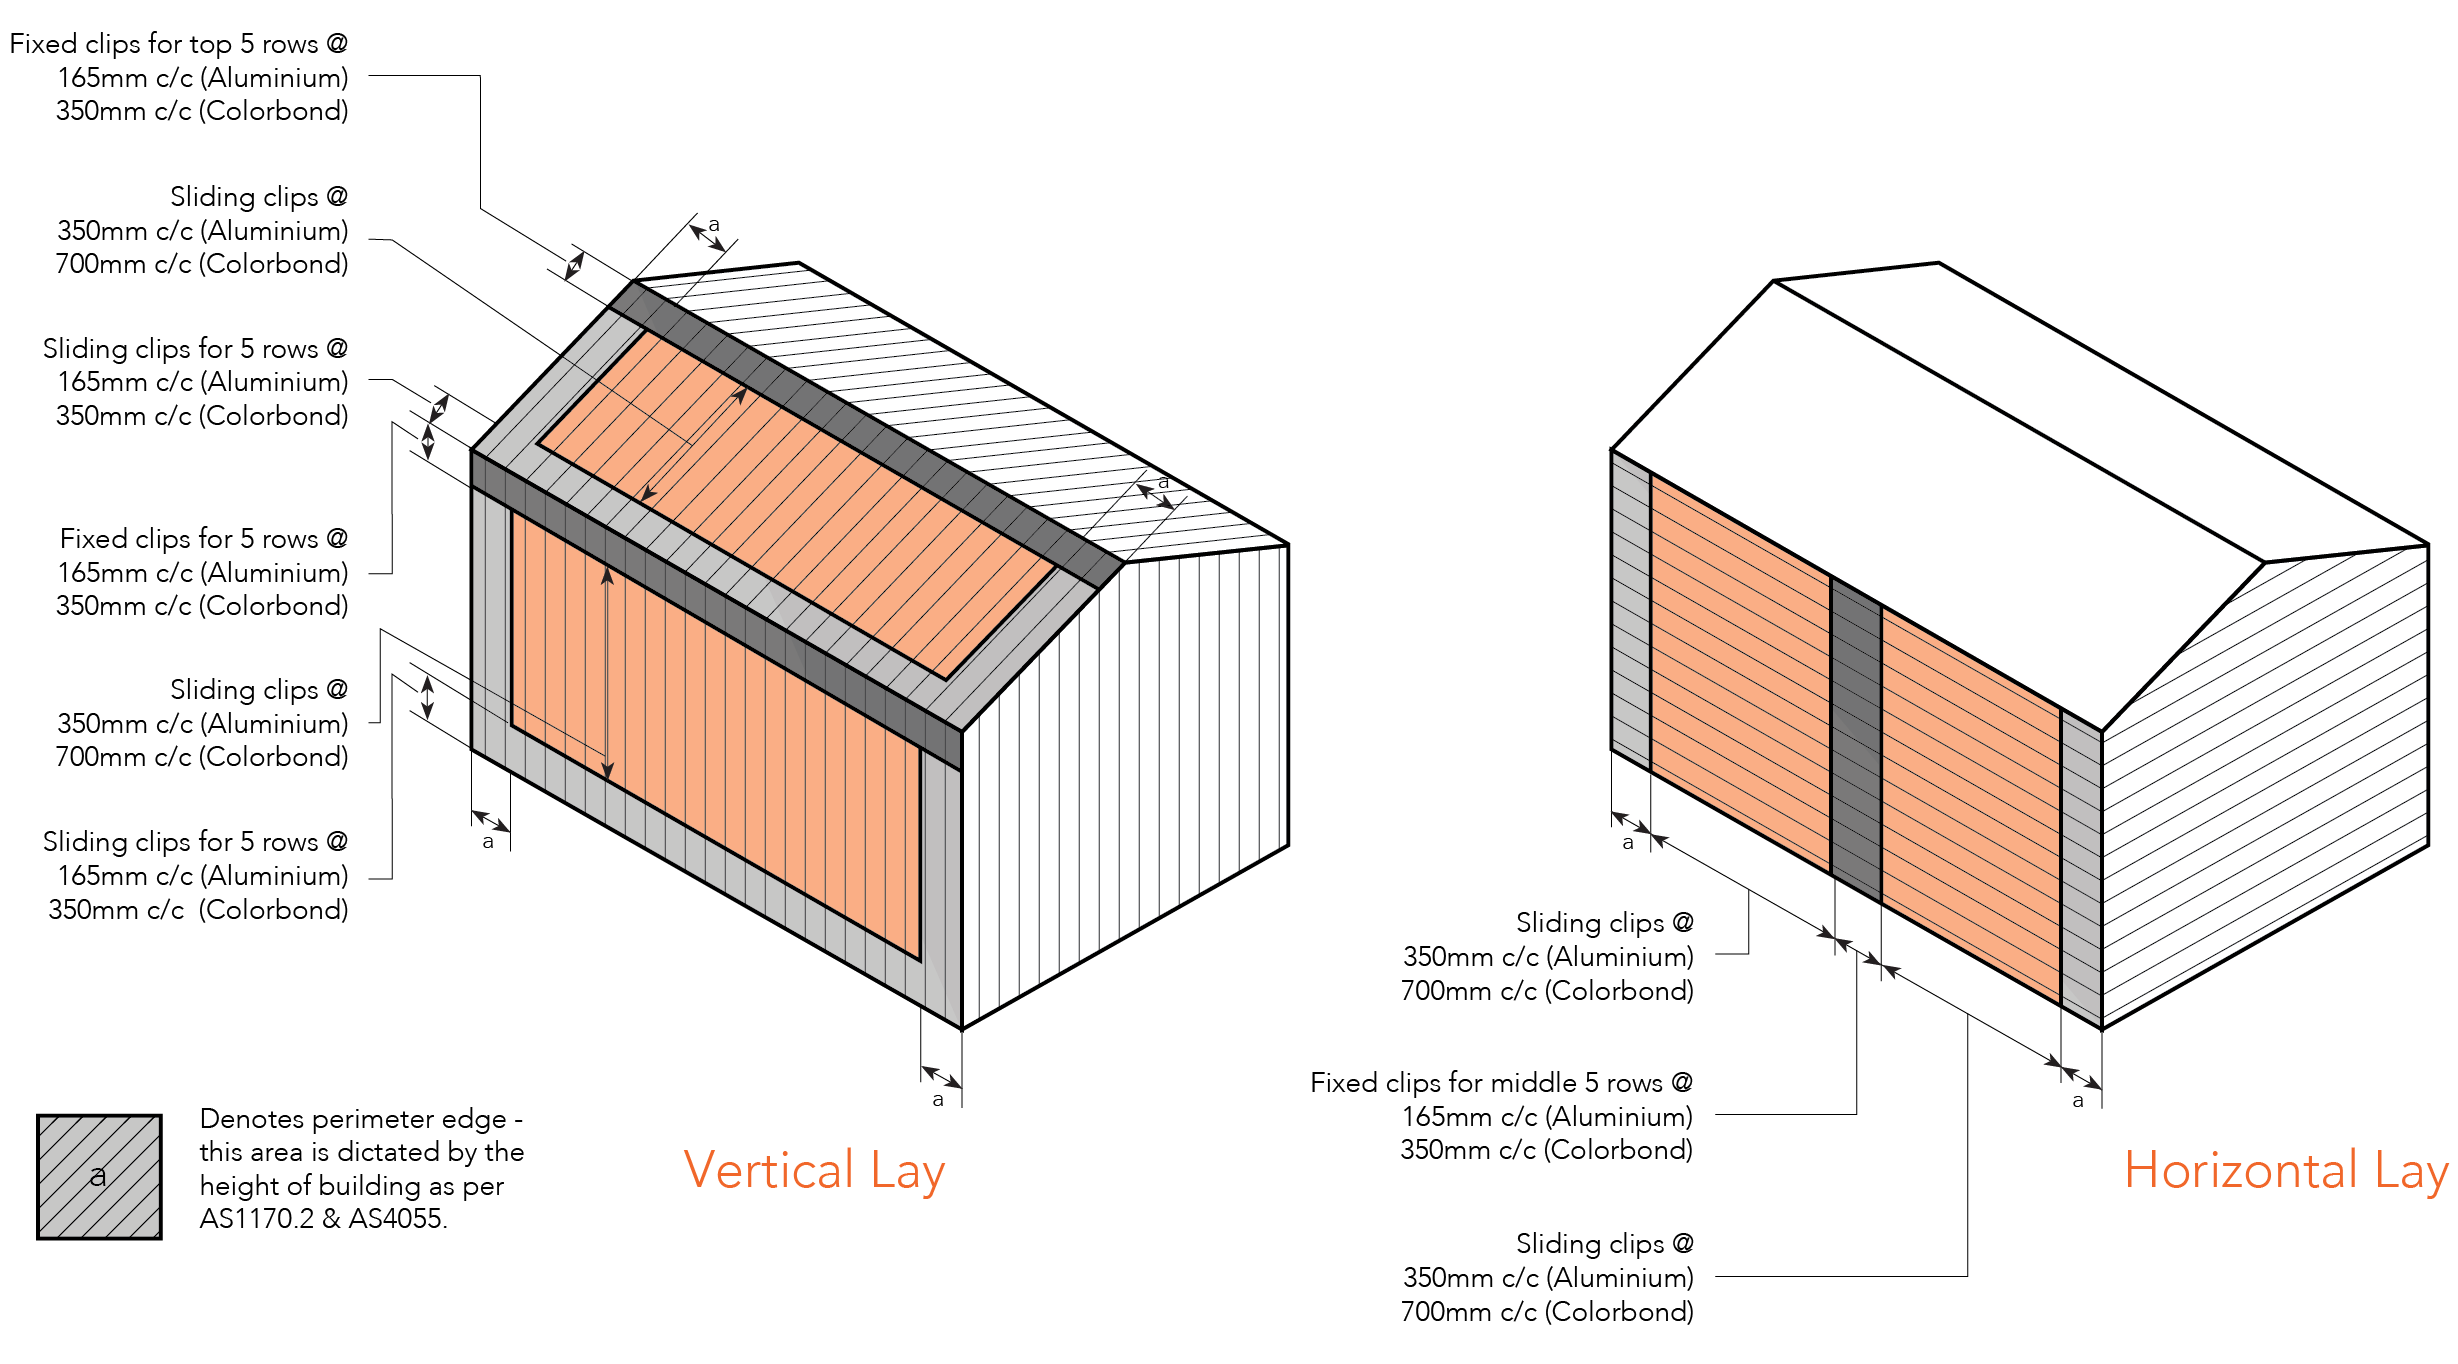
To allow for expansion and contraction, a combination of fixed and sliding clips should be used to install the profile, as detailed in this section start n Figure GR CL NC 001 & 002.
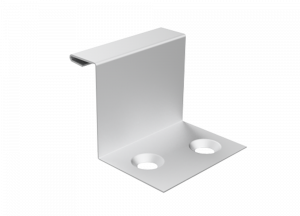
Figure GR CL NC 001 Grandeur® Fixed Clip
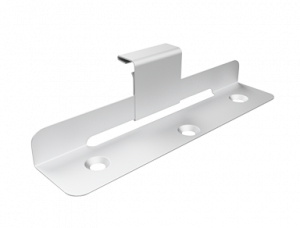
Figure GR CL NC 002 Grandeur® Sliding Clip
Typical Wall & Roof Sheet Layout
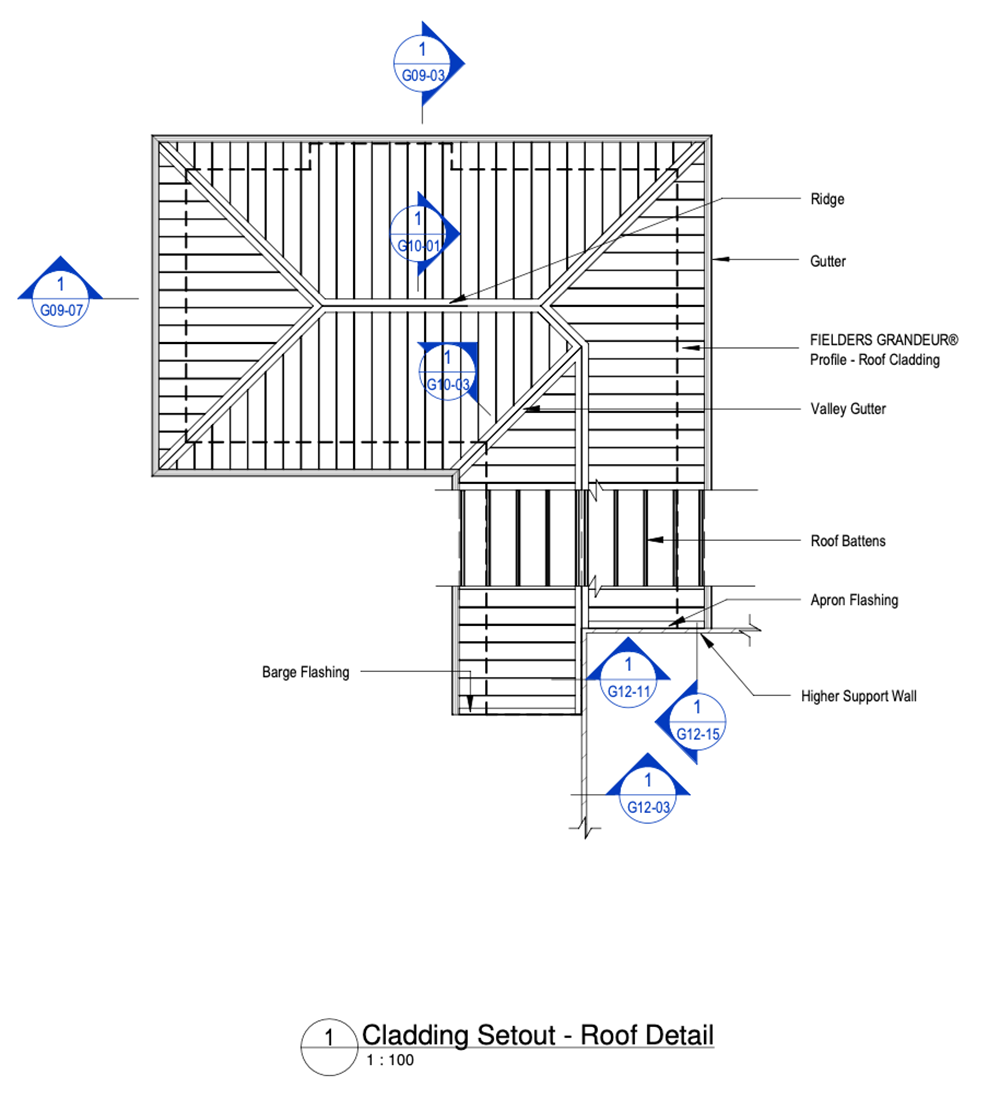
For typical clip, wall and roof sheet layouts on plywood see Figure GR ID NC 001.
The maximum recommended sheet length for Grandeur® utilising sliding clips is 24m. When Grandeur® is supported on 40mm steel battens, fixed clips are to be used throughout with a maximum sheet length of 12m. It should be noted that fixed clips will restrict thermal movement of the profile and that this may contribute to oil-canning on wider profiles and darker colours. Shorter lengths may need to be considered if this is a concern.
Seaming Tool
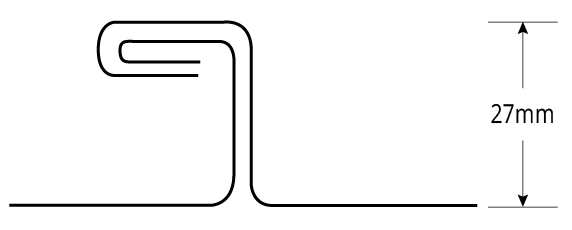
The cladding is to be installed with the seam running perpendicular with the battens or purlins. The seam is then formed using a specifically designed seaming tool that bends the lip of the female rib 90 degrees, locking it onto the male rib. This process can also be repeated with aluminium material to form a double seam.
Installation Guidelines
Typical Roofing Installation
Step 1
Starting from the lowest part of the roof, lay across the roof plywood an anti-abrasive membrane. Proceed to lay further runs up the roof pitch until the whole of the plywood is covered. Make sure that all the laps are from the top run over the lower run so any moisture will run into the gutters.
Step 2
Install a starter edge trim before attempting to fix the first panel. See Figure GR ID NC 002.
Step 3
Place the first panels female rib over the lip of the edge trim and when engaged, lay the panel flat on the covered plywood.
Step 4
Fit the clips to the male rib as per the details mentioned above, making sure they are square with no sharp edges protruding and screws fully tightened.
Step 5
Remove any protective strippable film before fixing the next panel.
Step 6
Place the next panel’s female rib over the male rib and repeat step 4.
Step 7
Continue to repeat Step 4,5 & 6 until the roof is fully covered.
Step 8
Seam the ribs with one pass for the single seam and two passes for the double seam (aluminium only).
Step 9
Flash the roof with products of the same material as the
roof panels as per architect’s details.
Insulation
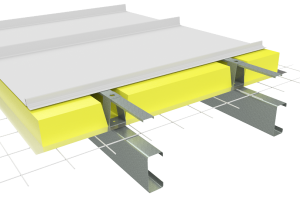
Care needs to be taken when installing insulation with Grandeur® roof sheeting. When insulation thicknesses up to 50mm are installed the screws may need to be increased depending on the thickness and density of the insulation. When the screw is properly tightened into metal there should be a minimum of three (3) threads protruding past the support being fixed in to. For timber, the screw must have a minimum embedment of 25mm into timber.
When insulation is required in conjunction with Finesse® profiles, Fielders® recommend the use of a thermal spacer to help maintain Rw values as well as minimising any bulging in the profile caused by the insulation.
Insulation blankets and batts can cause wide flat pan cladding to bow out between the supports, between fasteners along the support, or bow the pans. For insulation blankets and batts as well as more dense glass wool and rock wool, and thicker insulation, spacers are recommended.
Oil Canning
Oil canning is a characteristic of thin gauge cold formed metal. There are many factors that influence the degree of oil canning.
For further information about Oil Canning, please refer to our Oil Canning reference page.
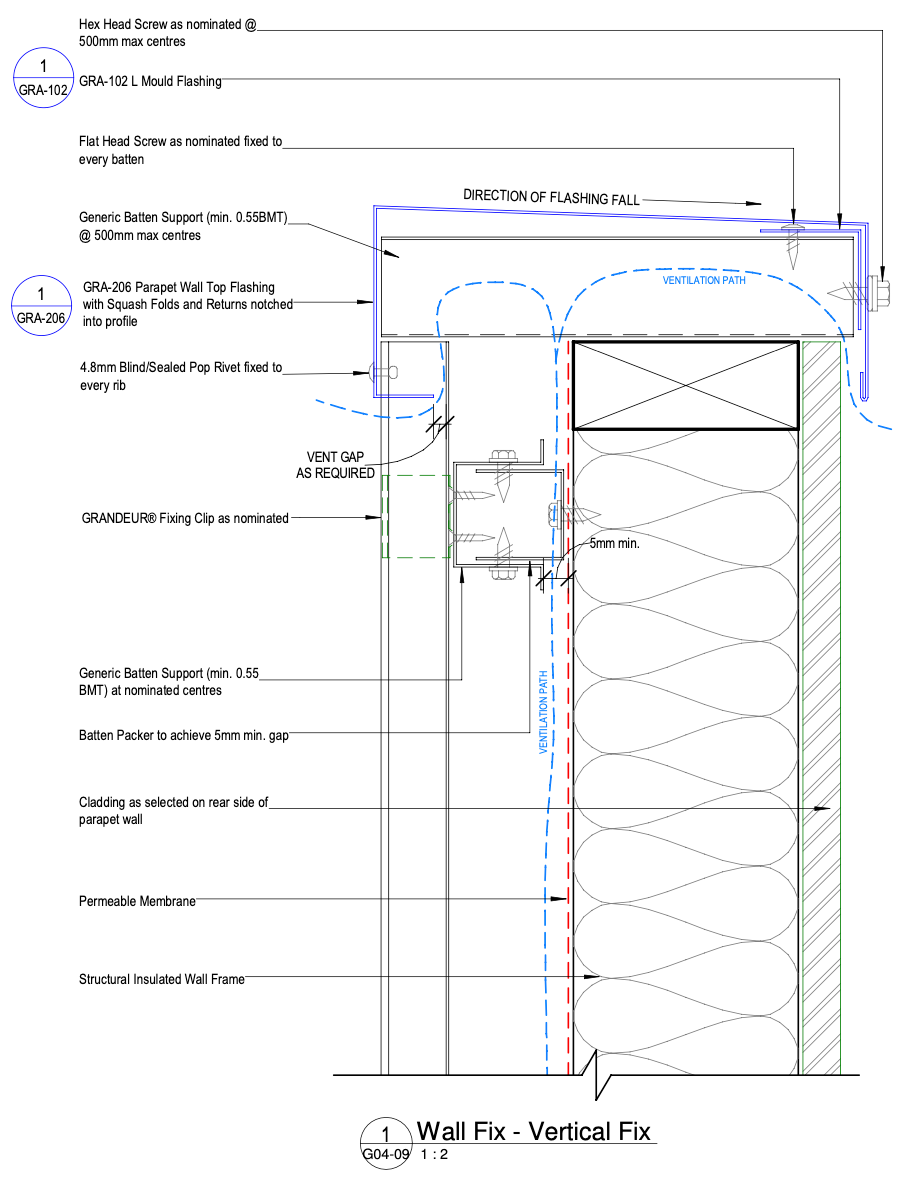
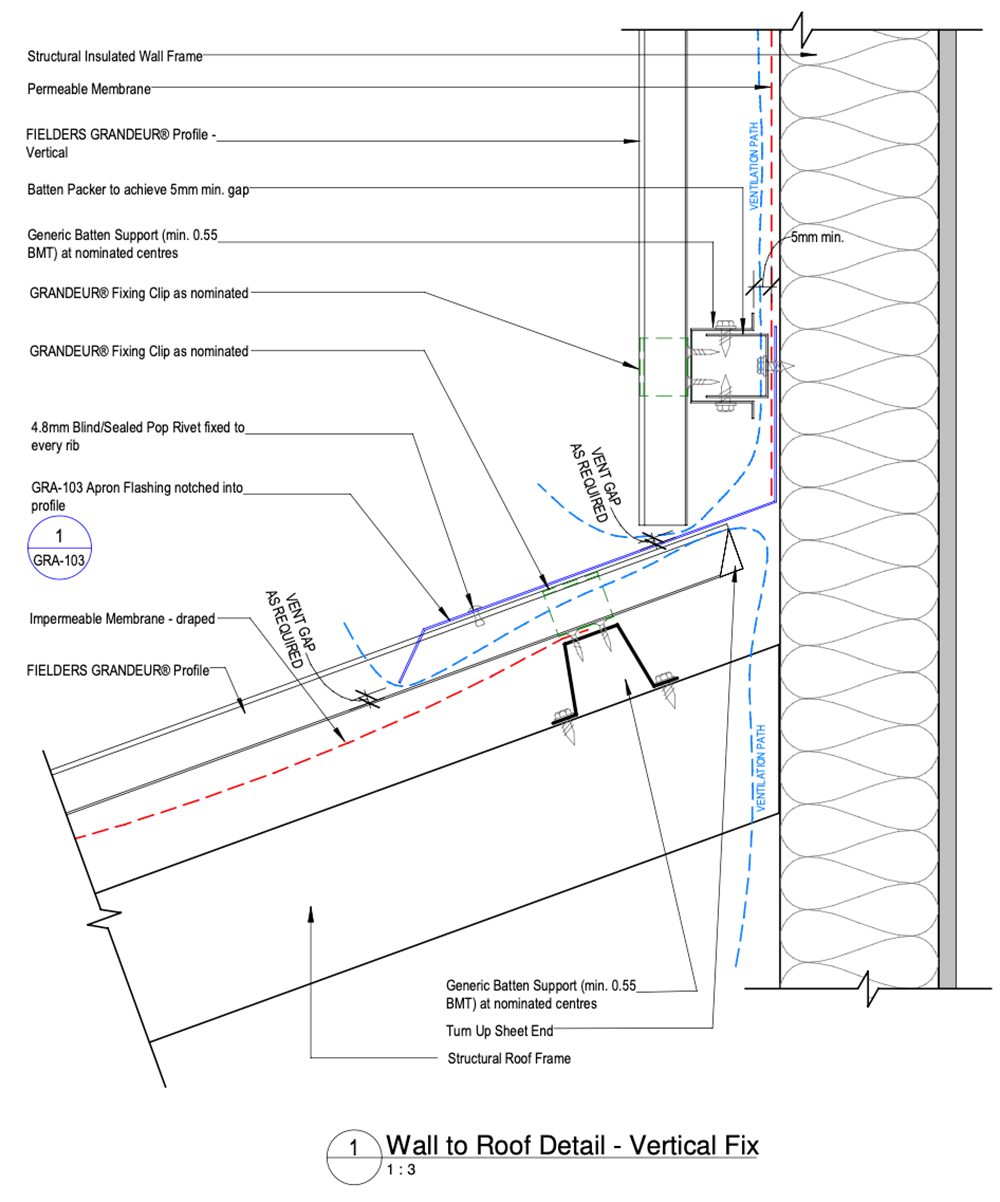
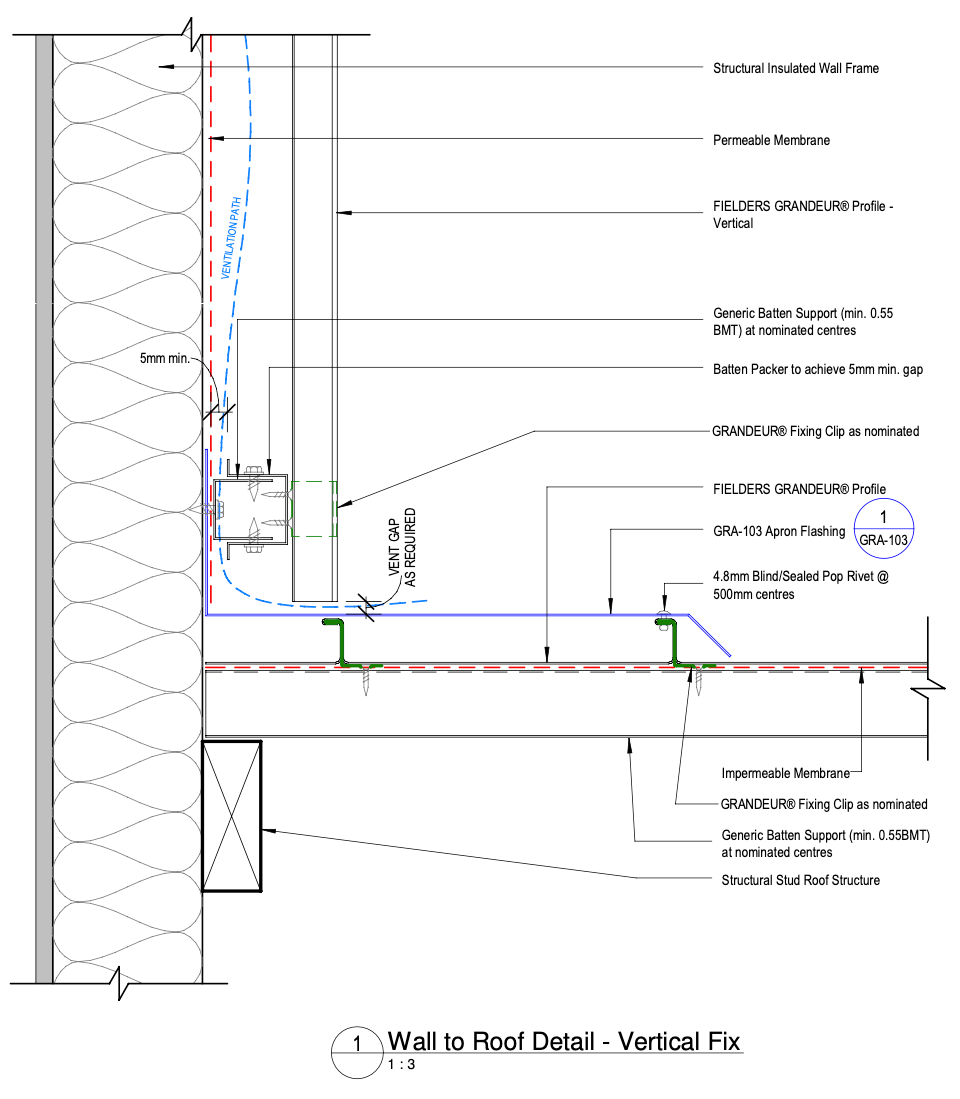
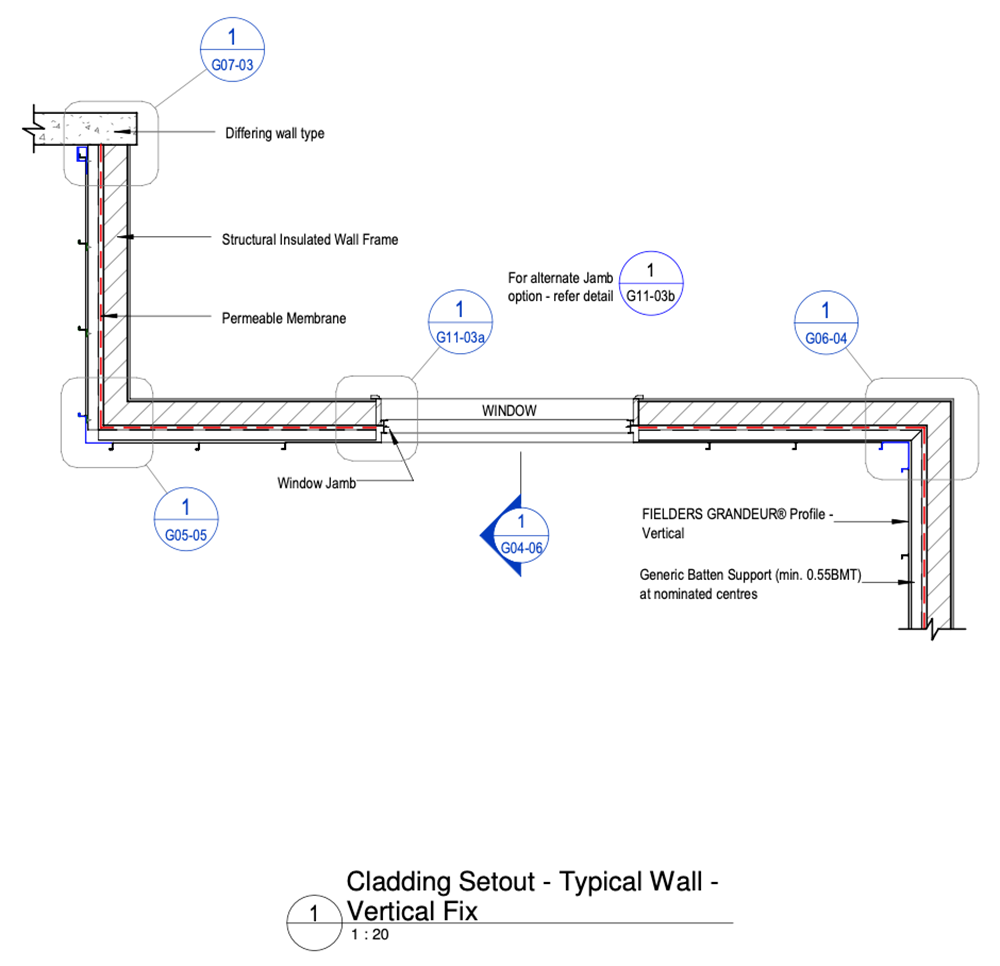
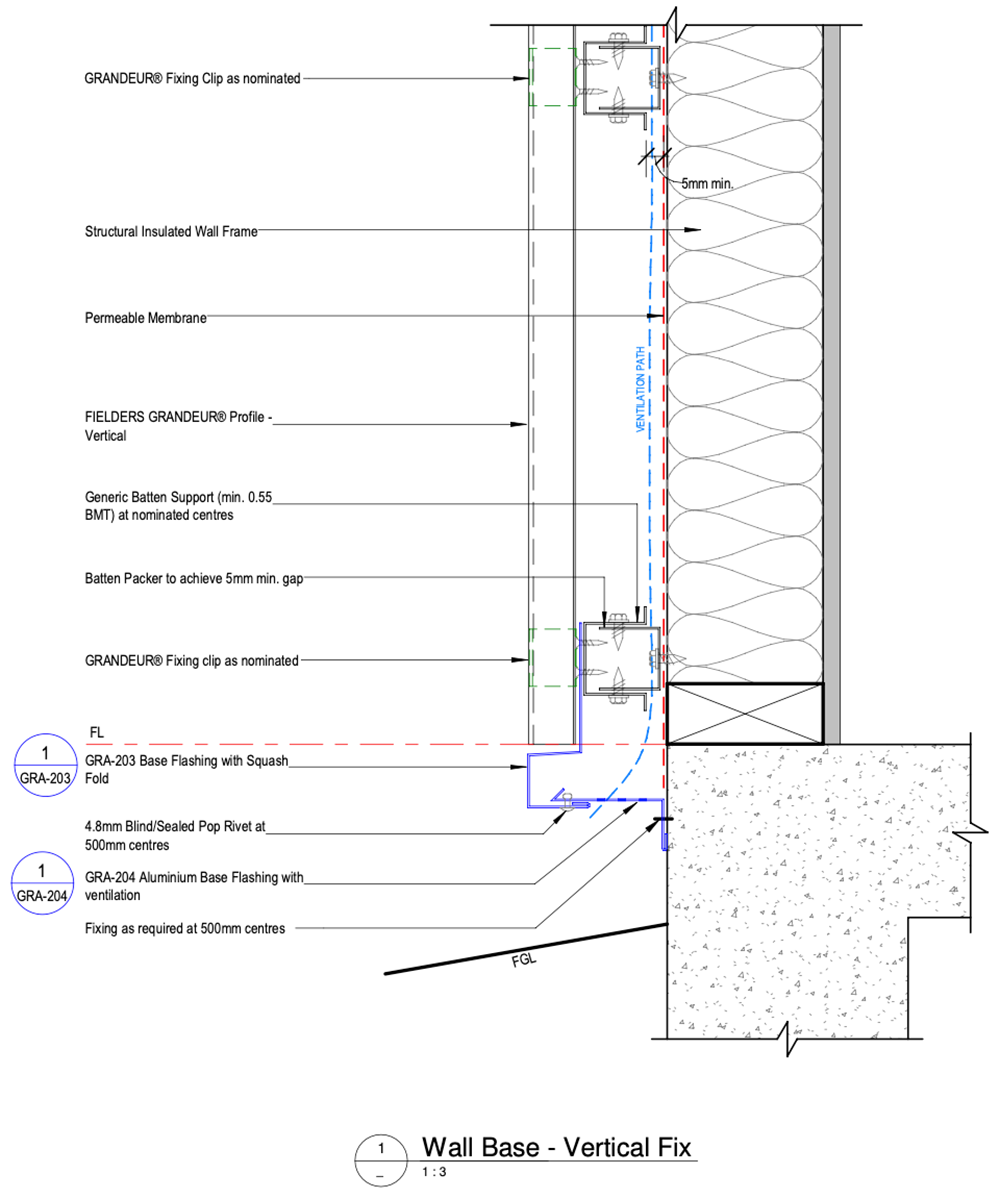
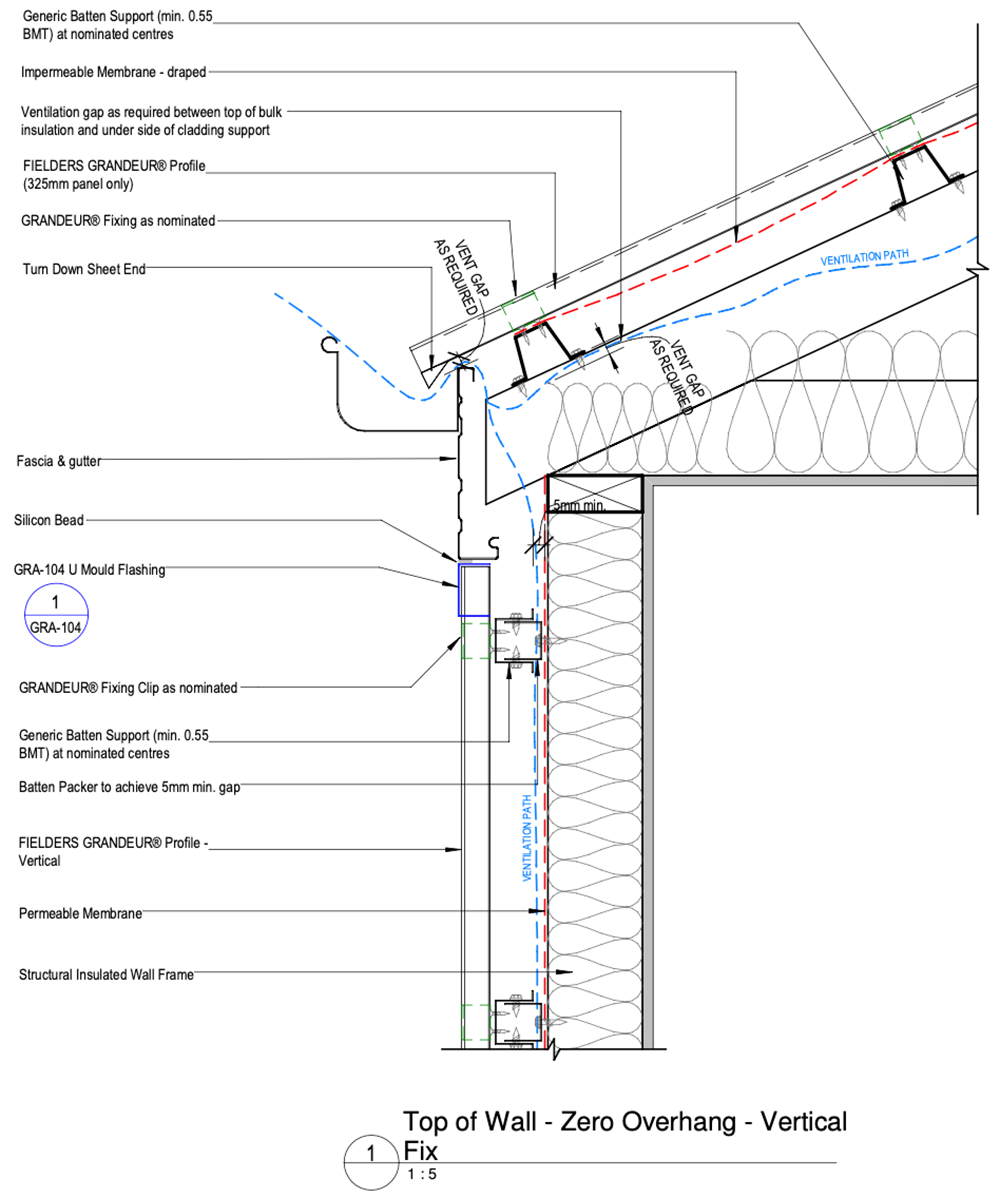
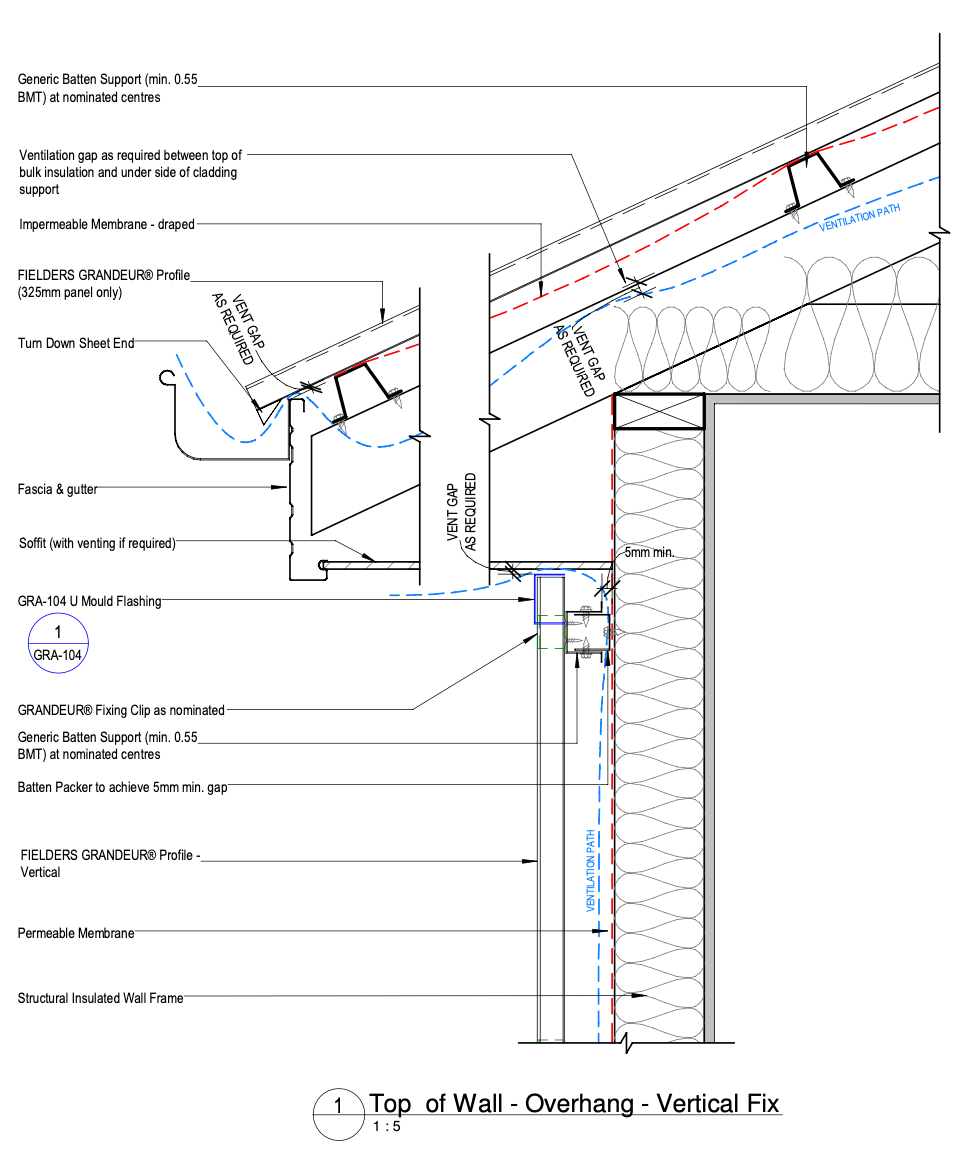
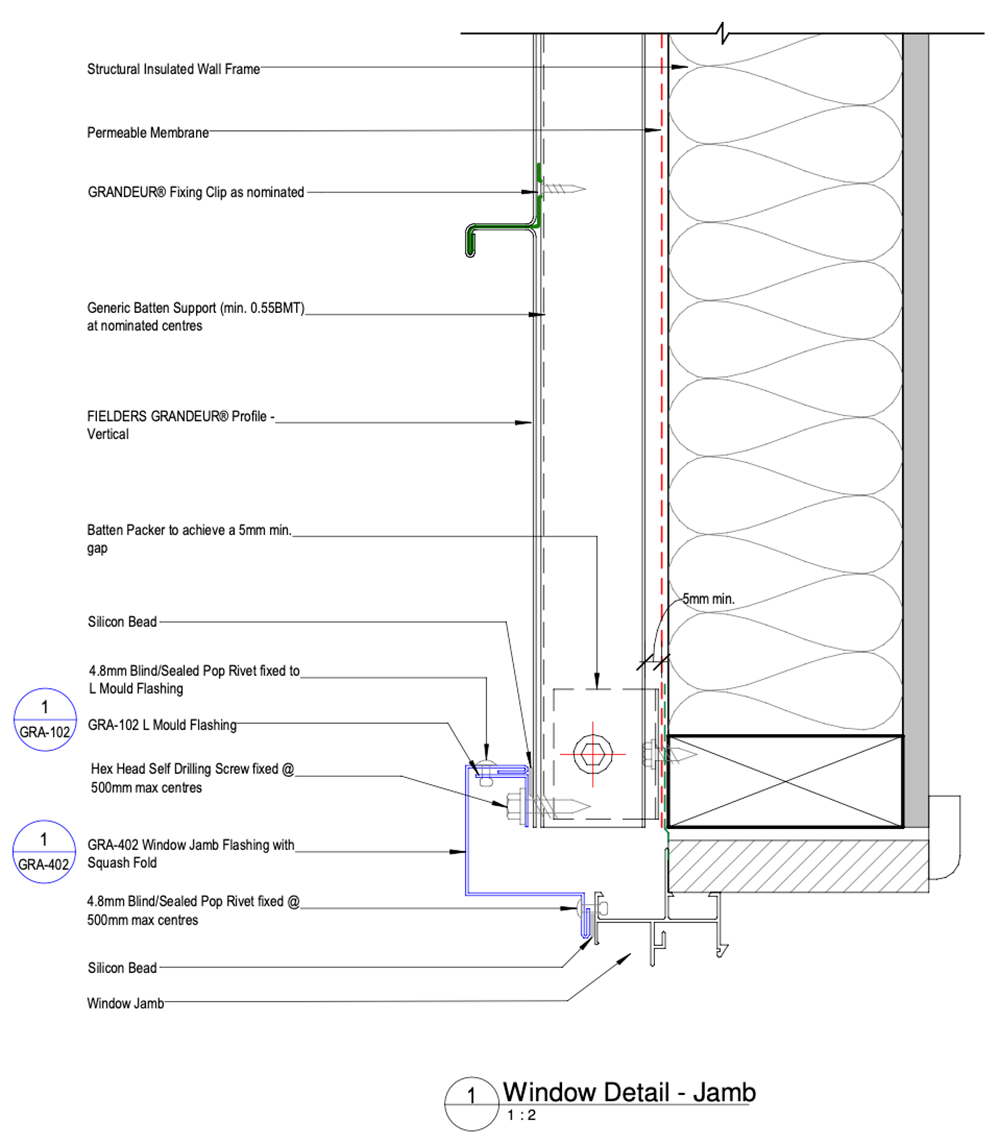
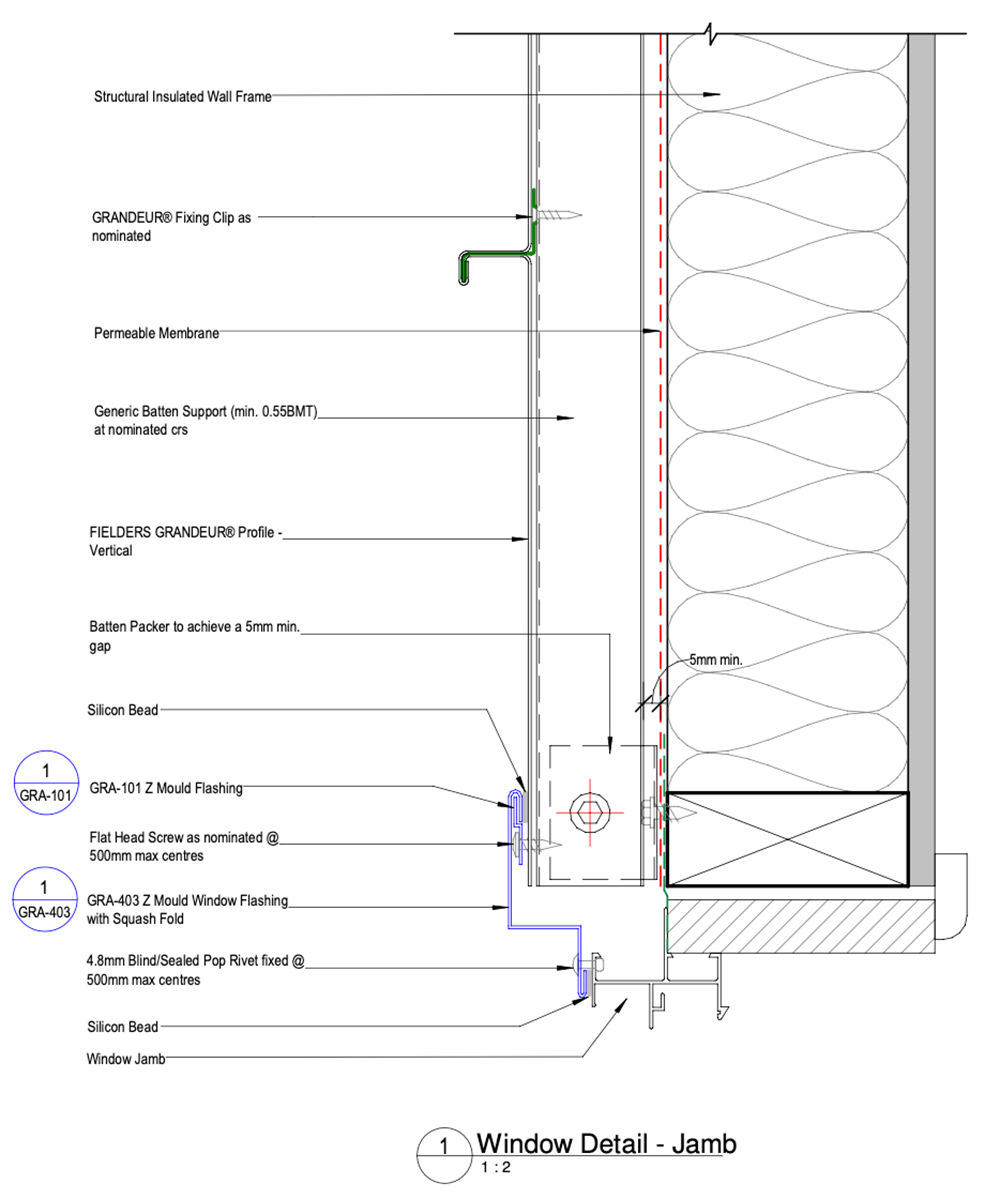
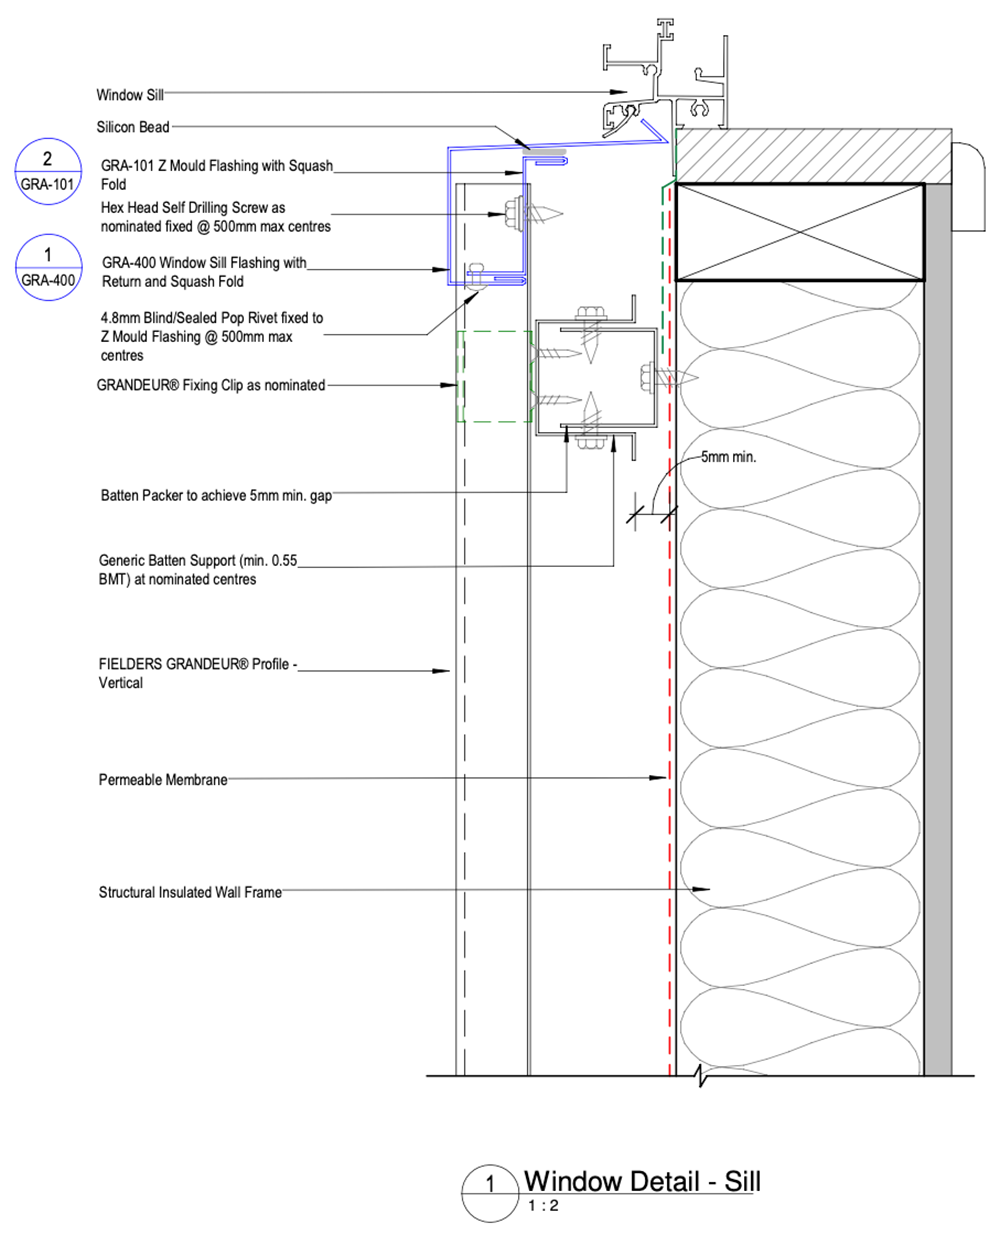
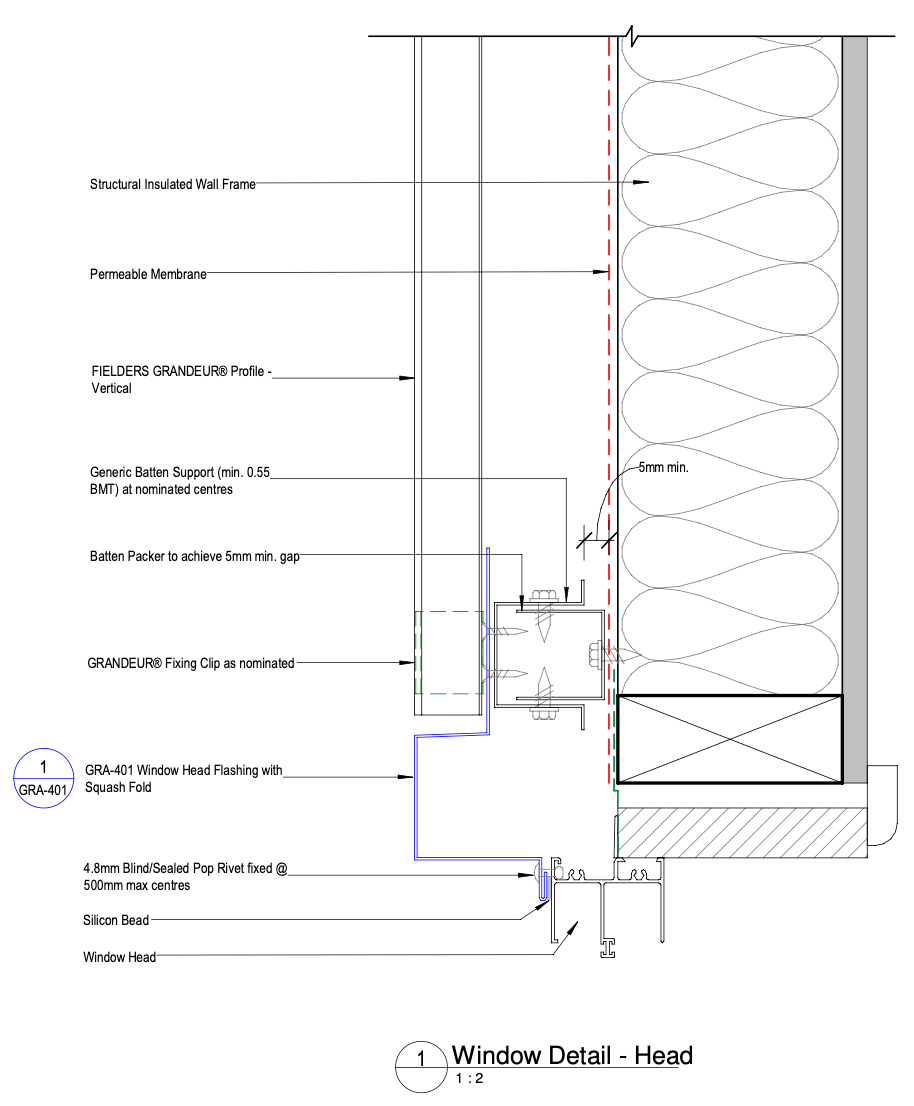
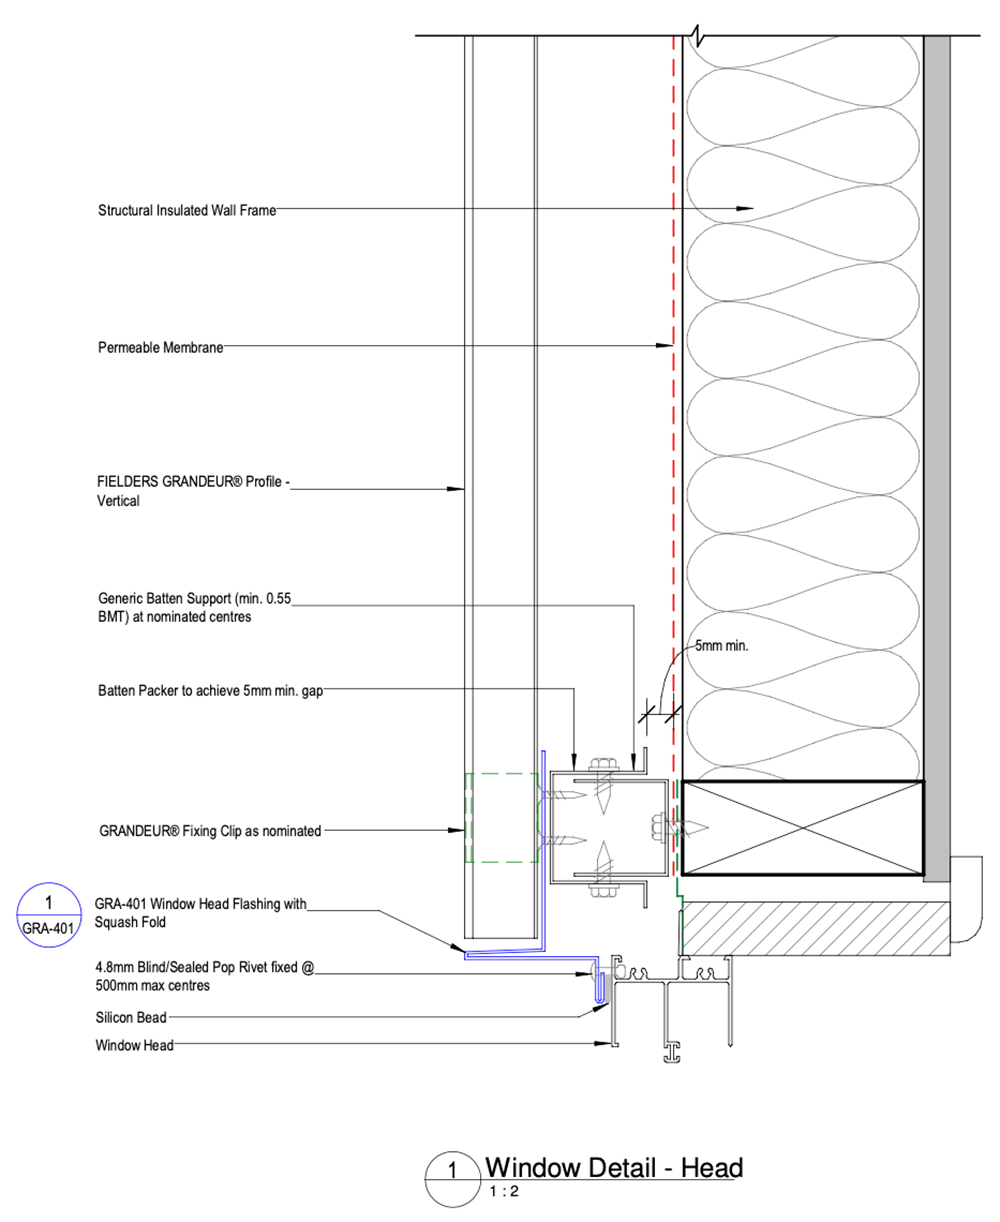
Construction Details
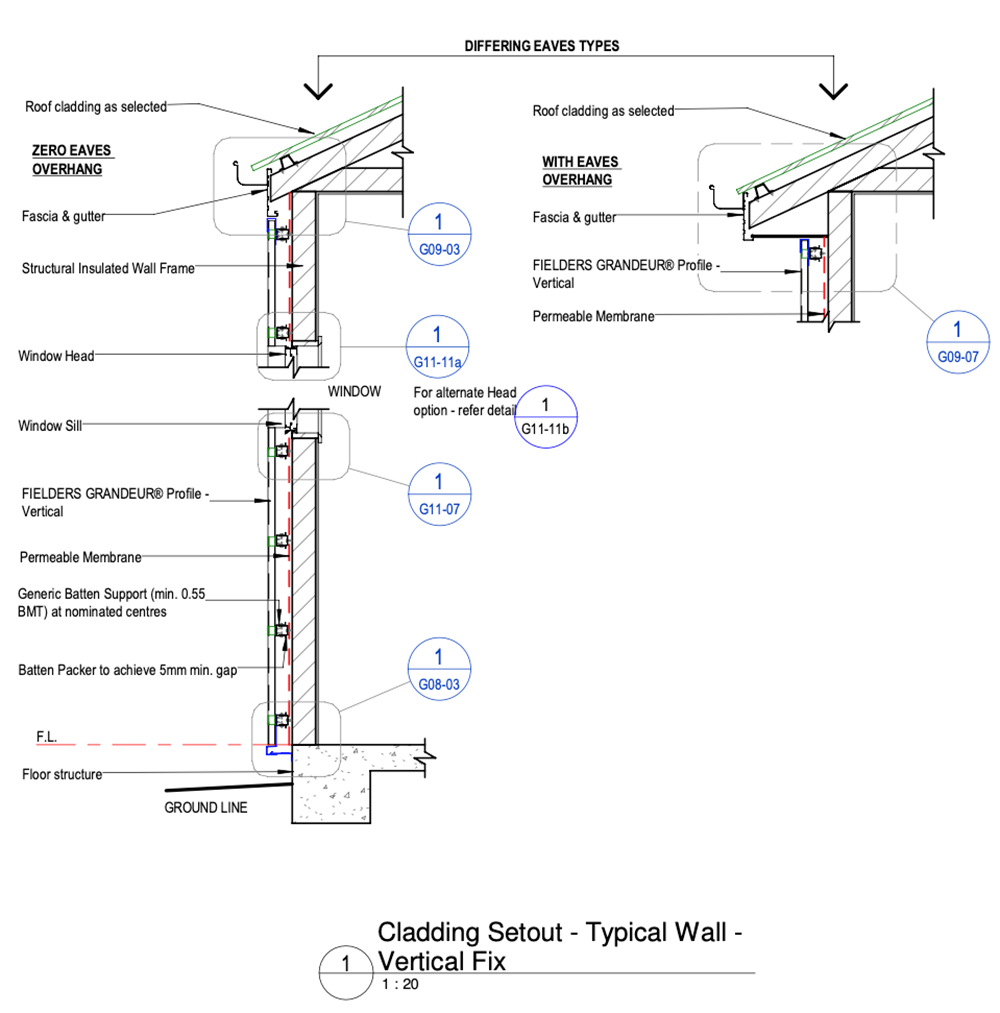
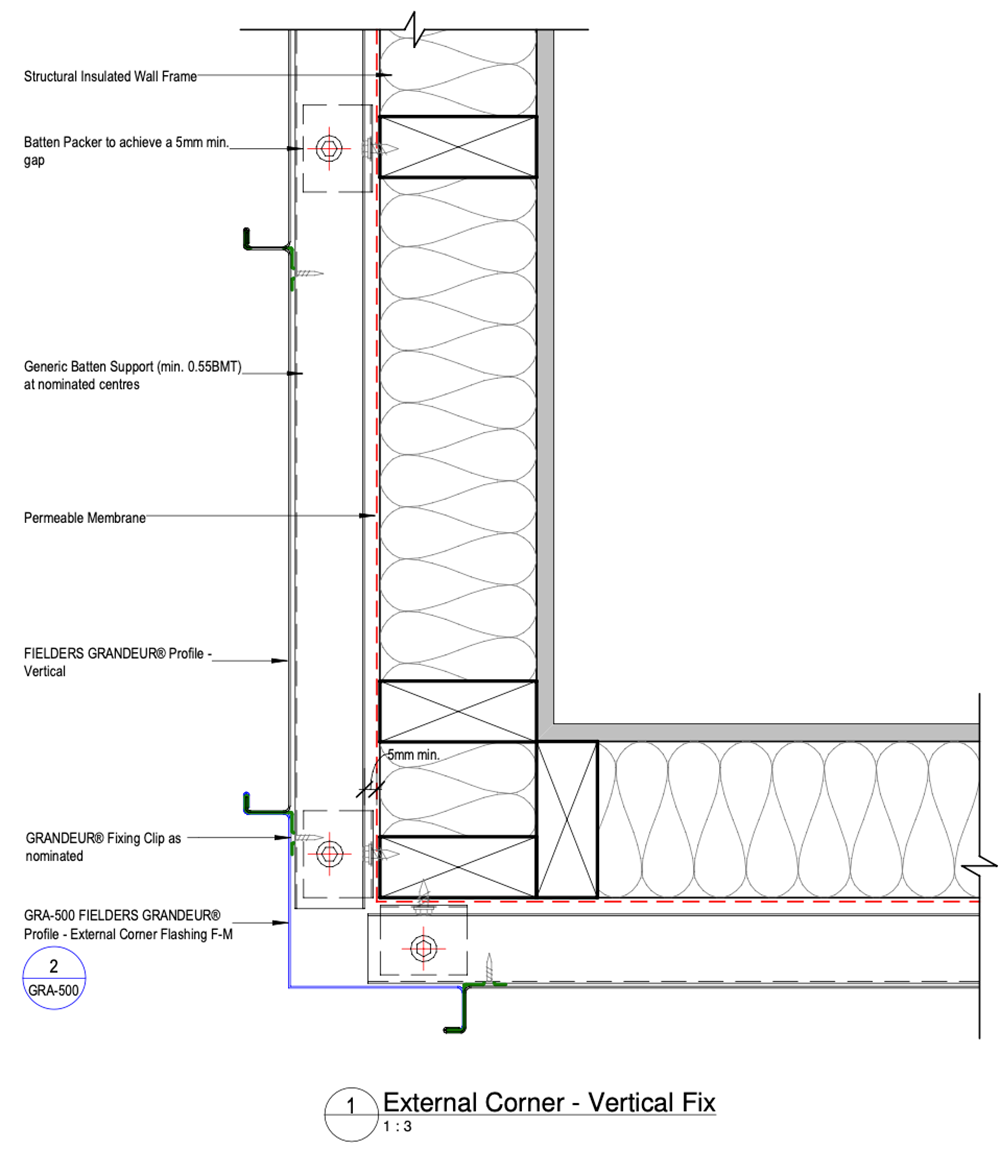
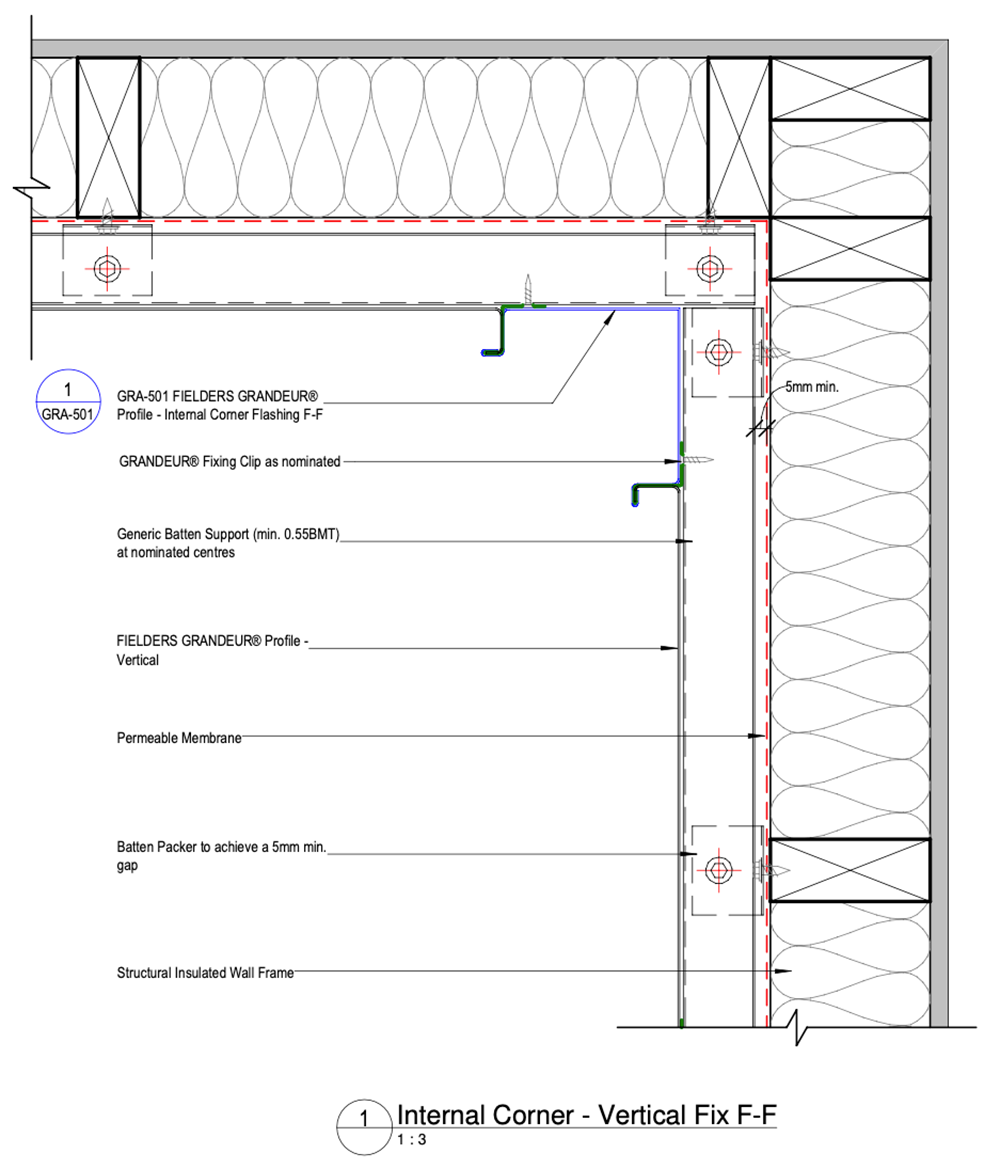
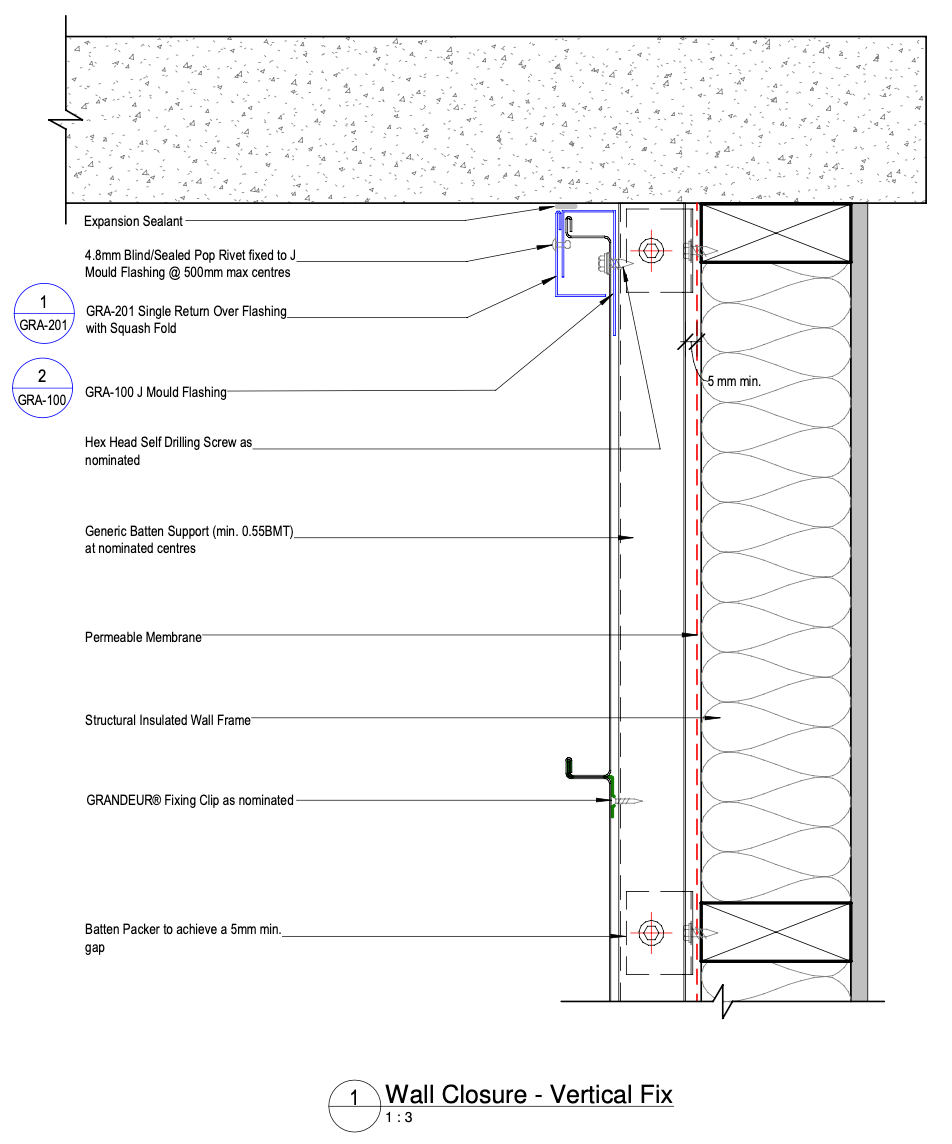
Installation Details
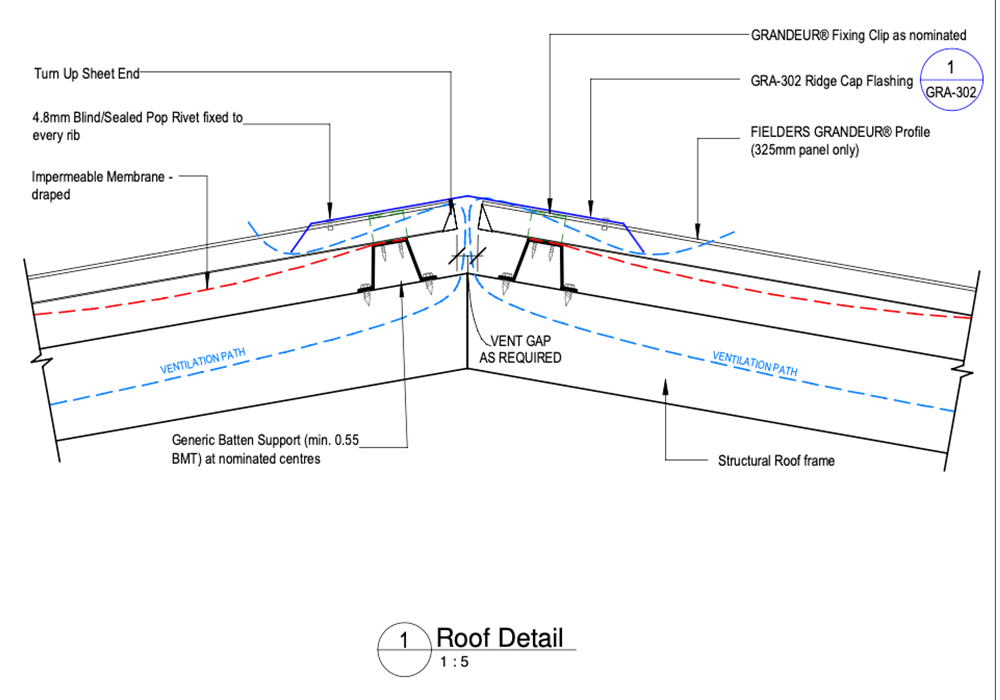
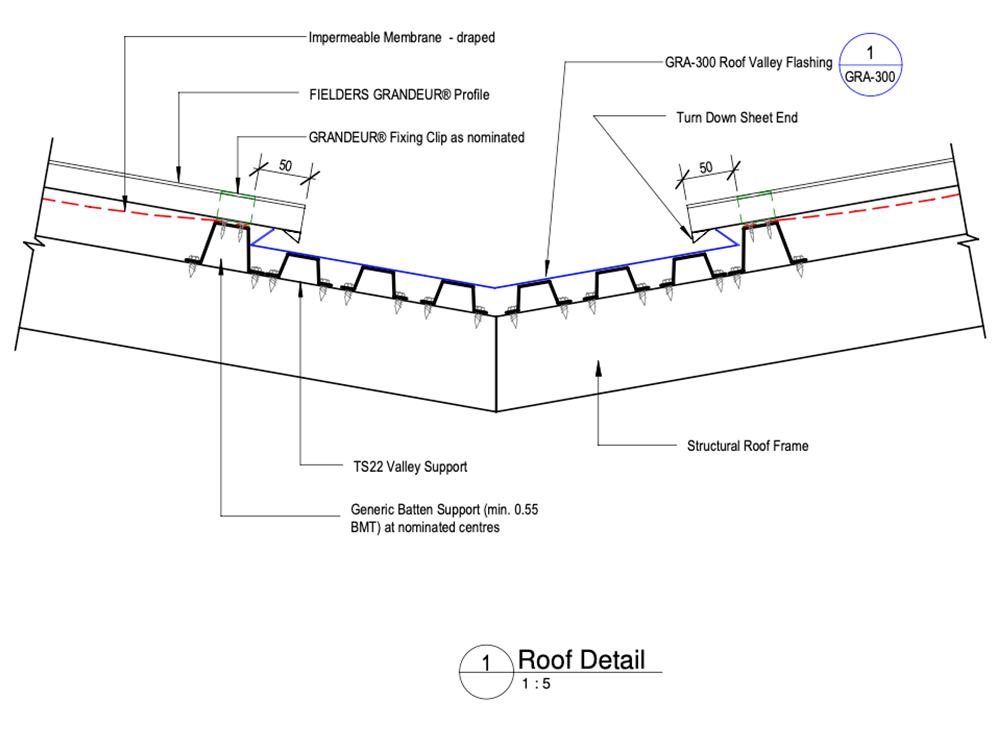
A wider range of Construction details covering fixing to ply substrate is available for download at https://specifying.fielders.com.au/downloads.
