How to Use Fielders FreeForm® Revit Content Library

Fielders FreeForm® Revit Content Introduction & User Guide

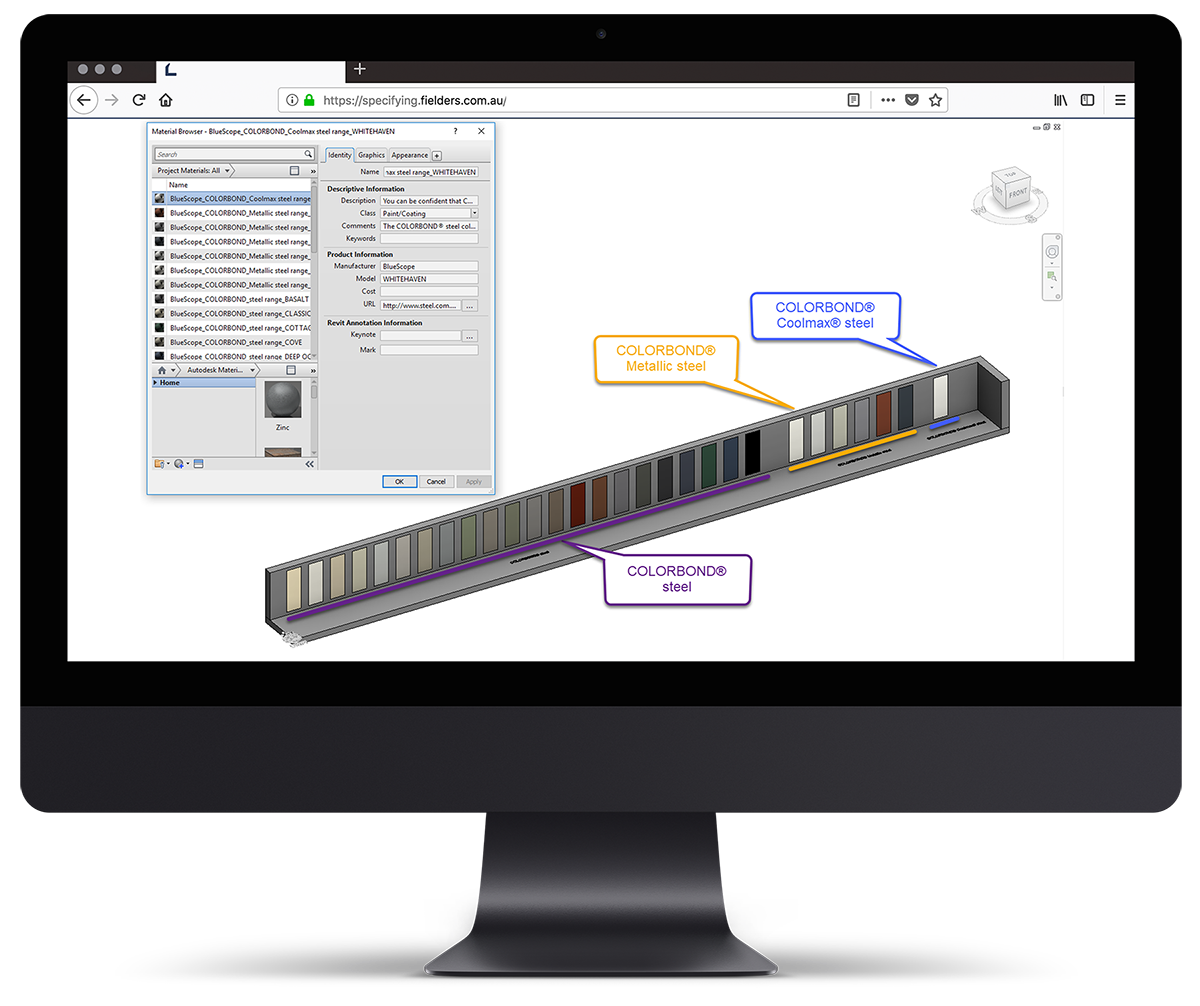
This document provides a detailed insight into the Revit content library supplied by Fielders for the FreeForm®. This parametric content is comprised of both System and Loadable Revit families, all created natively in Revit, allowing users the ability to design and document FreeForm® Roofing and walling.

Also covered in this document is an overview of the Revit content development methodologies used by UNIFI Labs in creating the Revit families, ensuring a consistent, robust and reliable Revit library. Ultimately, the FreeForm® Revit families should require minimal, firm-specific localisation / standardisation to become the ‘go-to’ Revit families when Structural Roofing and walling solutions are required in a Revit project.

Should you require cladding options outside the range of products detailed in this initial Revit content library, please contact Fielders to design a custom solution that meets your specific project requirements.


File access

View the downloadable files for FreeForm® range here or download this user guide as a PDF using the button below


FreeForm® Revit Family Creation Considerations

FreeForm® Revit families have been created to a consistent, high standard with the objective of finding a balance between complexity of use, functionality, documentation output, file size and performance in a project environment. Primary content creation insights and considerations are listed below:

  1. Families supplied in Revit 2016 format.
  2. Native Revit geometry used throughout, including nested families. (E.g. no AutoCAD or SAT files etc.)
  3. Consistent family and shared parameters (ANZRS and standard UNIFI parameters) have been used sparingly, allowing FreeForm® attributes to be scheduled in the Revit project environment.
  4. ANZRS-based Subcategories and additional FreeForm® specific Subcategories (names only) have been applied to all geometry and linework. Resulting families allow users to fully customise how the cladding documents in a Revit project via View Templates and overrides.
  5. Reference Planes have been applied, named, tidied and set to the correct ‘Is Reference’. Thought has been given to the likely end-user requirements in placement / alignment and dimensioning of the families.
  6. All Warnings have been reviewed and removed where possible.
  7. The families have been fully Purged and all additional Materials, Line Patterns and Fill Patterns removed.
  8. Logical and consistent Type naming has been applied across all families.
  9. Family file sizes have been optimised to be relatively small in the context of the family’s overall capabilities, minimising the burden of FreeForm® families in Revit projects.

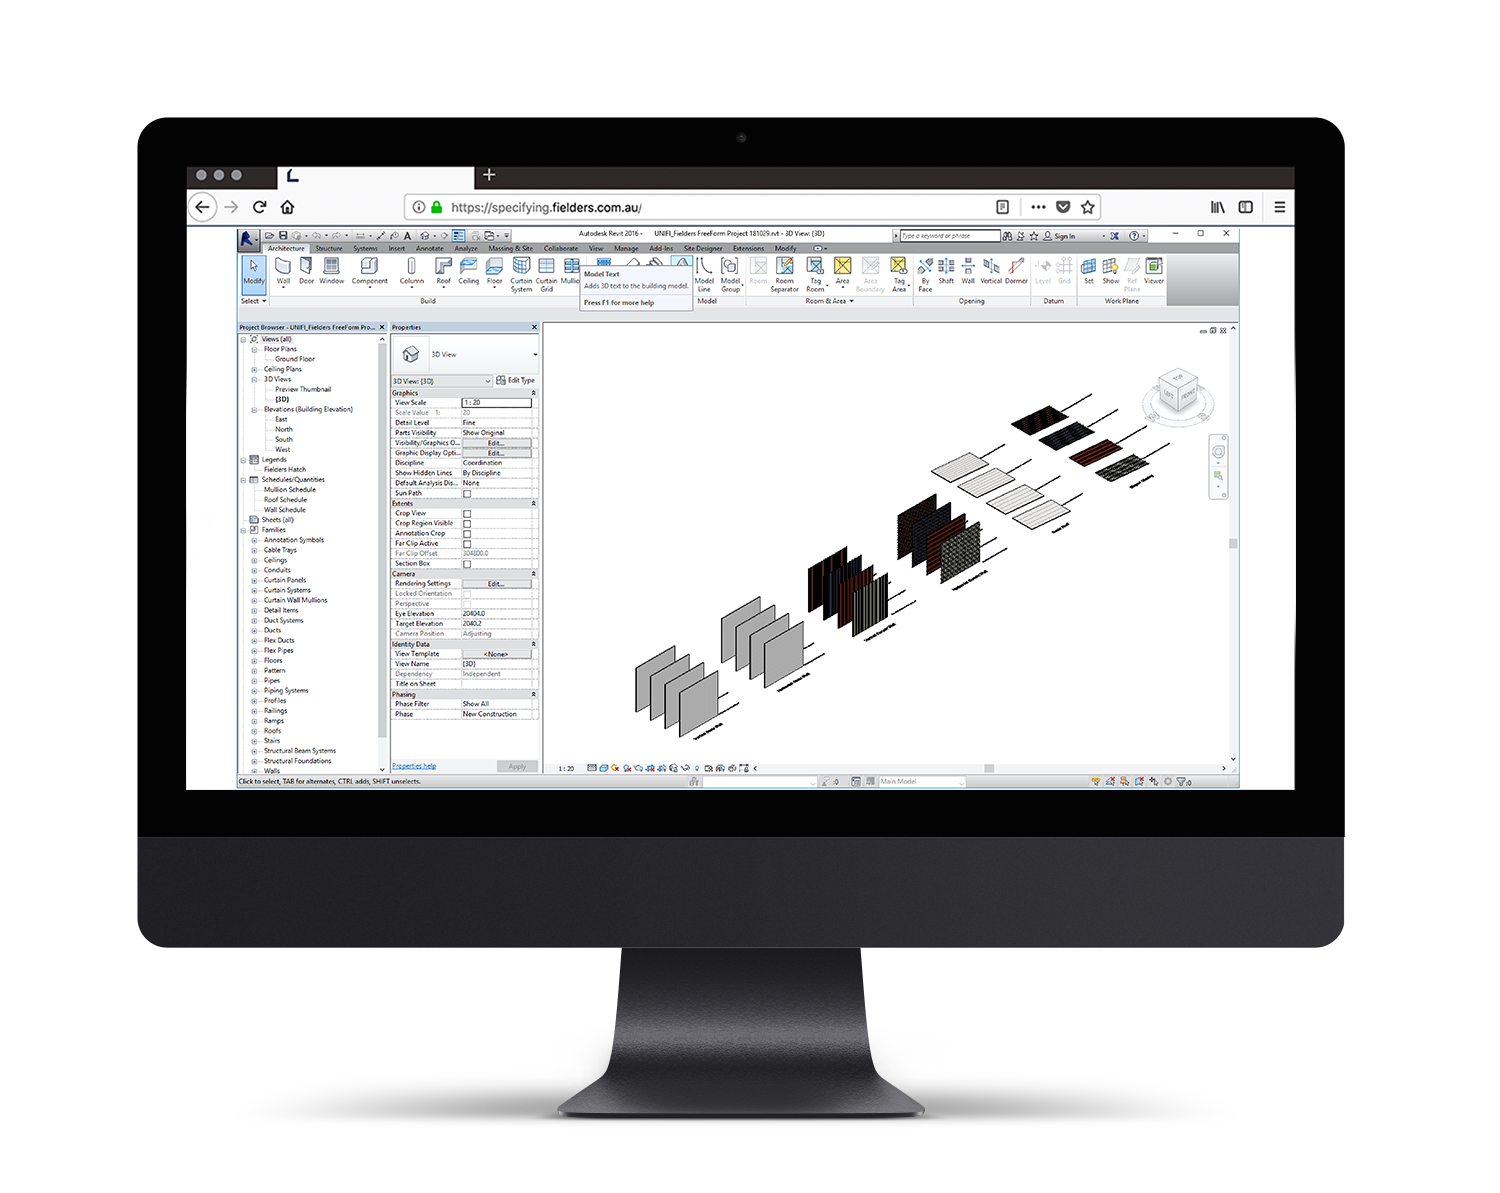
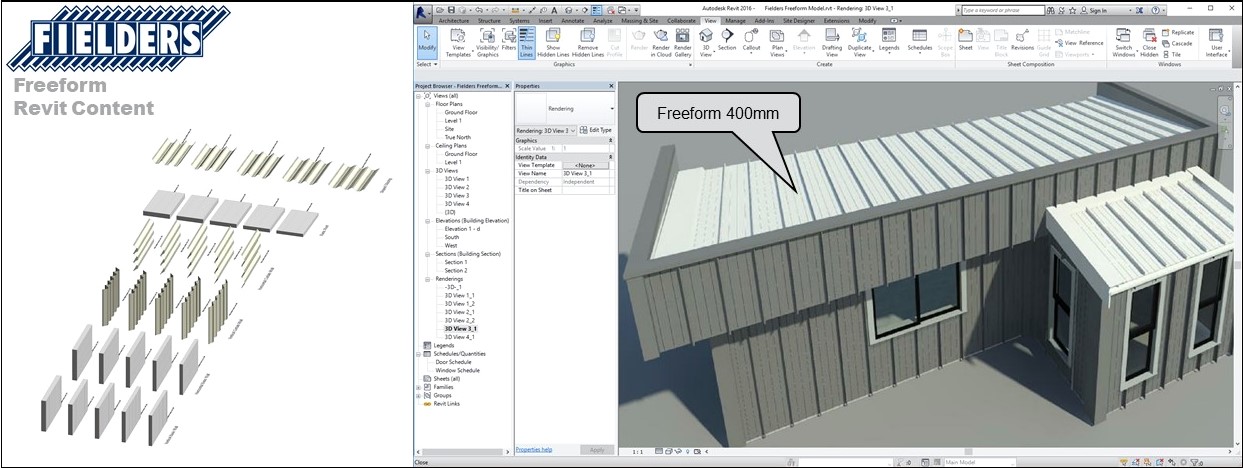
FreeForm® Revit Content Library Overview

The FreeForm® Revit content library is broken up into the following Revit components:


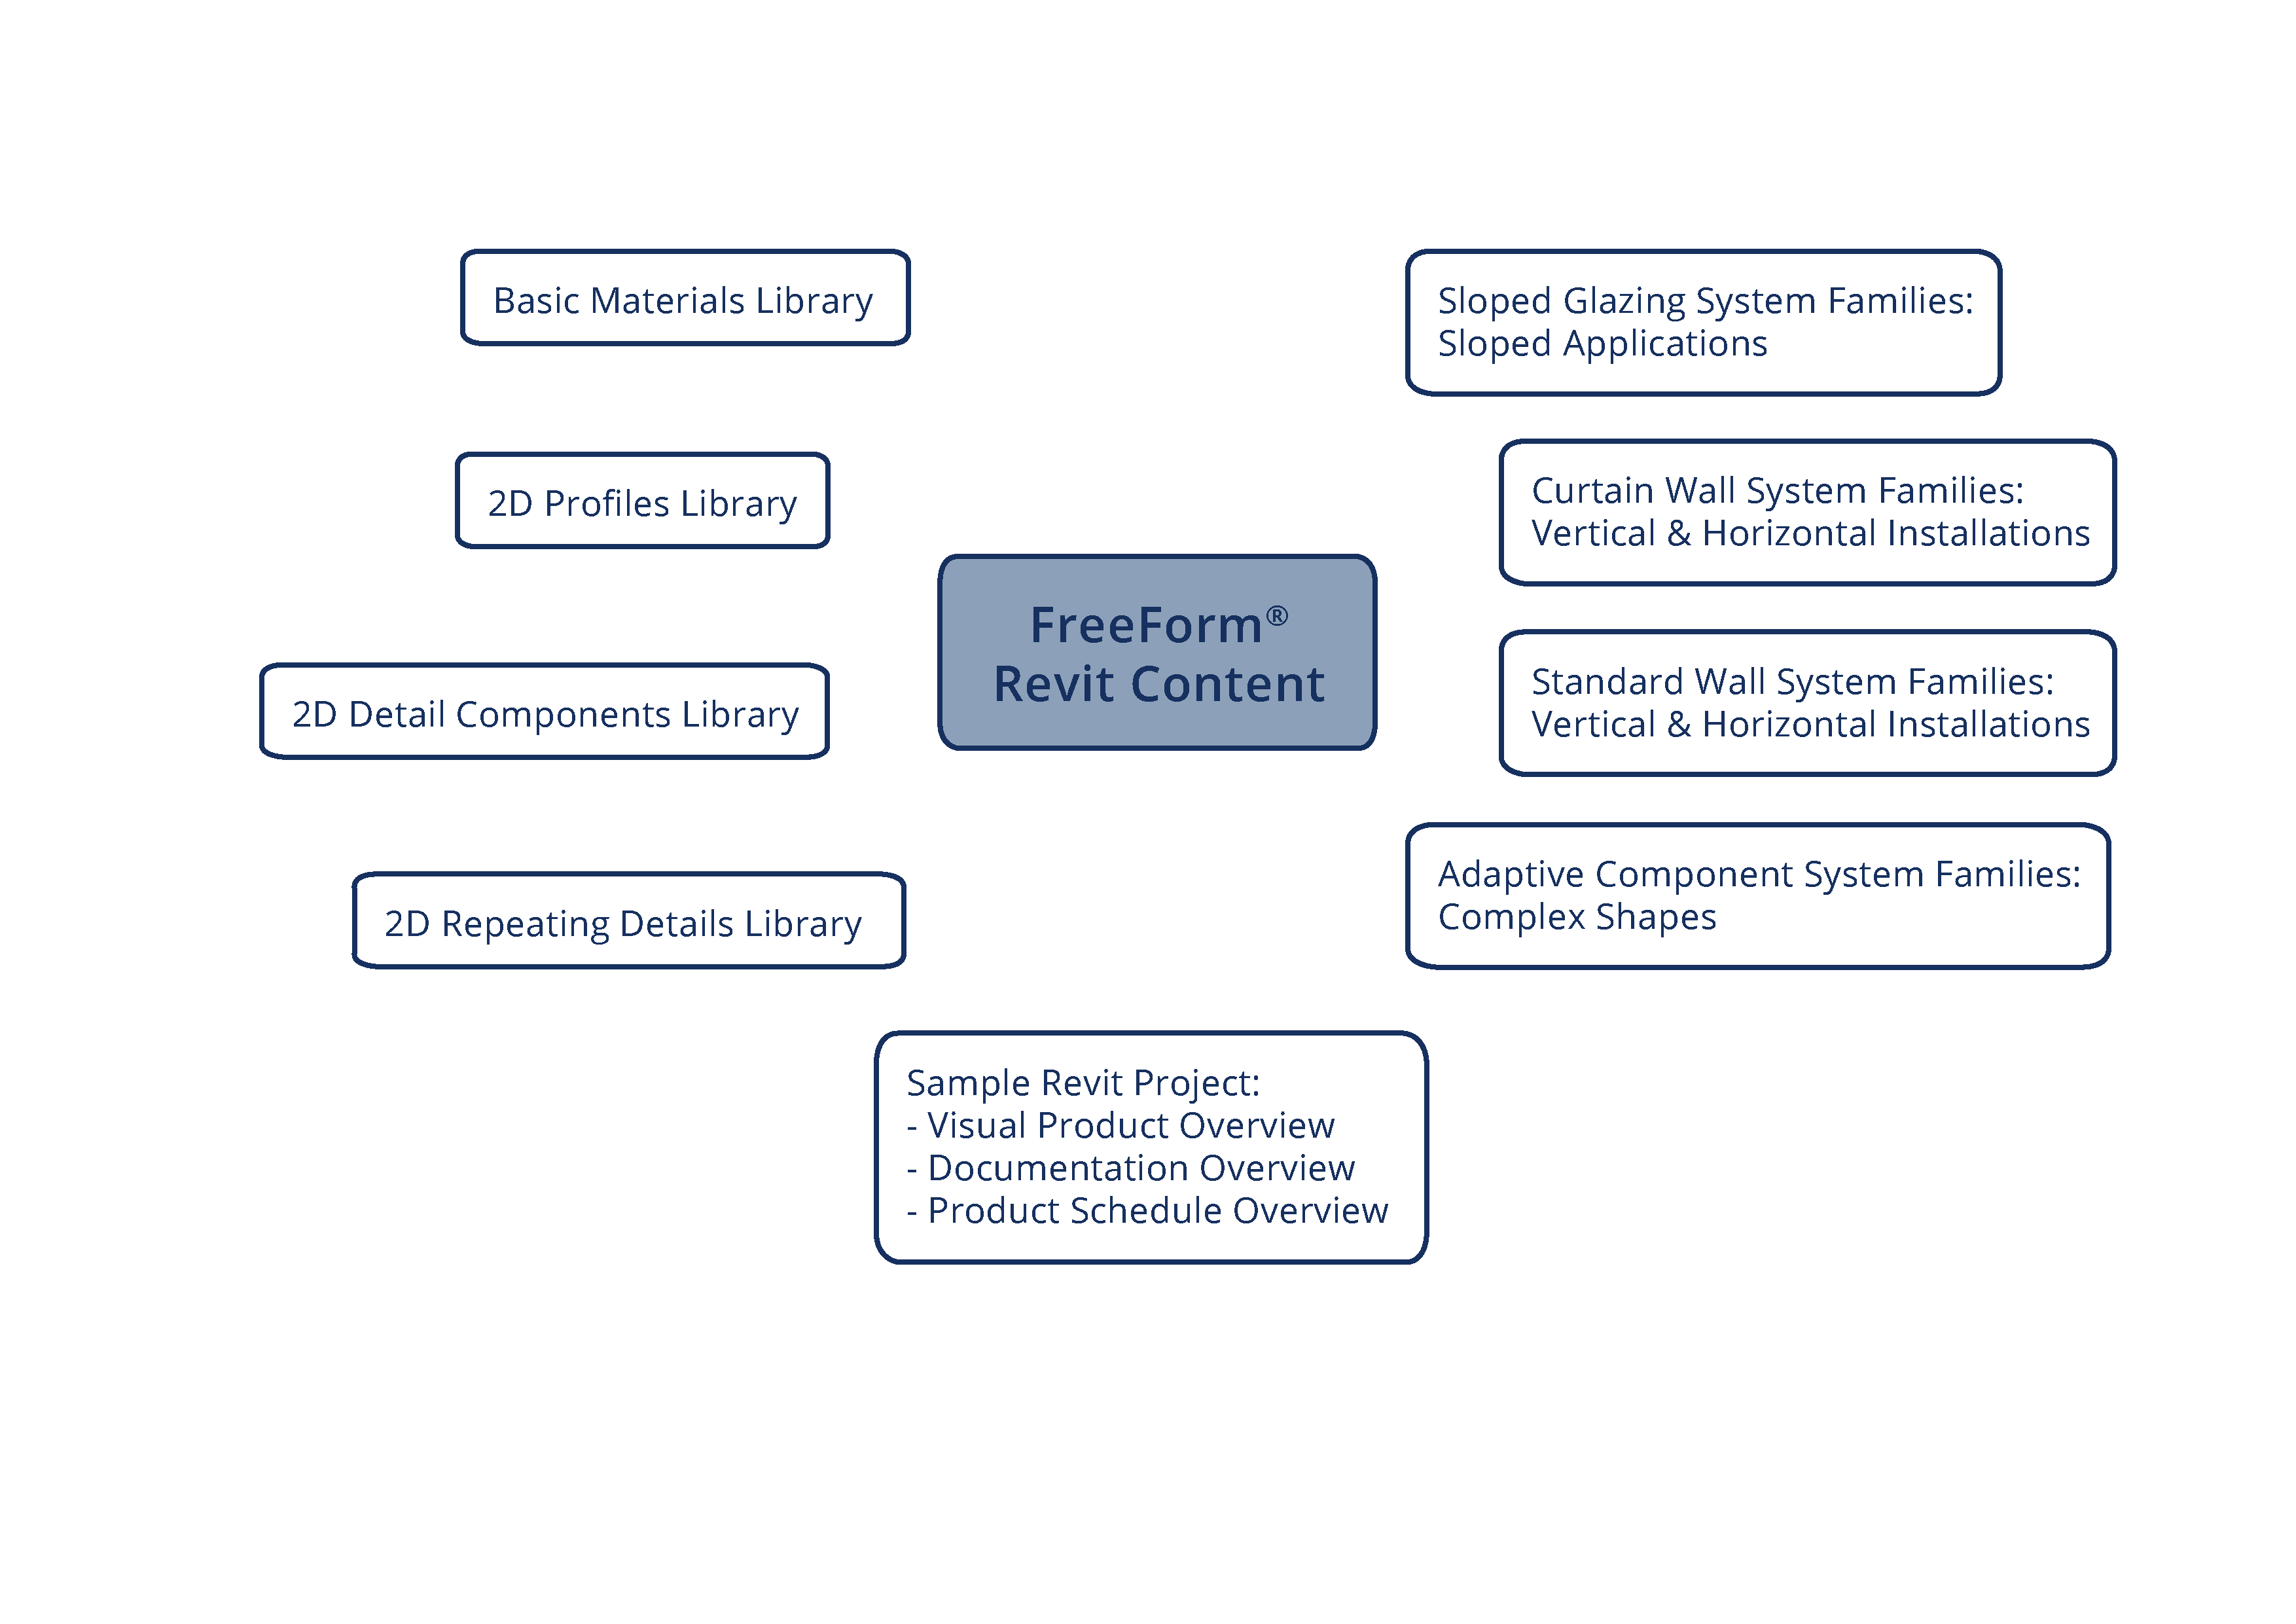
Revit library metrics and intended use of each component are listed below:

Product Ranges
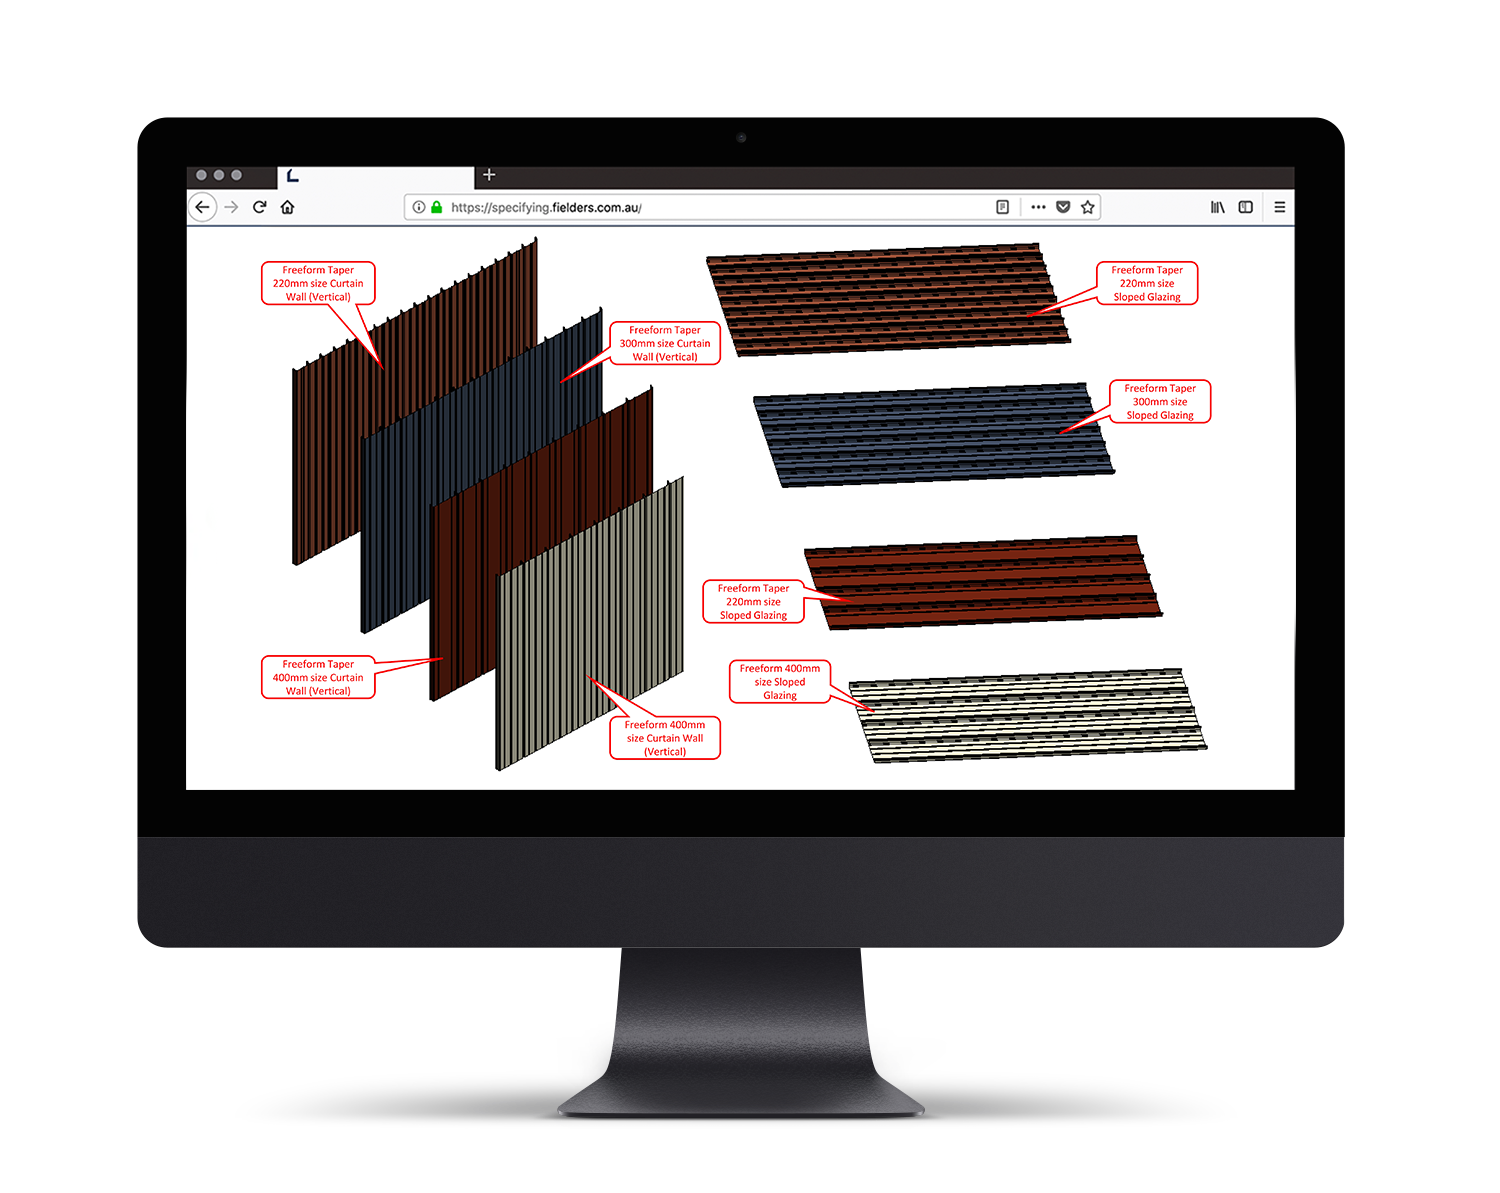
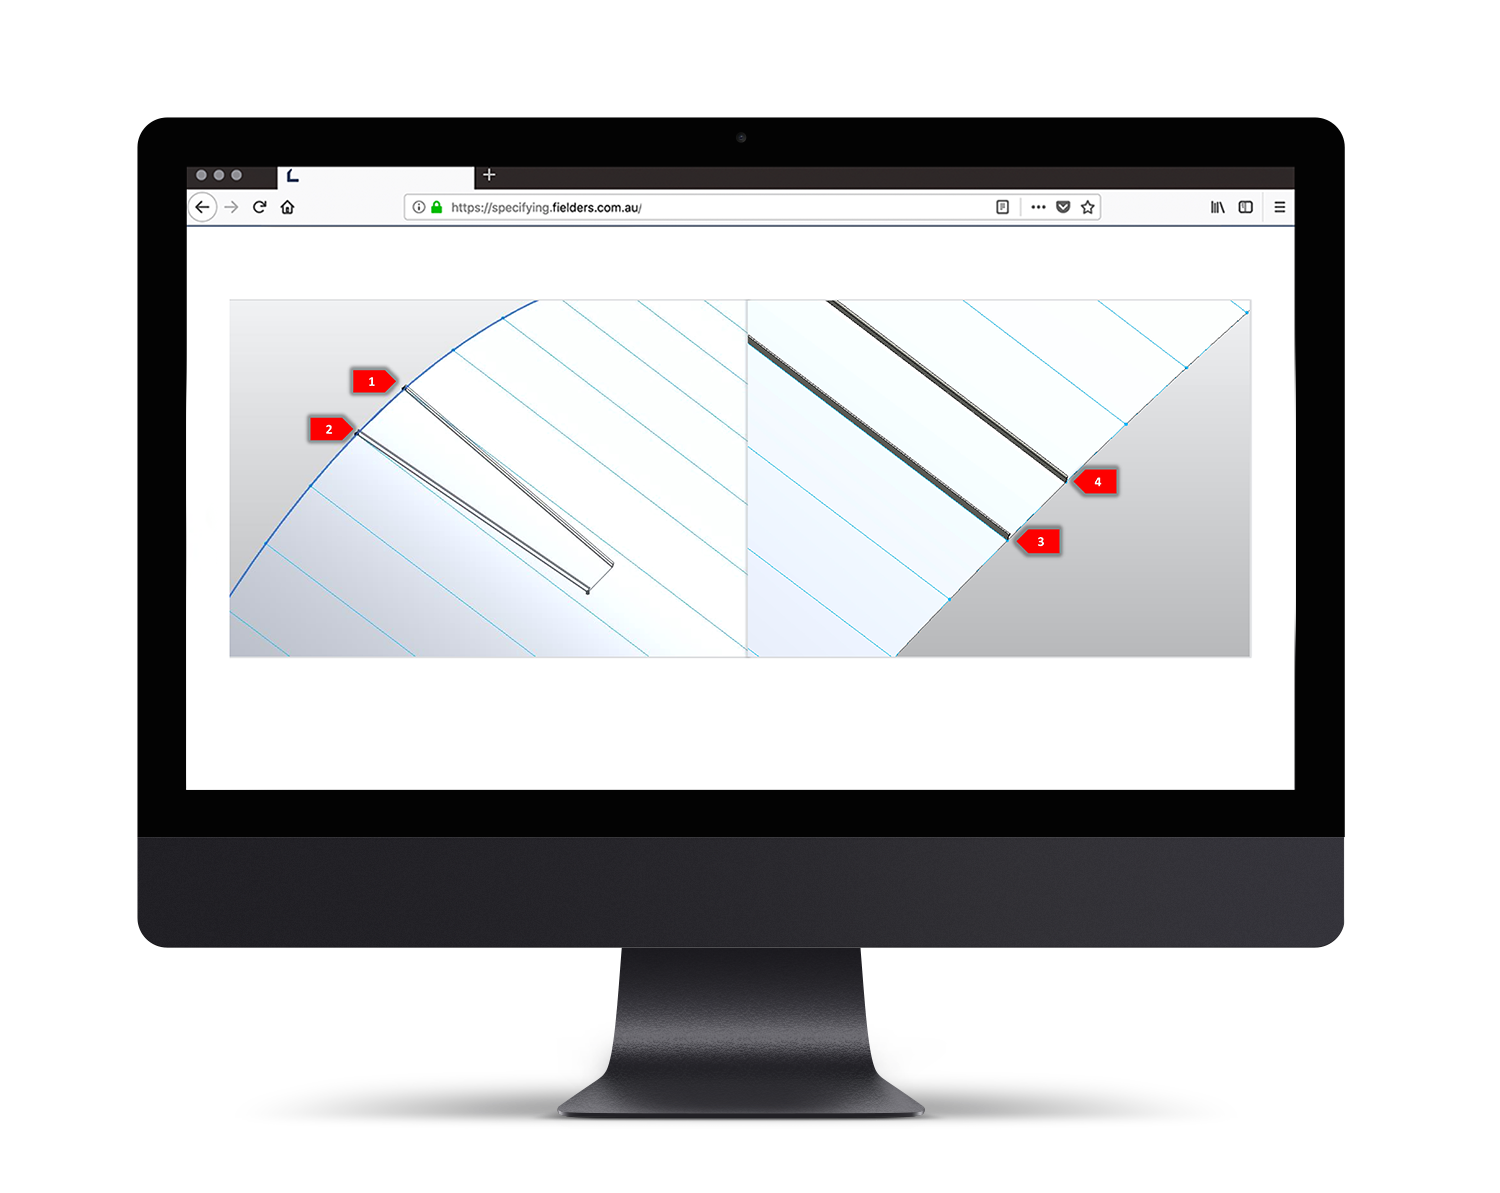
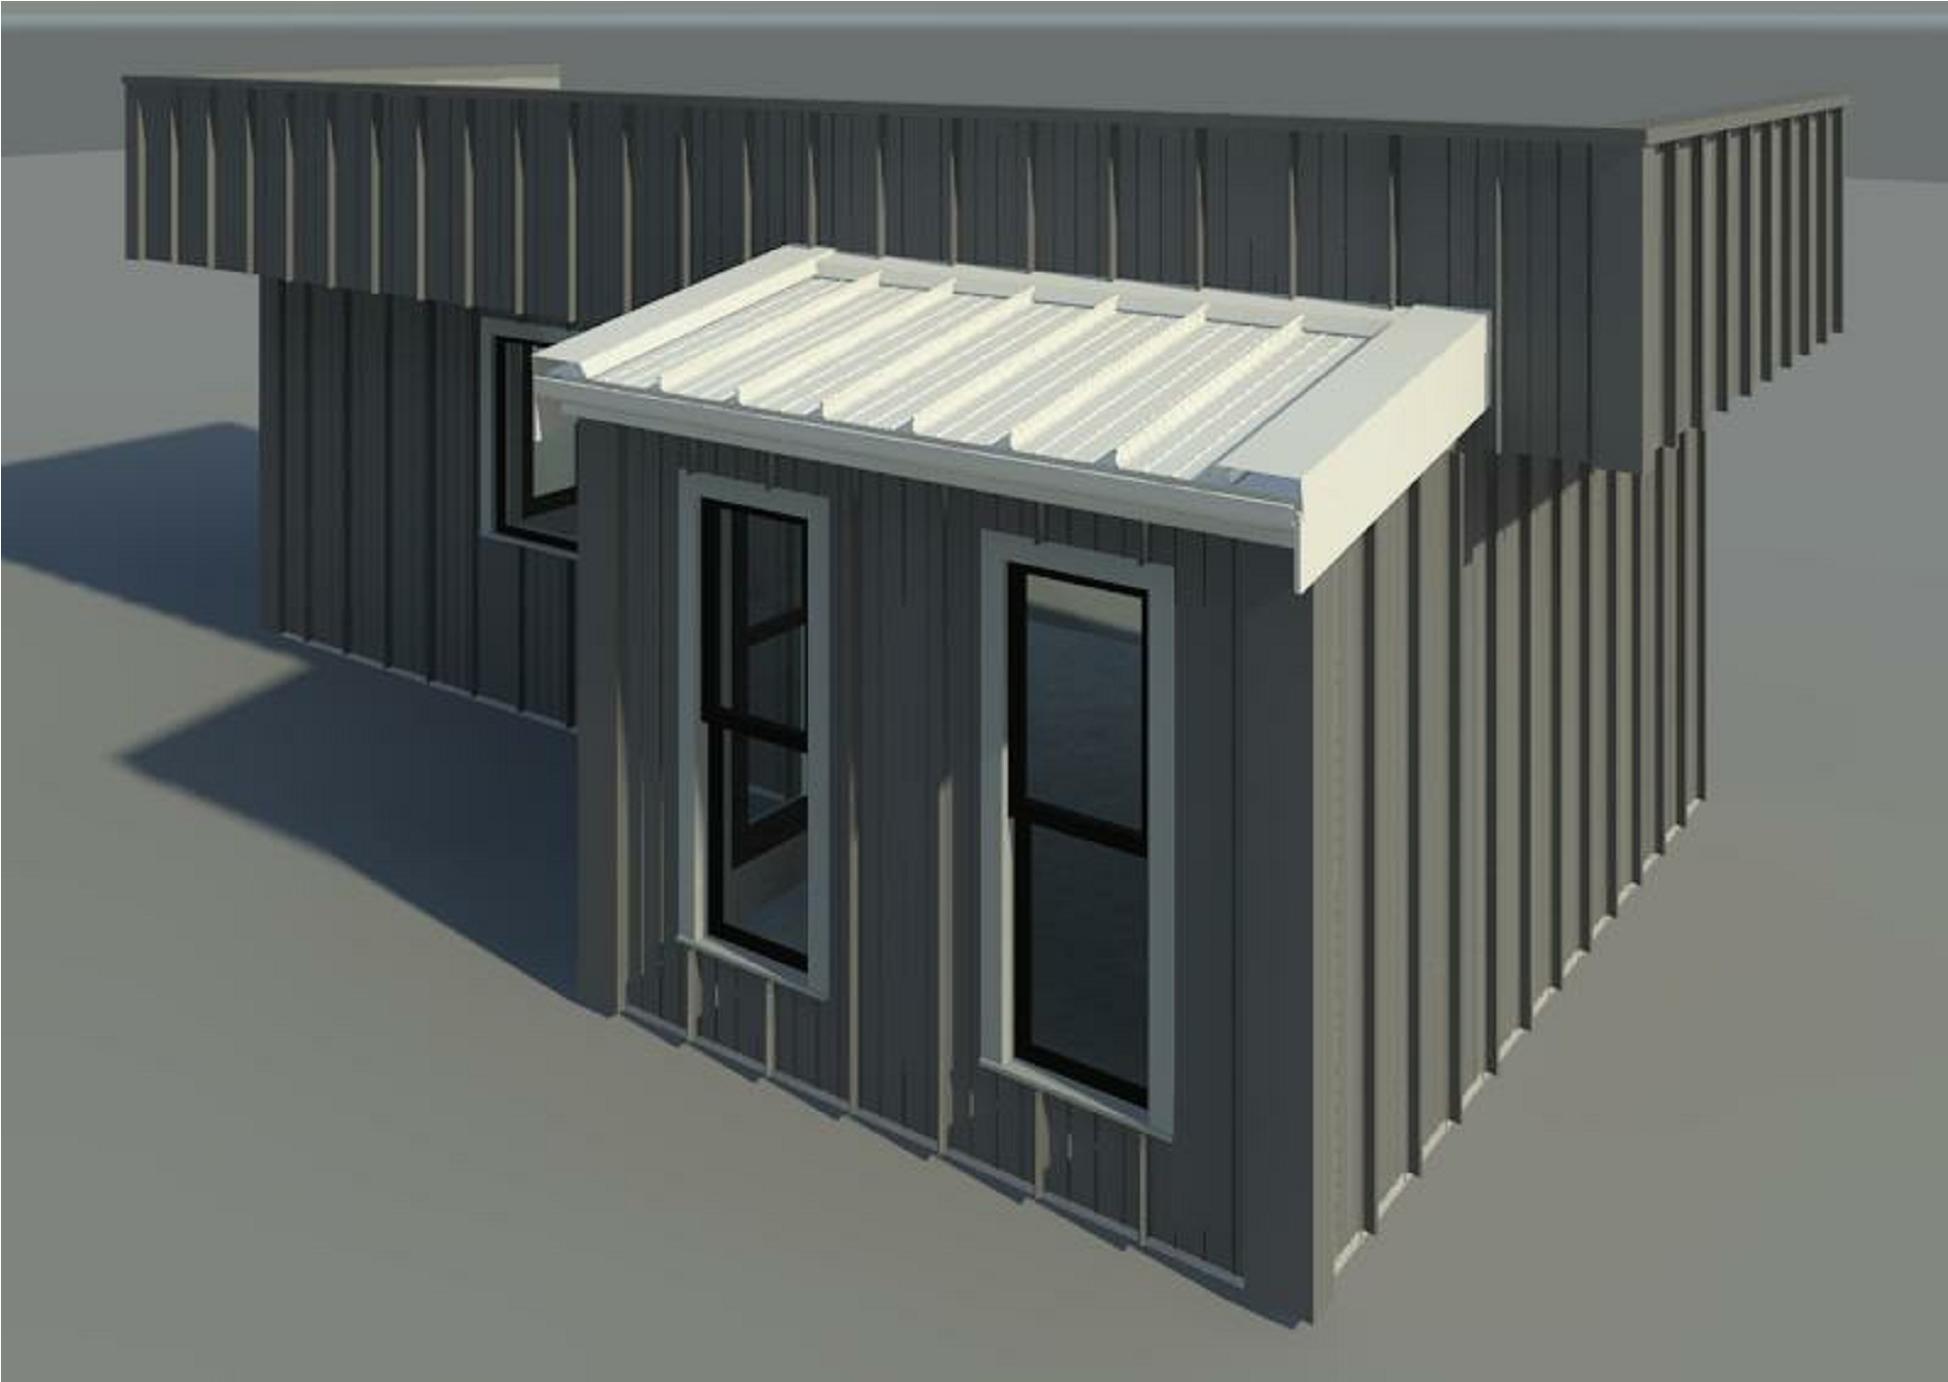
FreeForm® profiles have been represented in the following
• FreeForm® 400mm cover width
• FreeForm® 220, 300 & 400 taper profile


Basic Materials Library

29 very basic, non-intrusive COLORBOND® materials have been included in the Revit library. All unused material assets have been deleted from the families and all material assets purged where possible.

Profile Families

The ‘Freeform’ profile family is set to 400mm cover and should not be adjusted. The ‘Freeform Taper’ profile family can be adjusted from 220mm to 480mm (Please note: any cover widths outside of these dimensions cannot be physically produced by Fielders).


Detail Items

Detail Items have been created to aid in 2D detailing of your Revit projects.

Repeating Details

Repeating Detail families have been included to further assist in 2D Revit project documentation.

Sample Revit Projects

A Revit project has been created containing the profile. In addition to all of the items listed above, the following items are also documented and available in the sample Revit project file. All of these Revit assets can be ‘Copied & Pasted’ into another Revit project.

Preconfigured Standard Wall System Families

Standard Wall System Families and Standard Roof System Families allow users to very basically document FreeForm® Cladding products. Standard Wall and Roof families are set to the correct thickness for the given product and allow for square metre take-off schedules. Standard Walls and Roofs are a good solution for large installations where the FreeForm® Curtain Wall Systems Families can be too ‘processor intensive’ for the specific project application.


Preconfigured Curtain Wall & Sloped Glazing System Families

Standard Curtain Wall System Families and Sloped Glazing System Families both work in a similar fashion each other. They allow users to apply the FreeForm Cladding systems to vertical and horizontal (where applicable) surfaces.


Adaptive Components

4 point adaptive components have been created for complex roof shapes. They have been supplied in 3 separate levels of detail – course, medium and fine. The fine detail family should be used sparingly as it does take a fair amount of time to load and process.


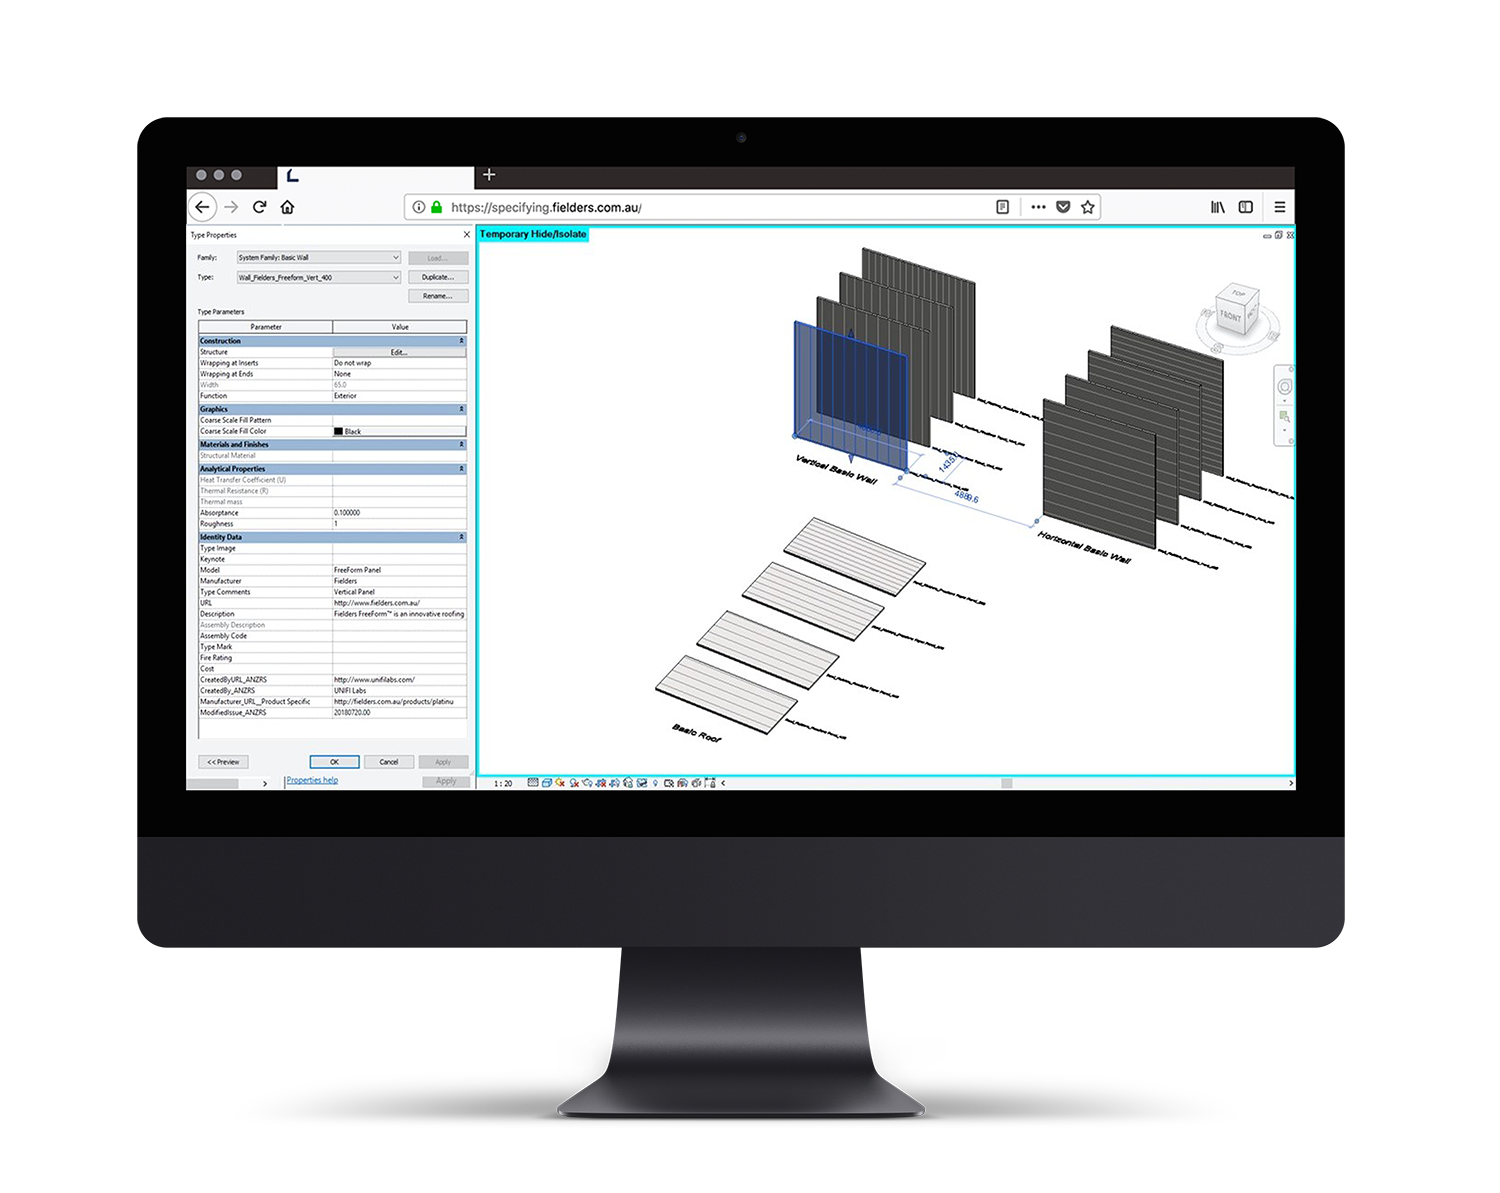
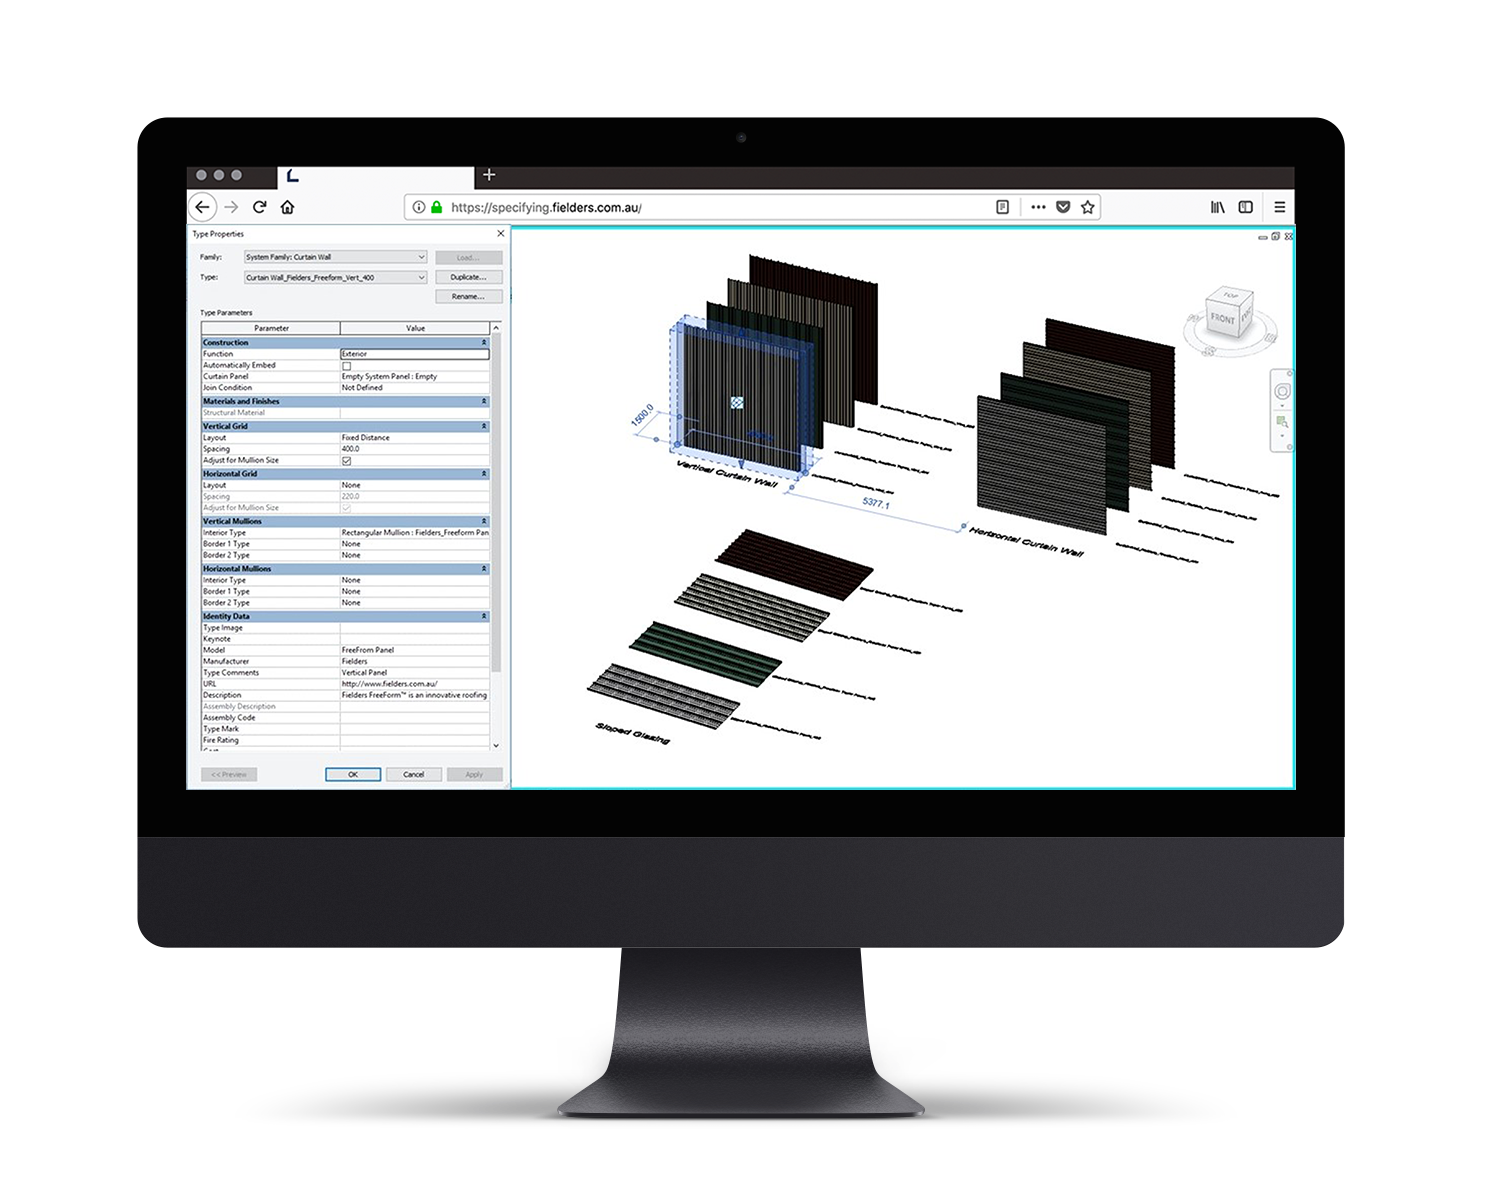
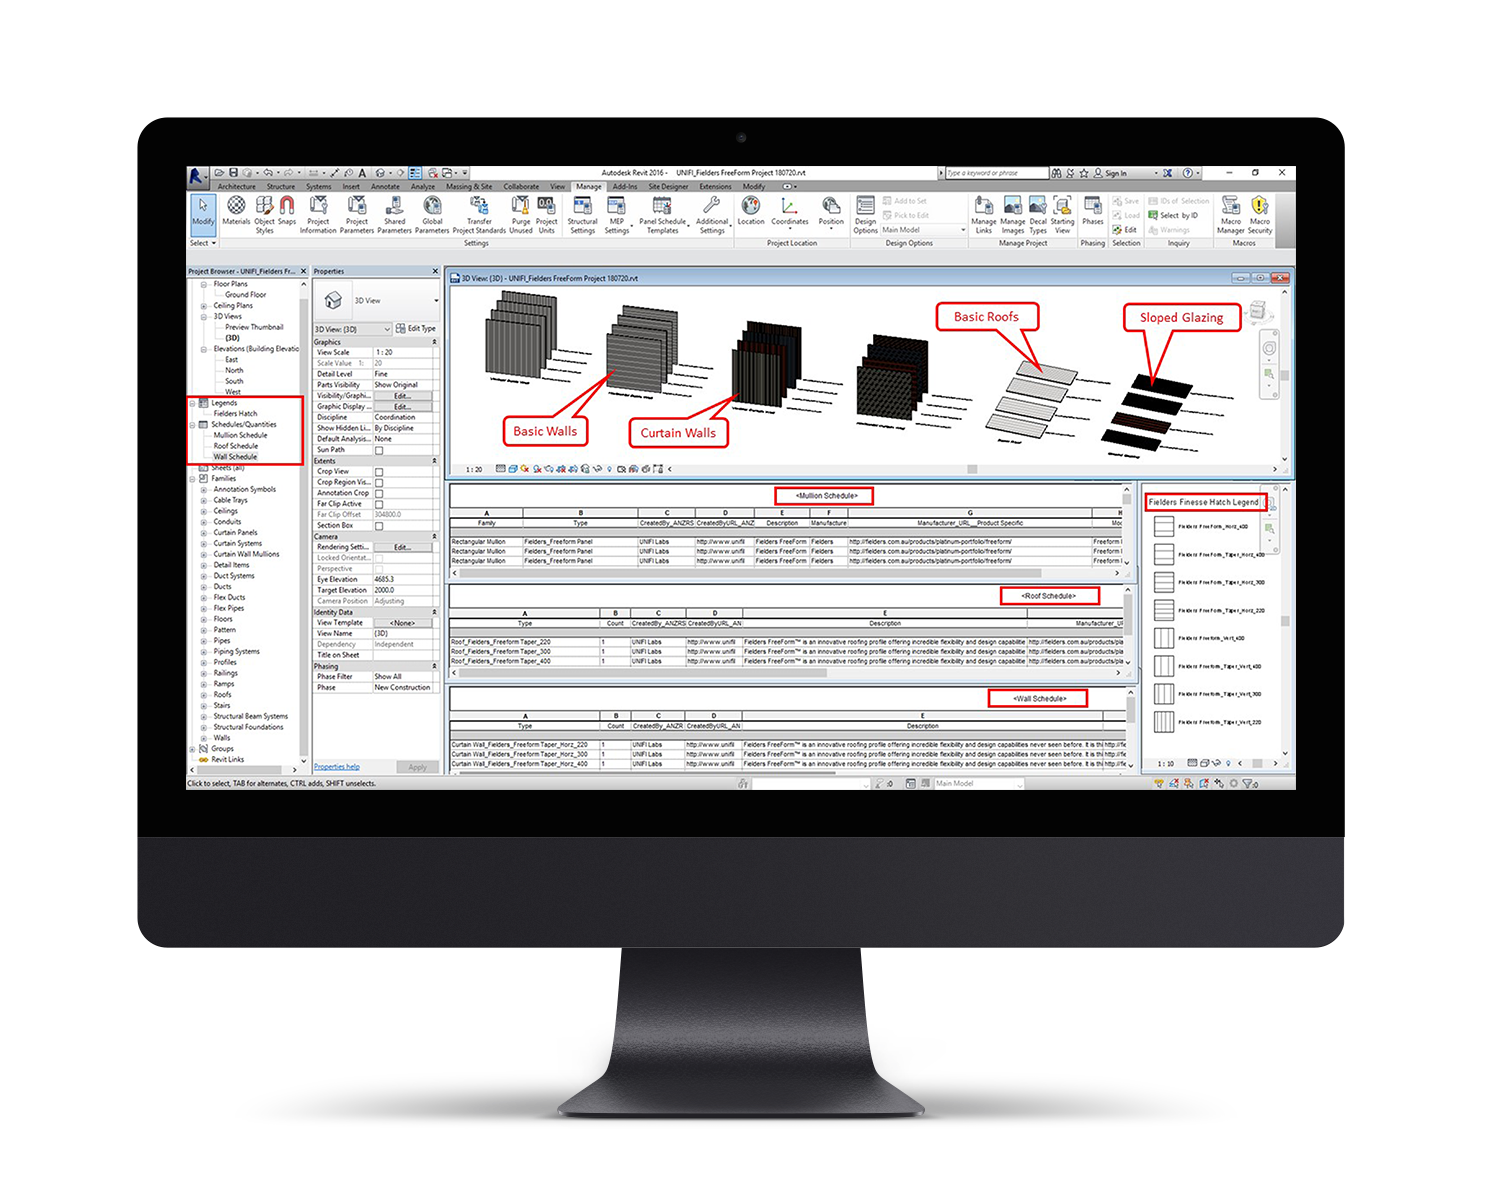
FreeForm® Sample Revit Projects Insight

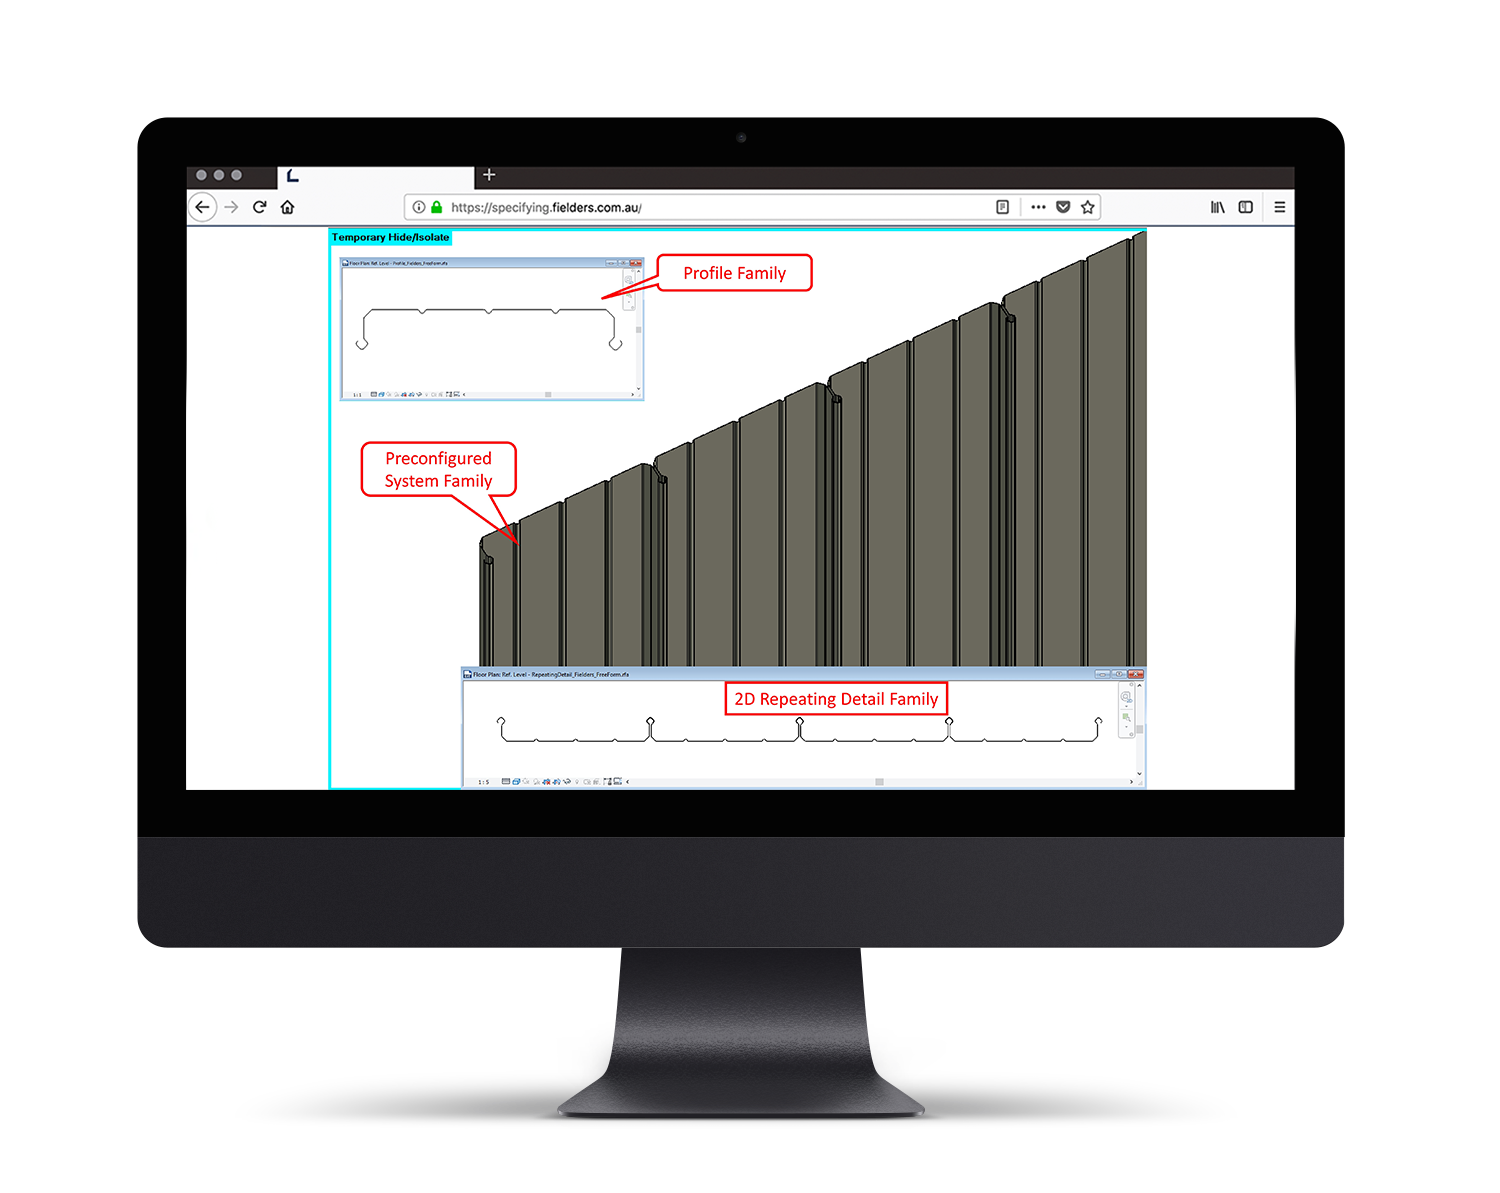
The FreeForm® sample Revit project contains the following items that can be ‘Copied & Pasted’ into your Revit projects.

FreeForm® Revit Content Selection & Key Parameters

At all times it is recommended users familiarise themselves with the most up-to-date FreeForm® product literature at www.fielders.com or speak to a FreeForm® representative.

The FreeForm® Revit library has been created with the following end-user workflow in mind:

Range Selection

What product do I require?

  • FreeForm® 400mm cover width
  • FreeForm® tapering profile
  • Freeform® Adaptive Component


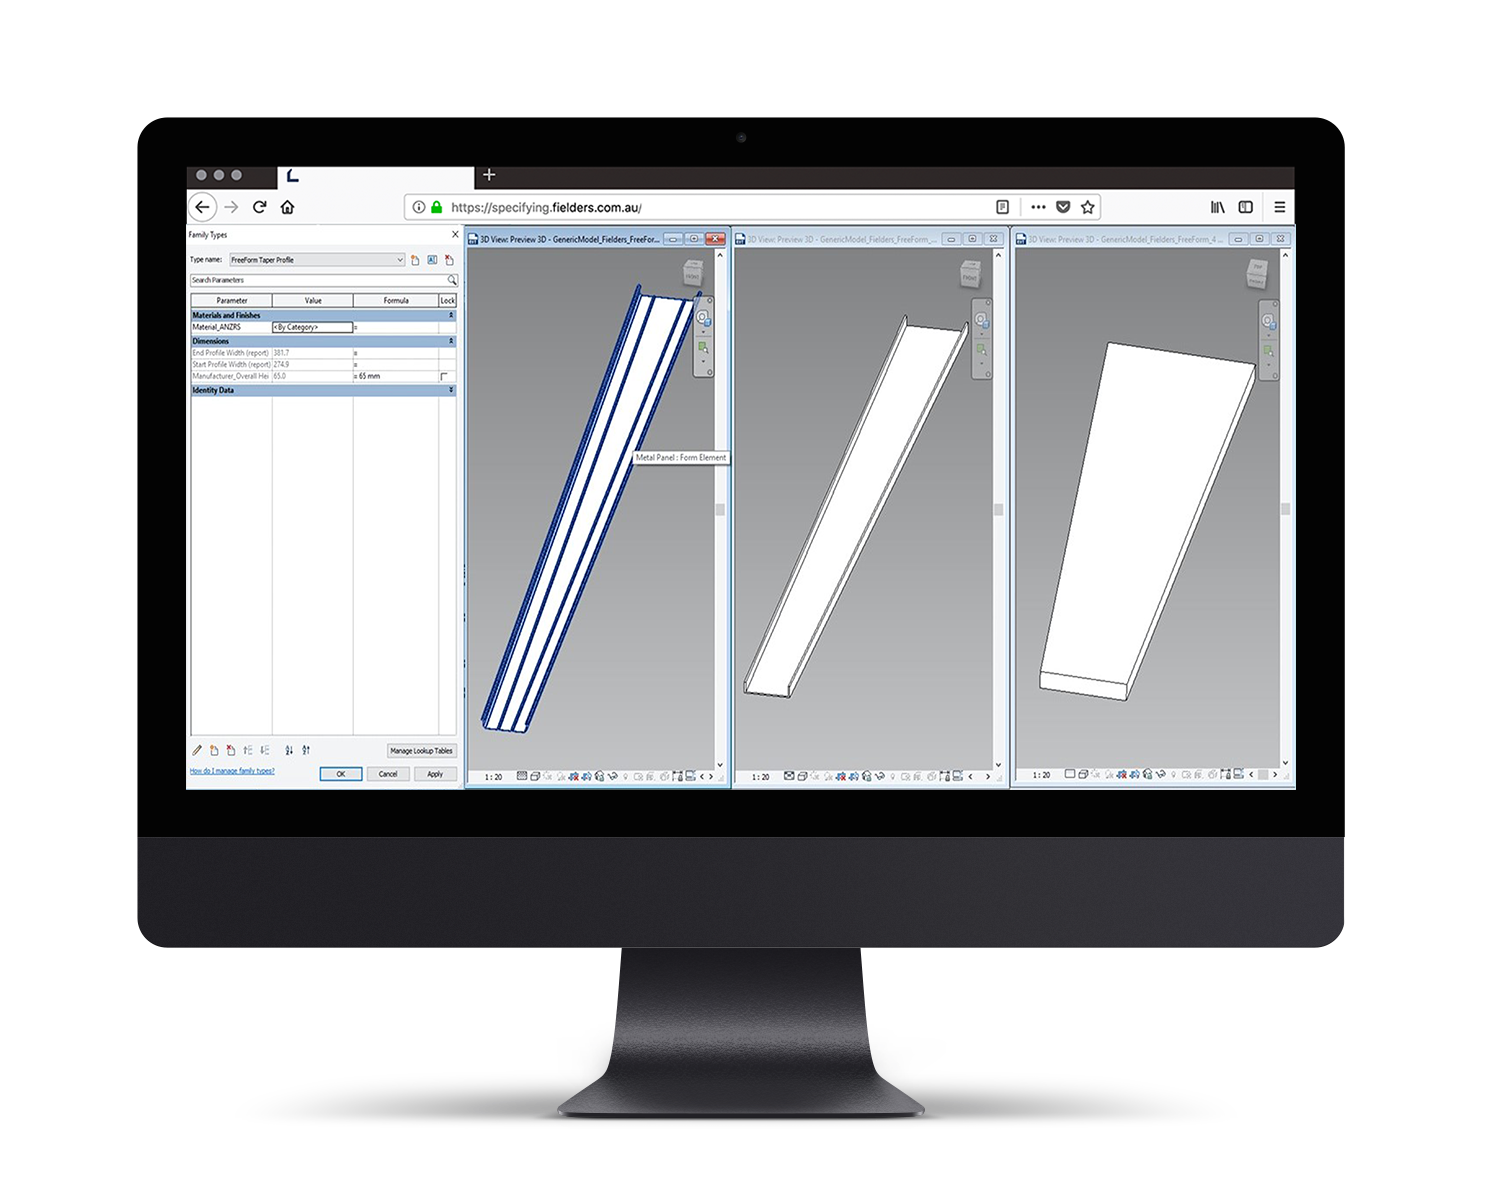
Family Type Selection

Depending on what is required to best document your project, the following options are available:

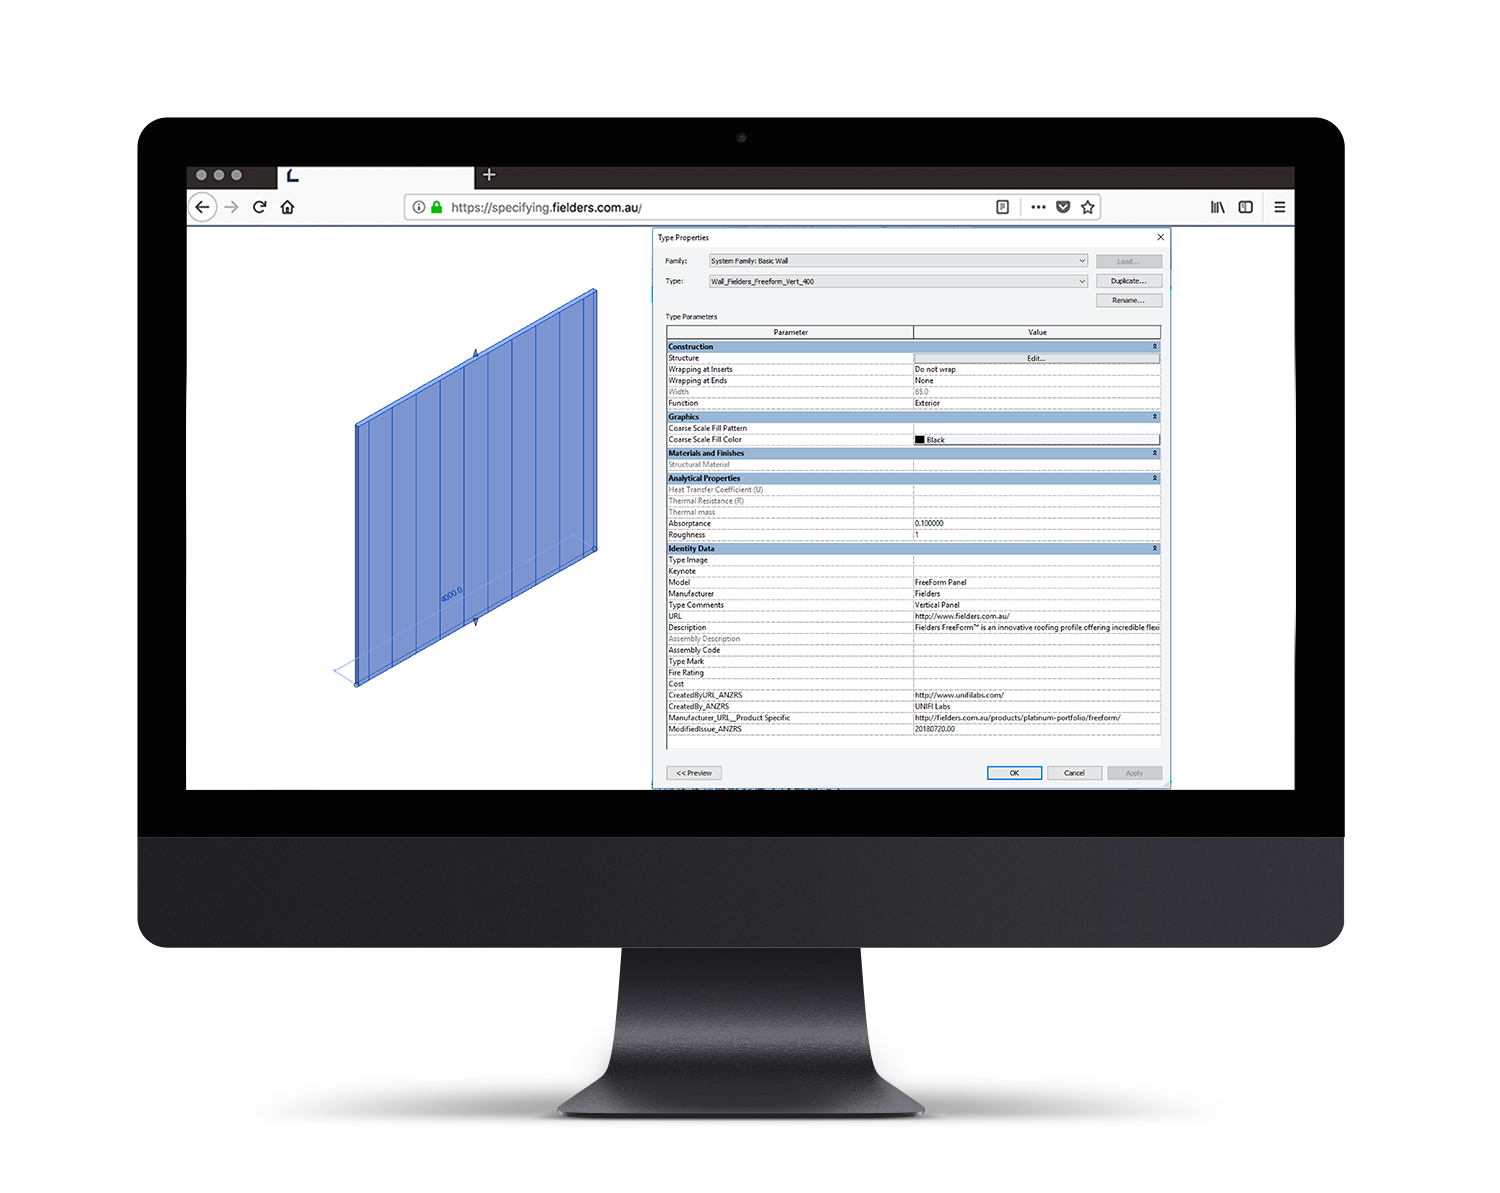
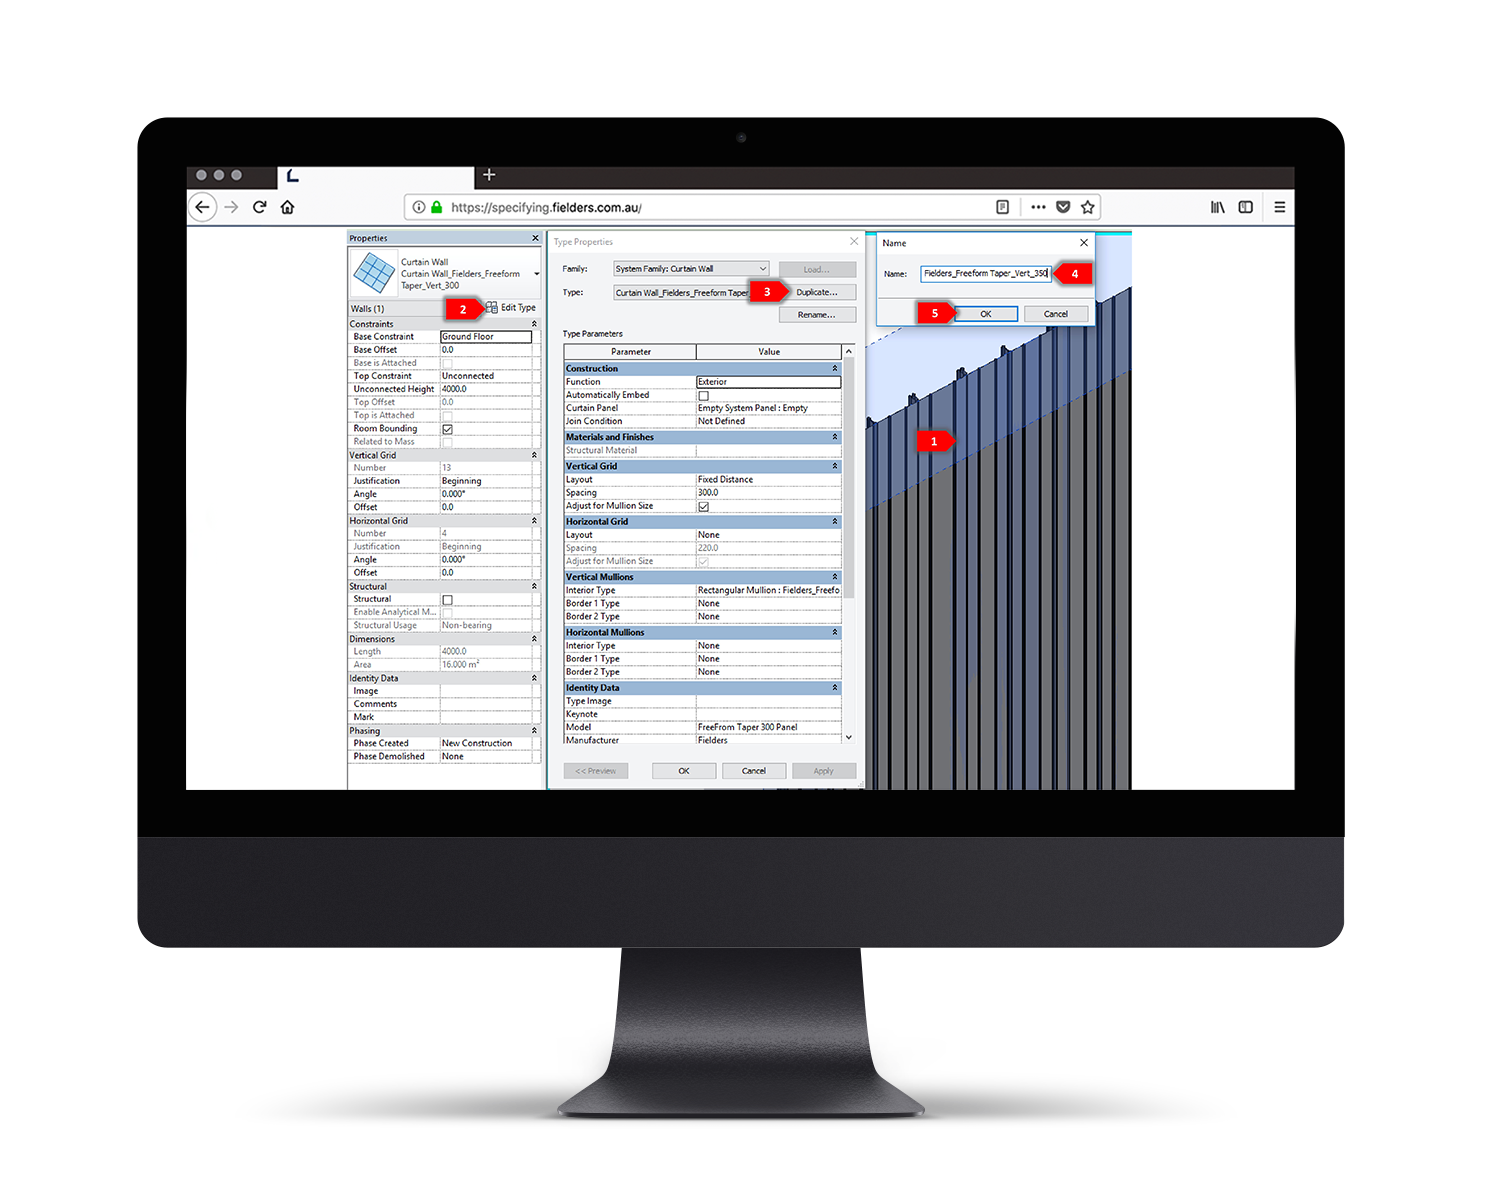
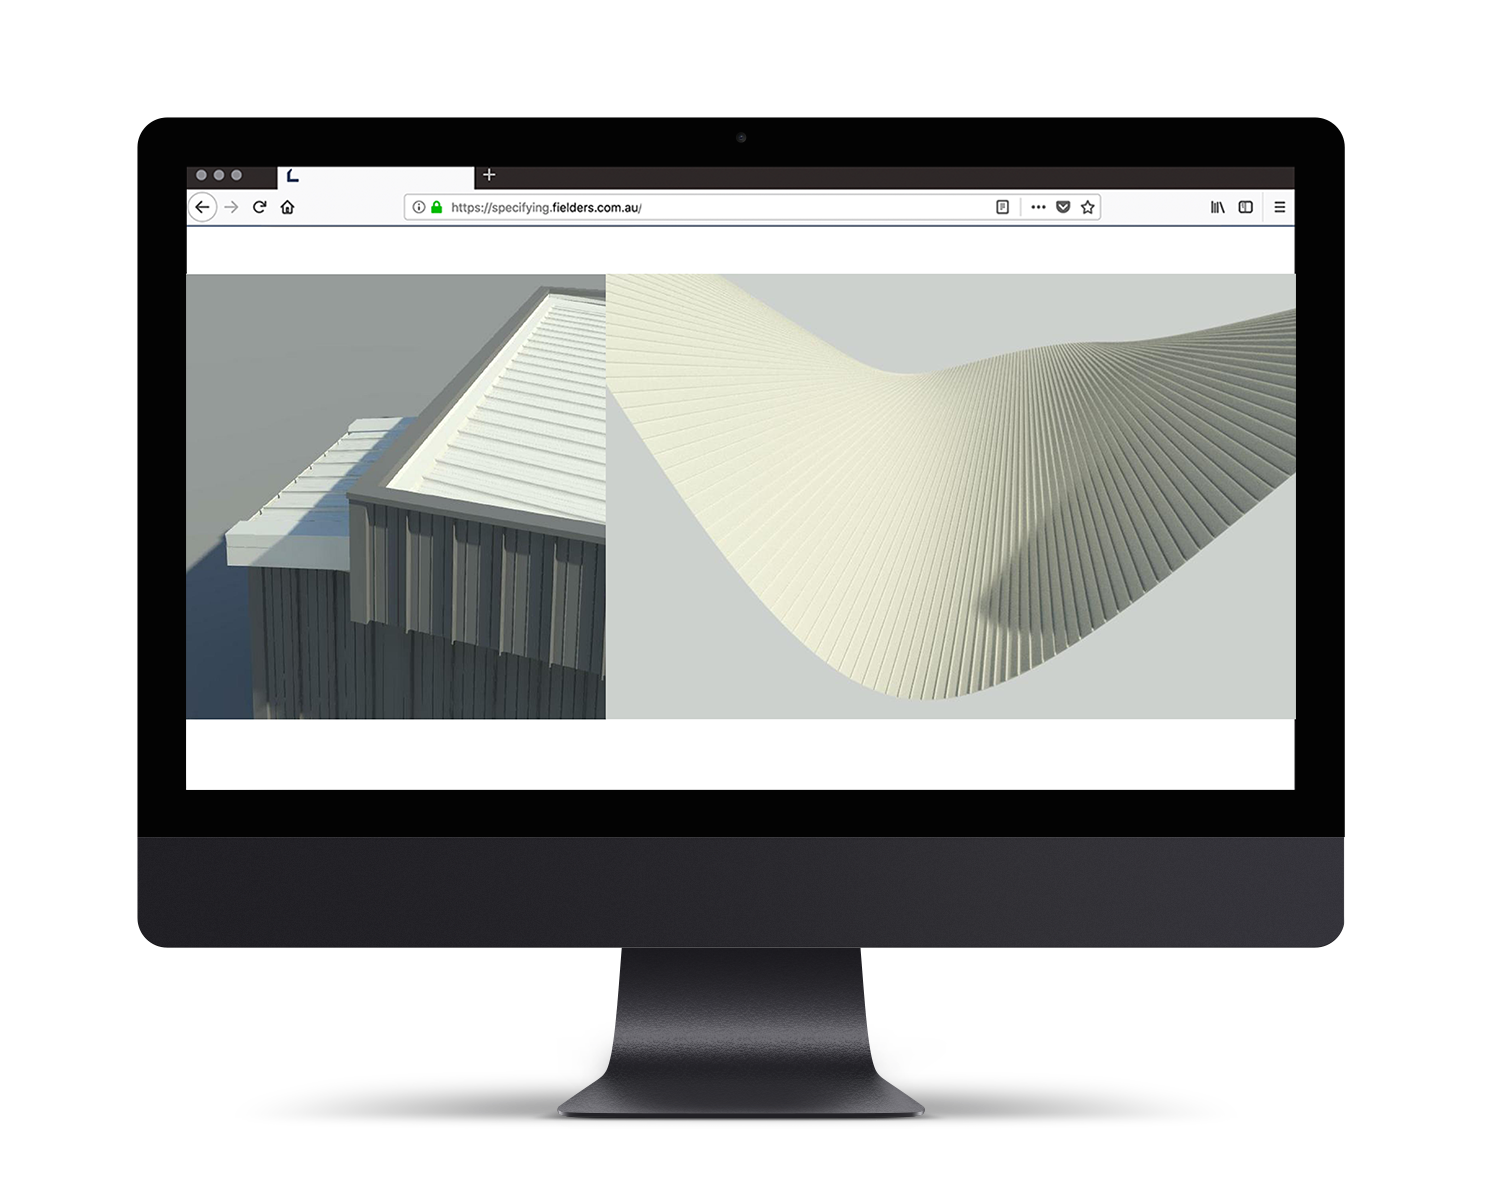
a. A preconfigured System Family of the product stored in the sample Revit project.
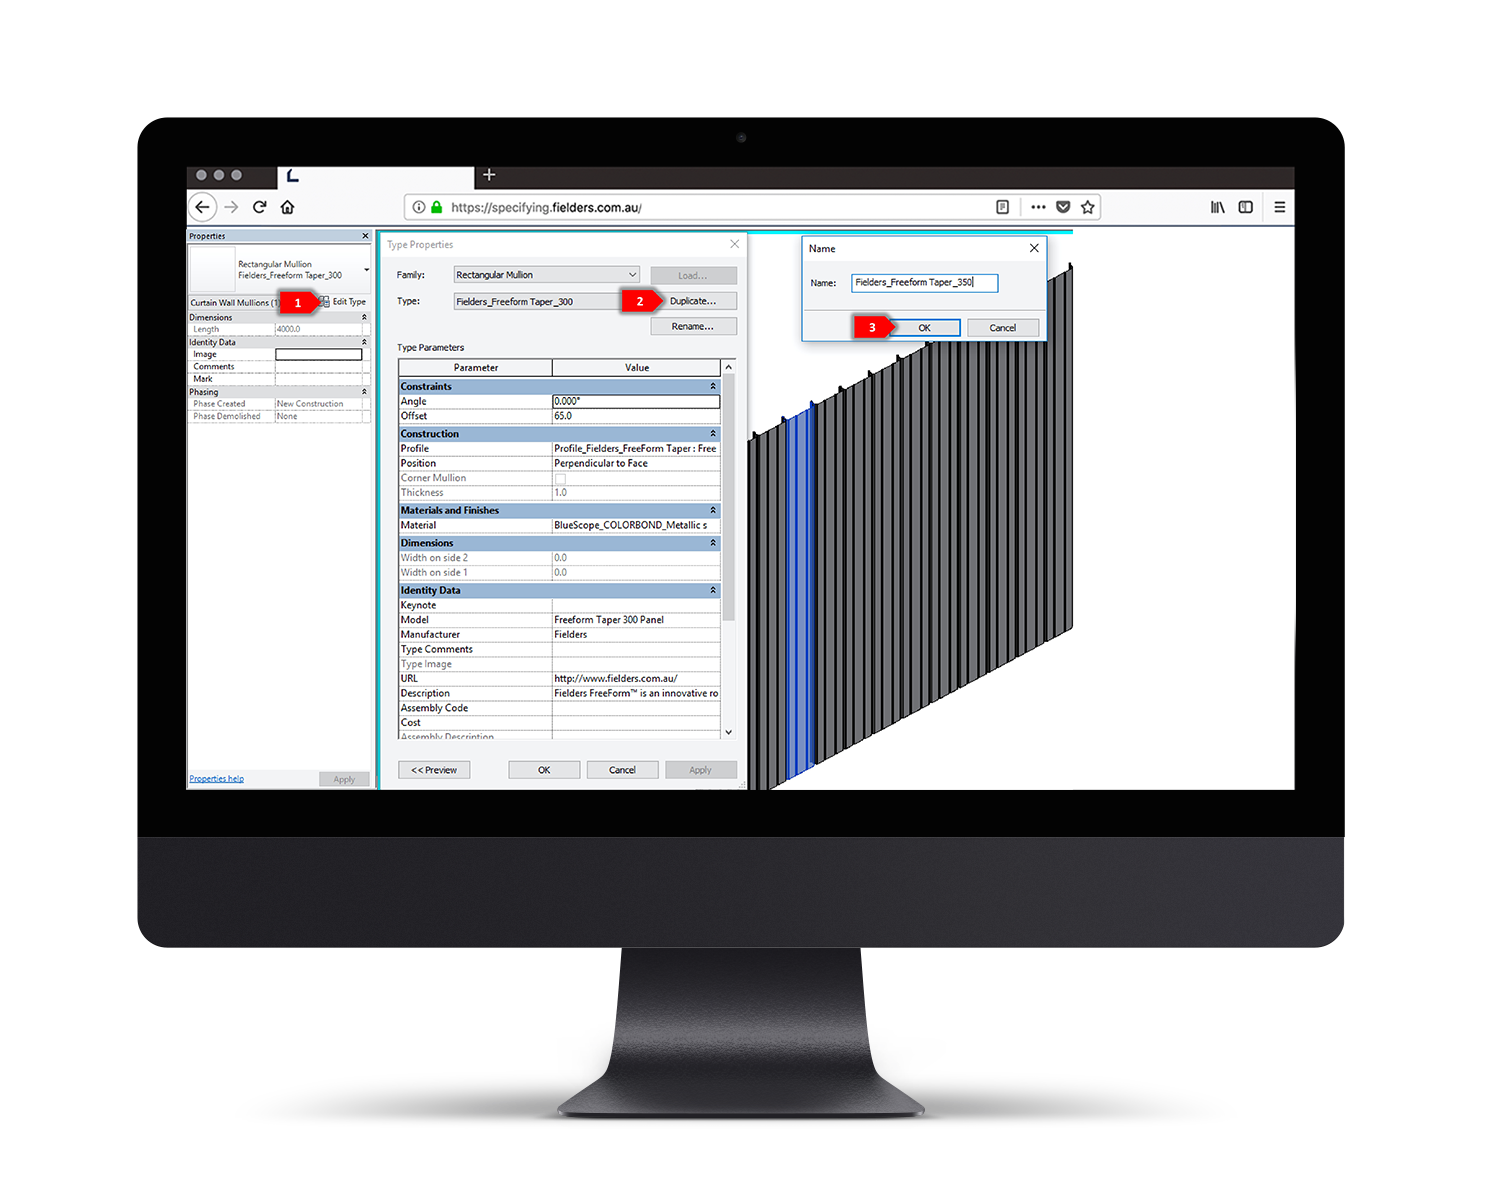
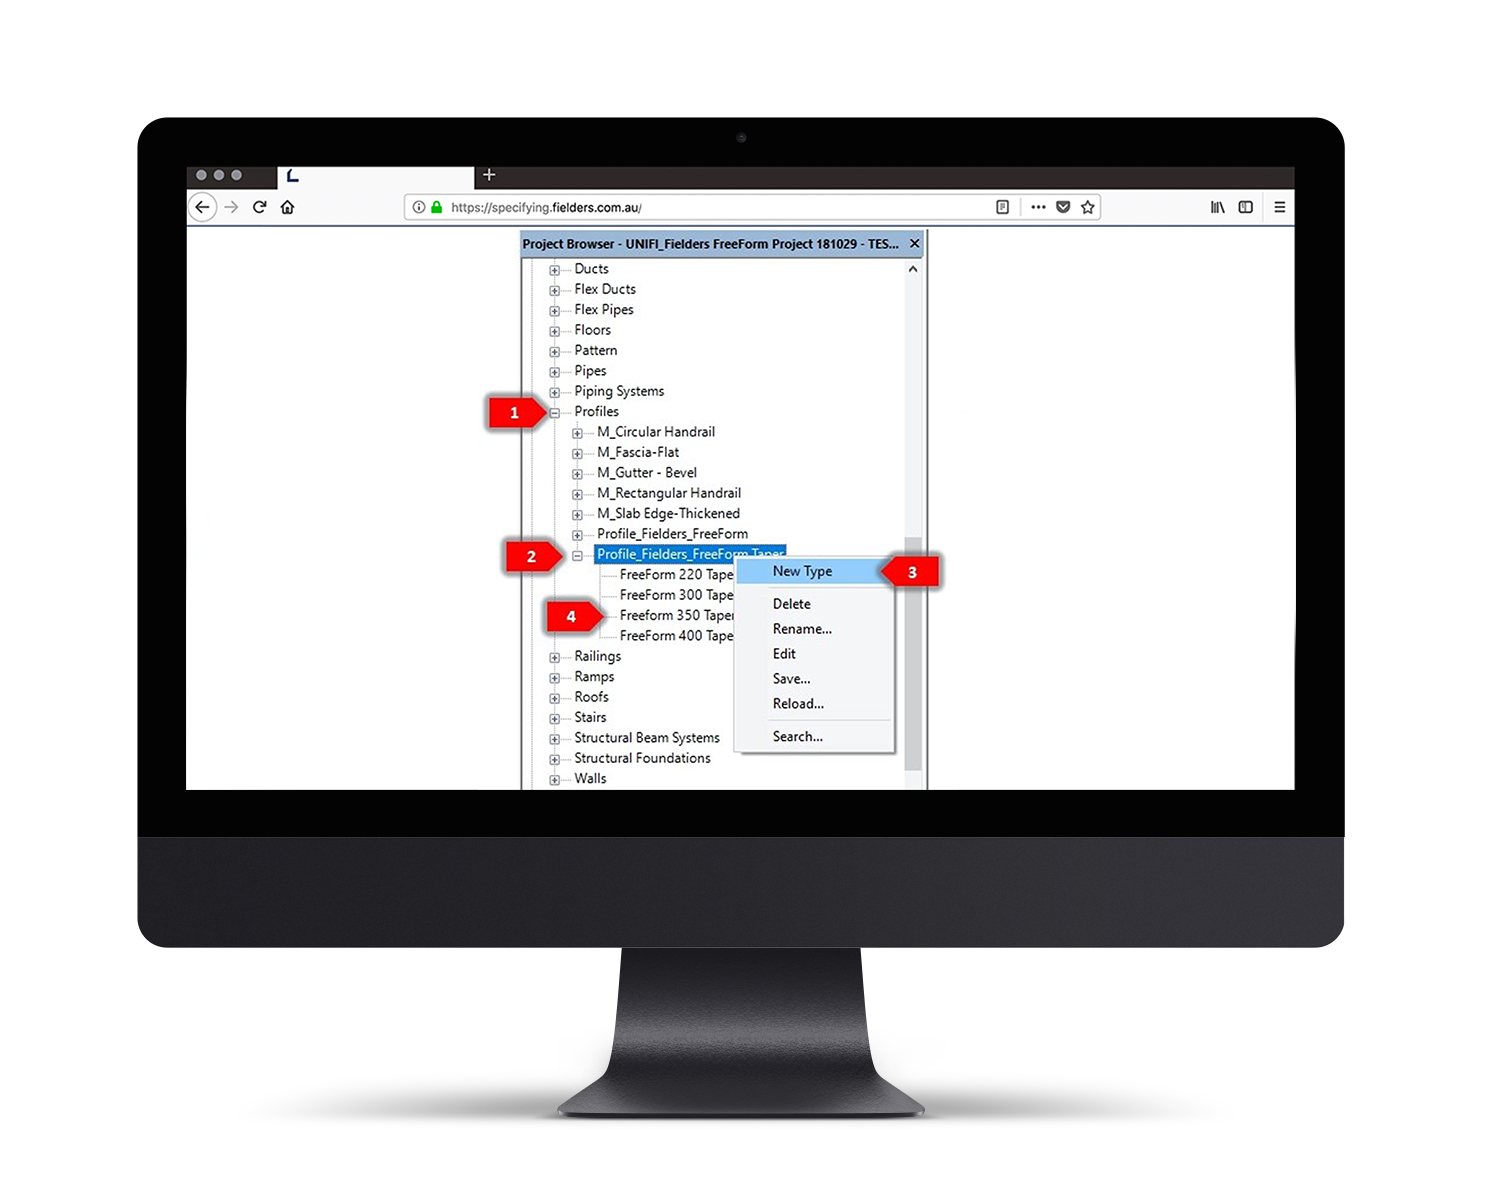
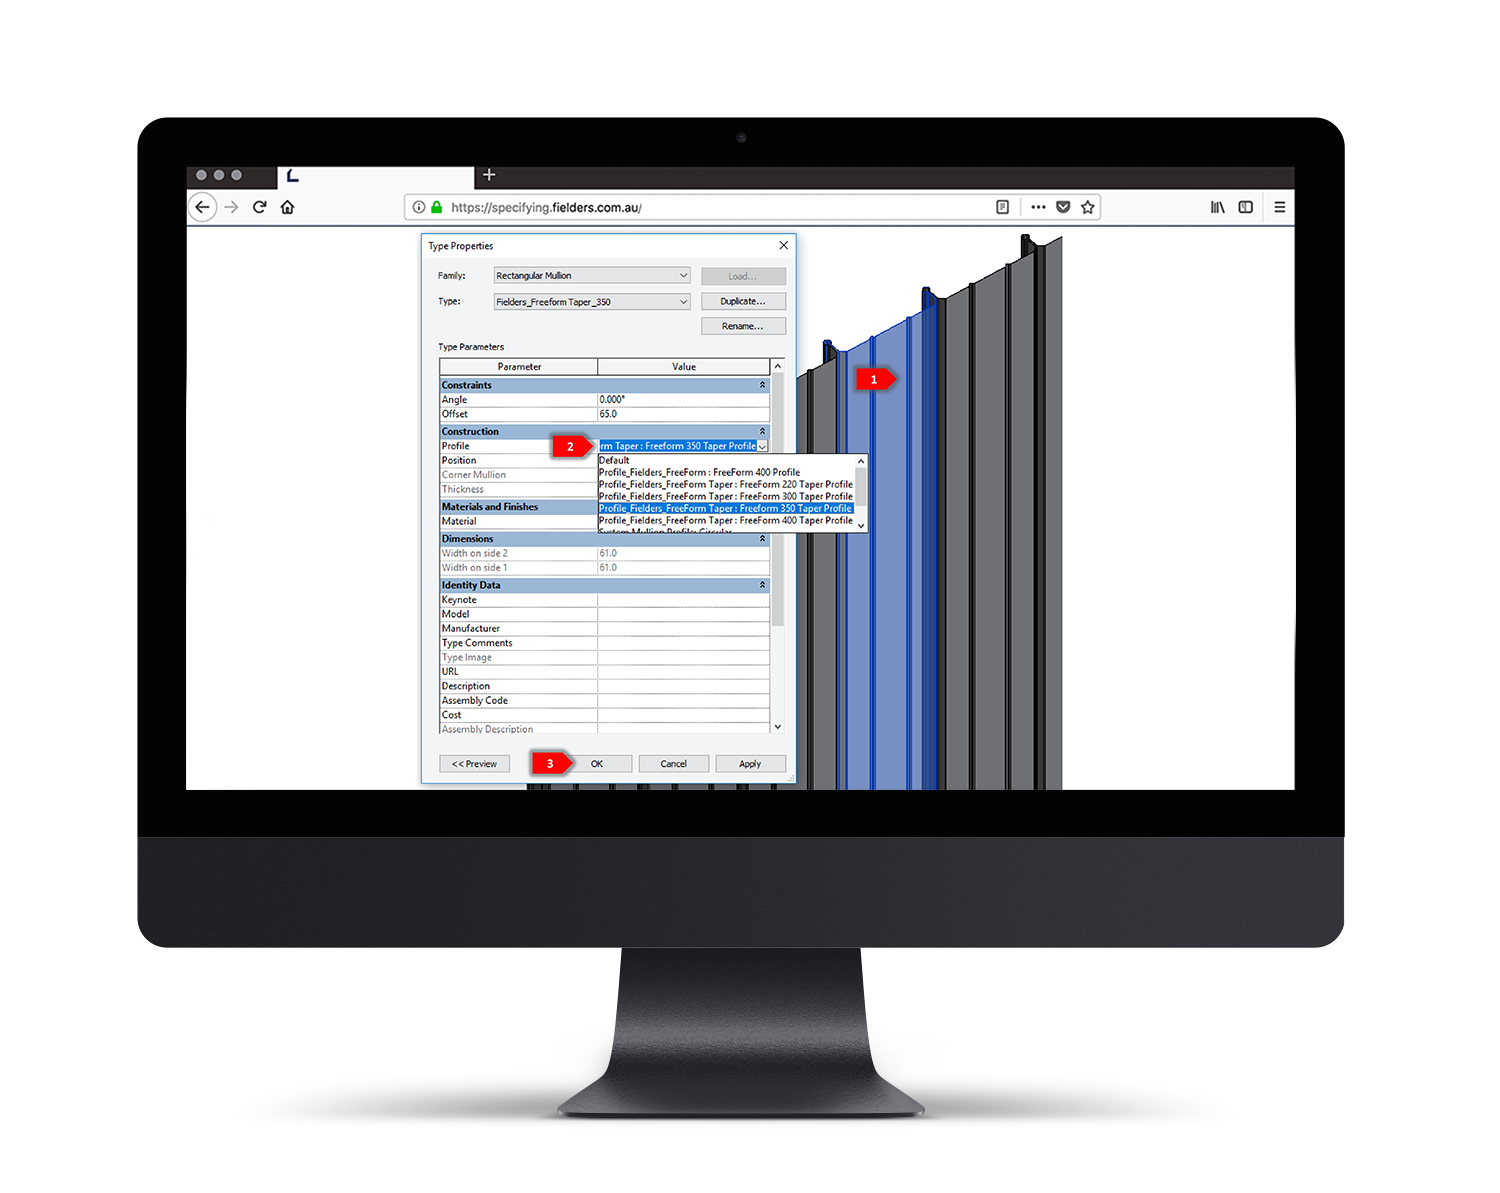
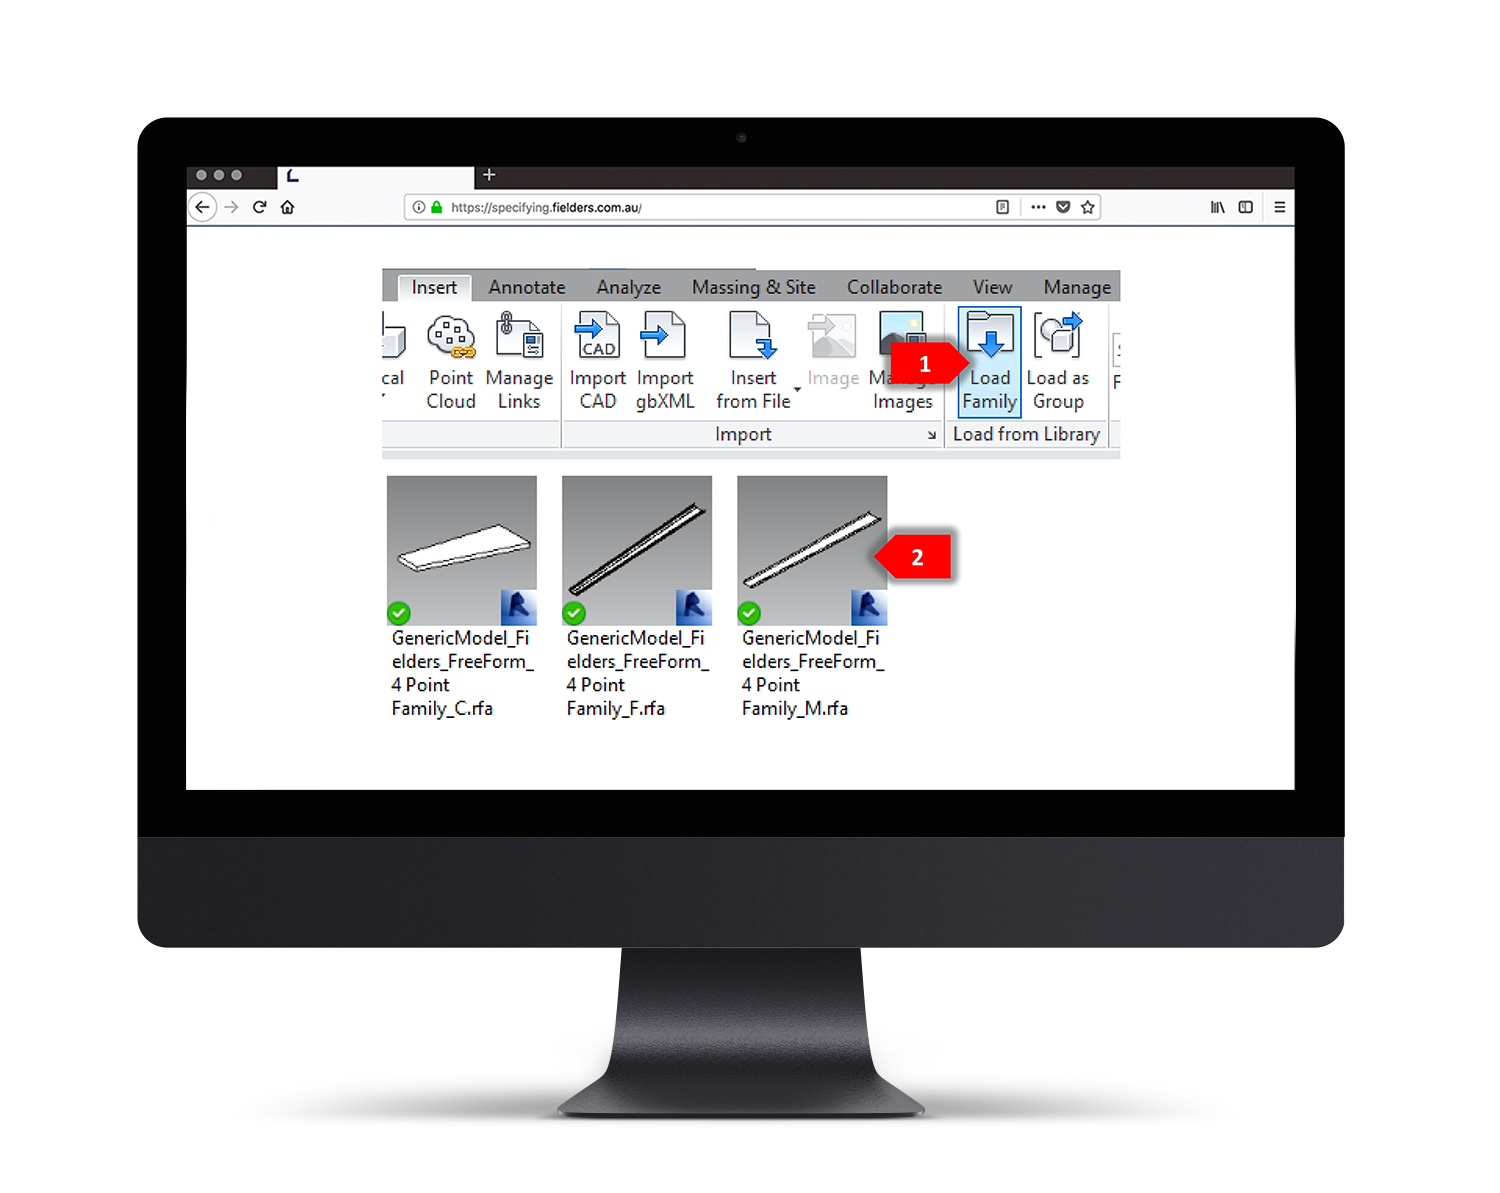
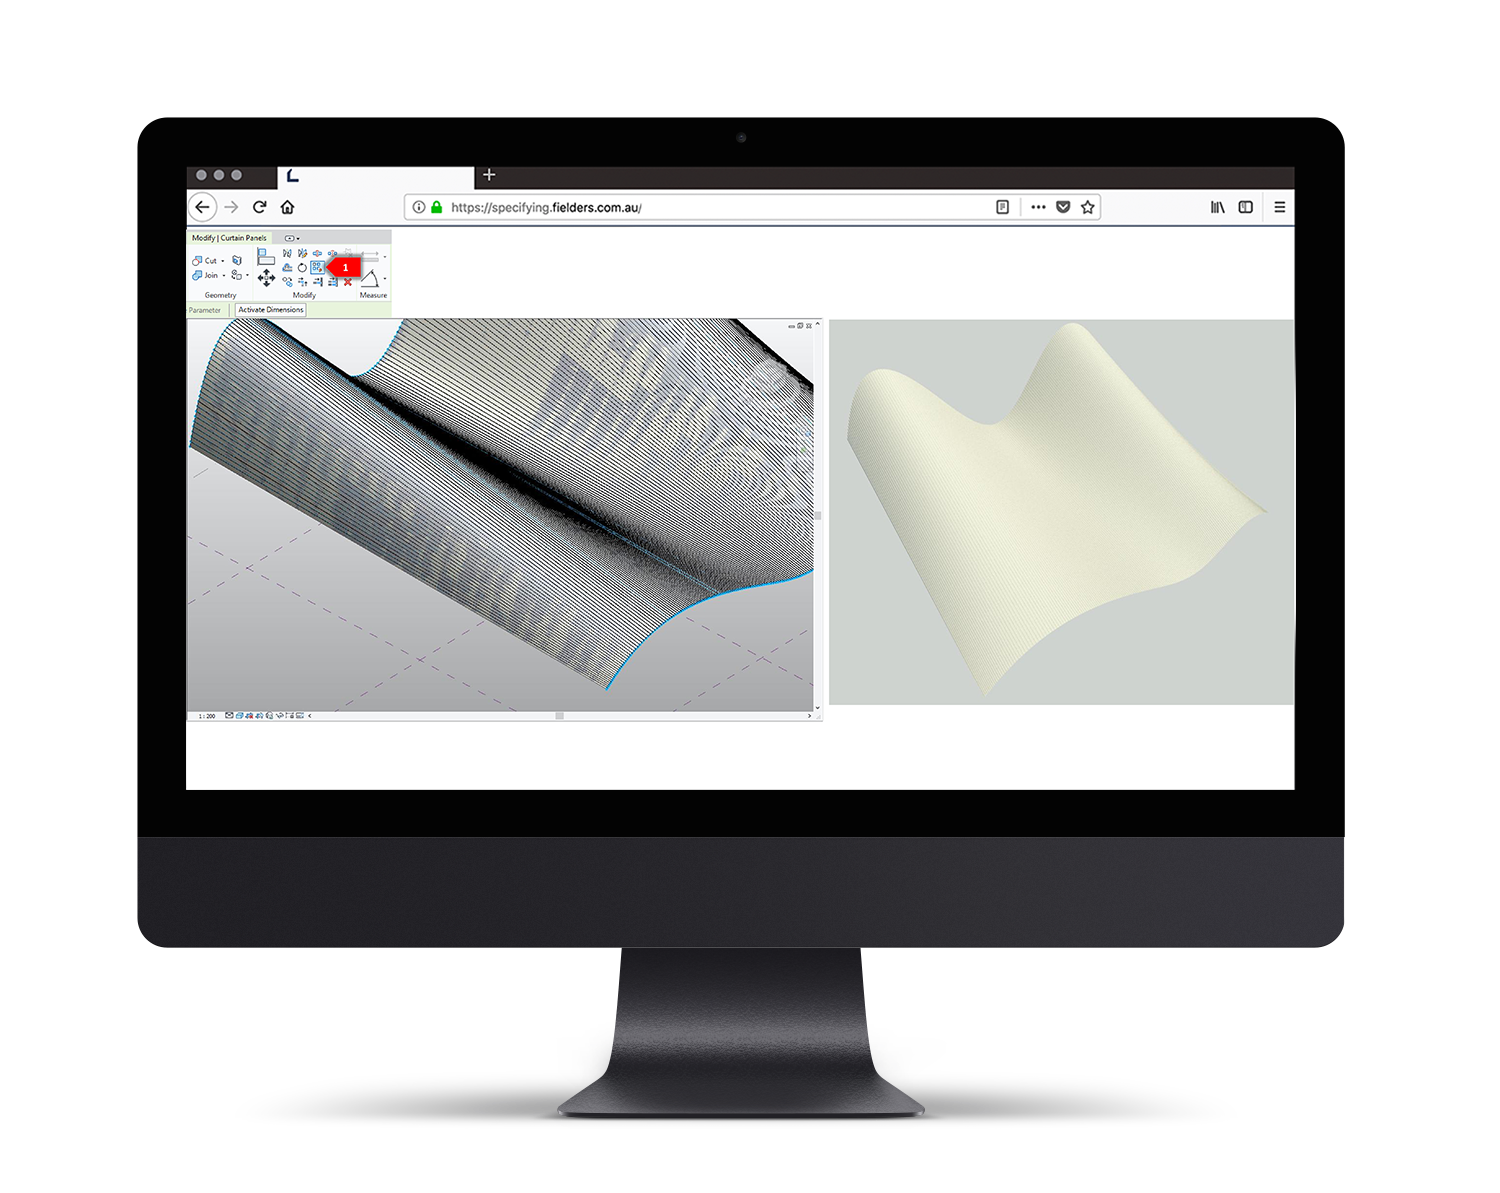
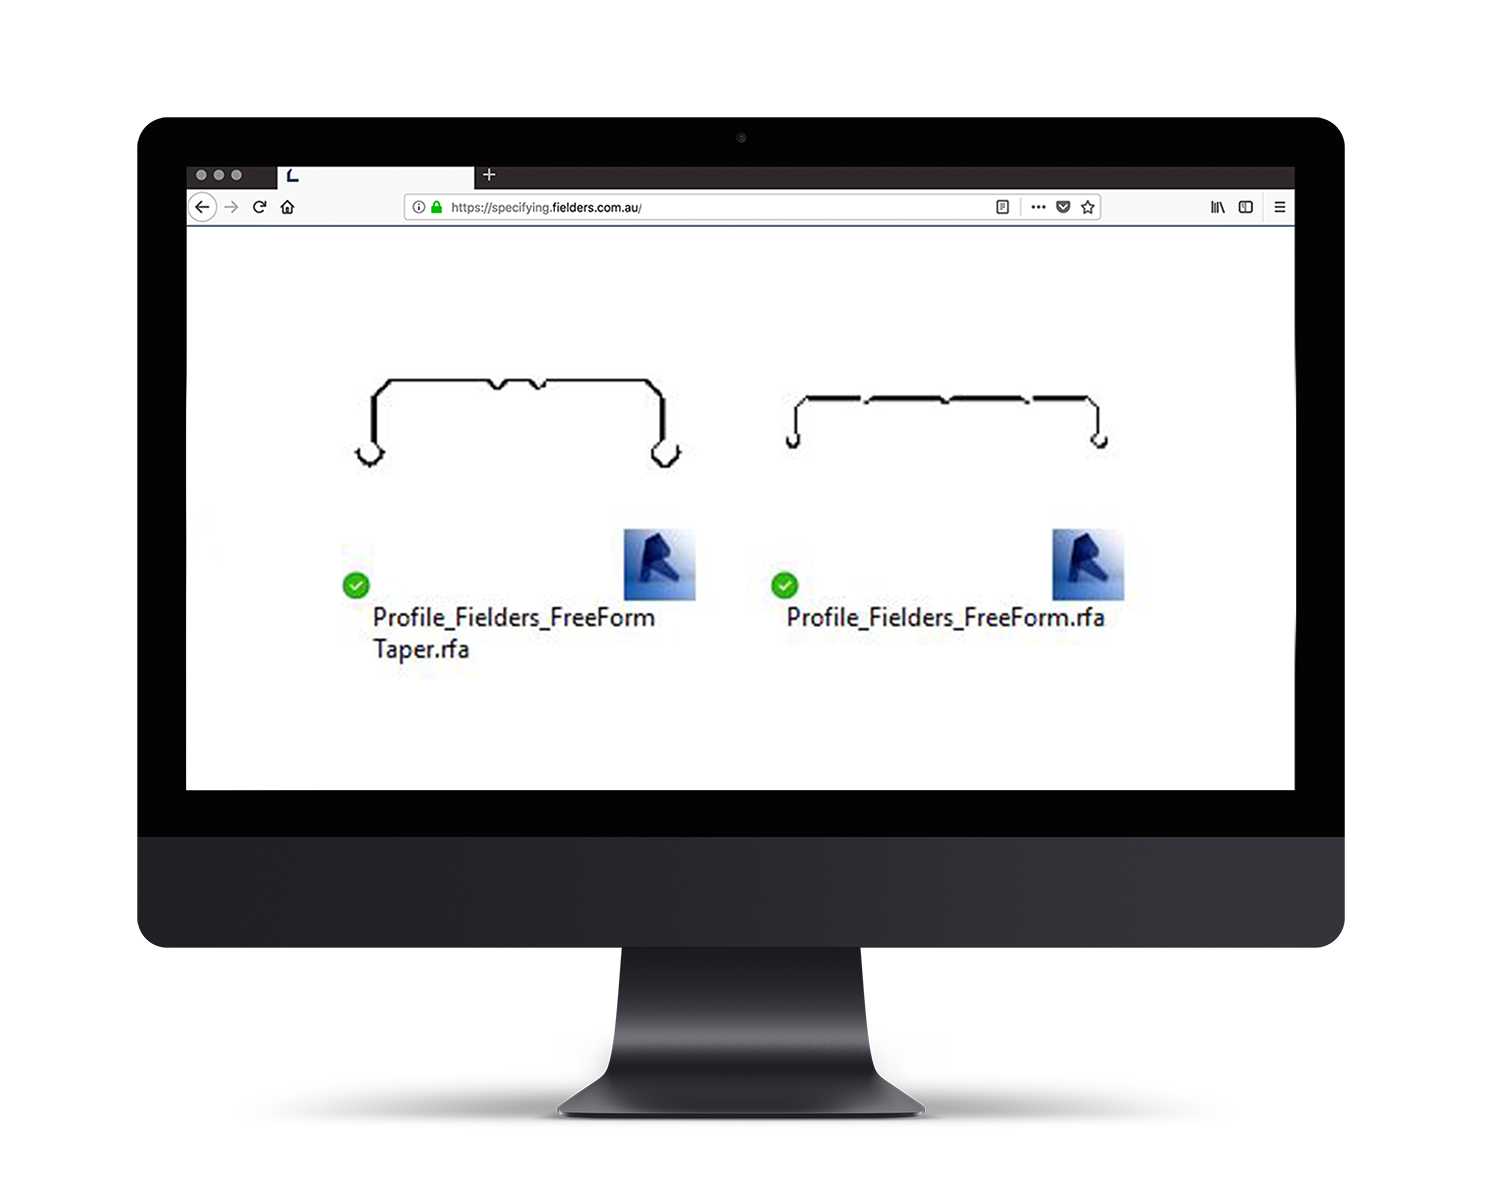
b. An individual Profile Family supplied to develop your own System Families.
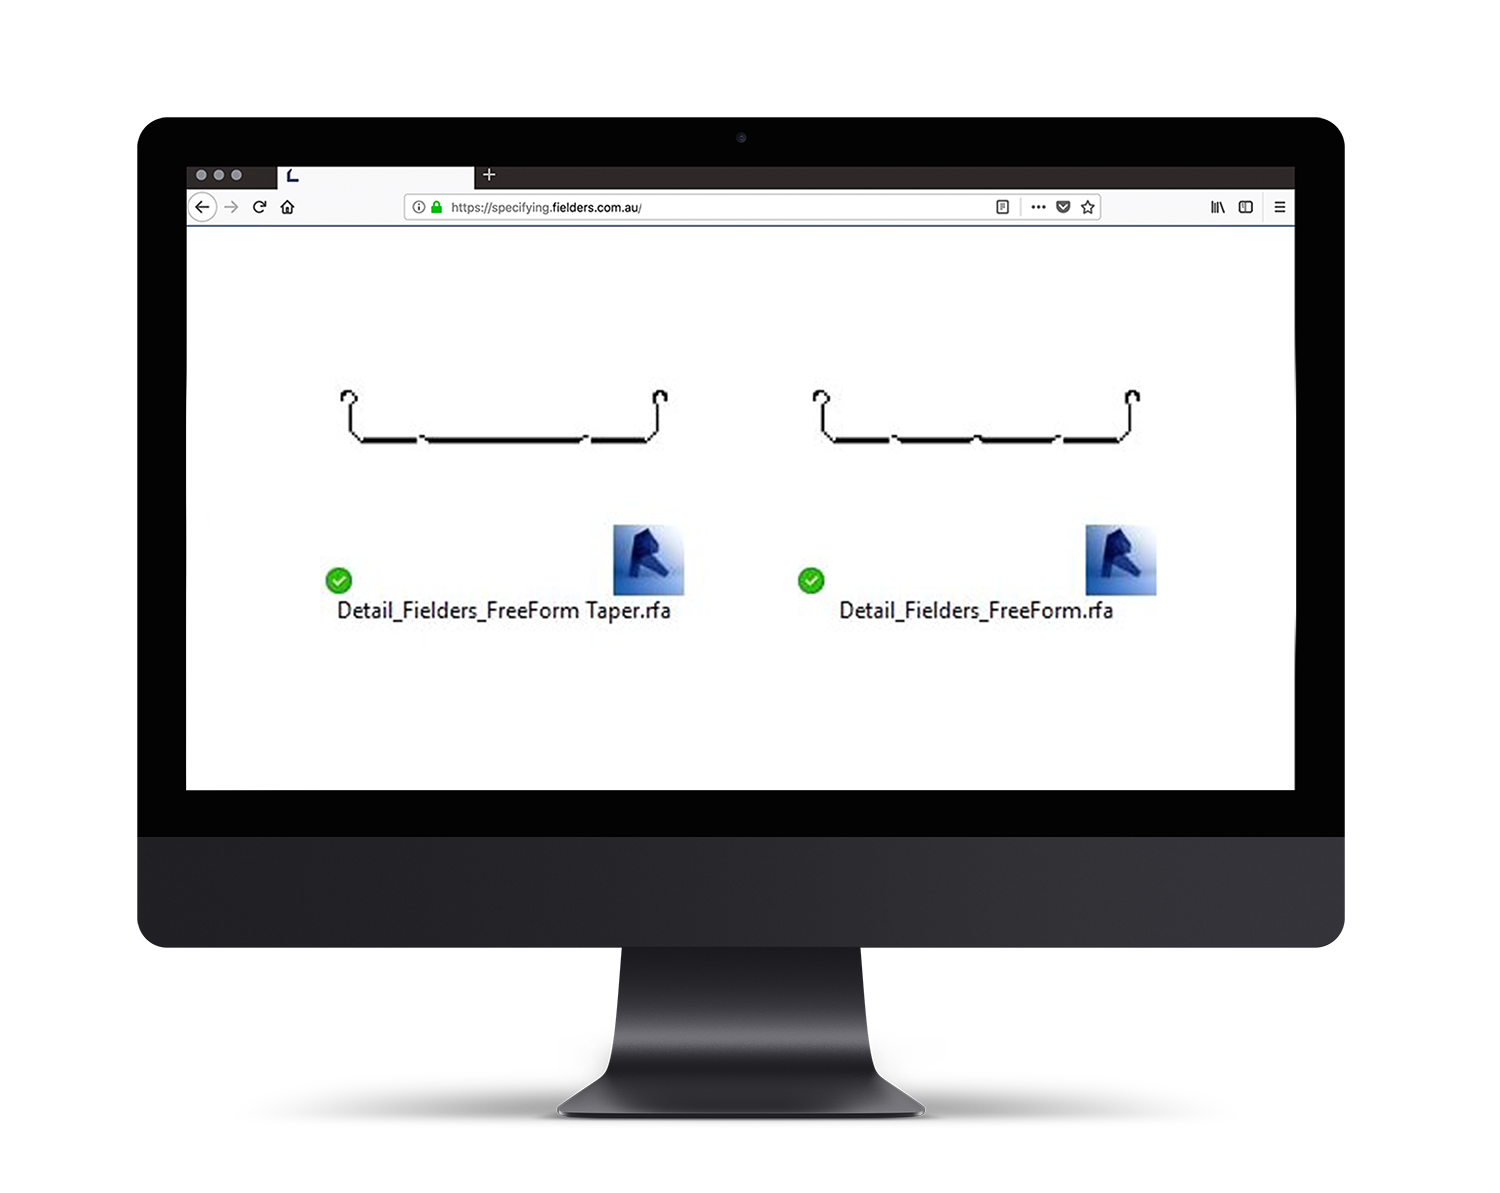
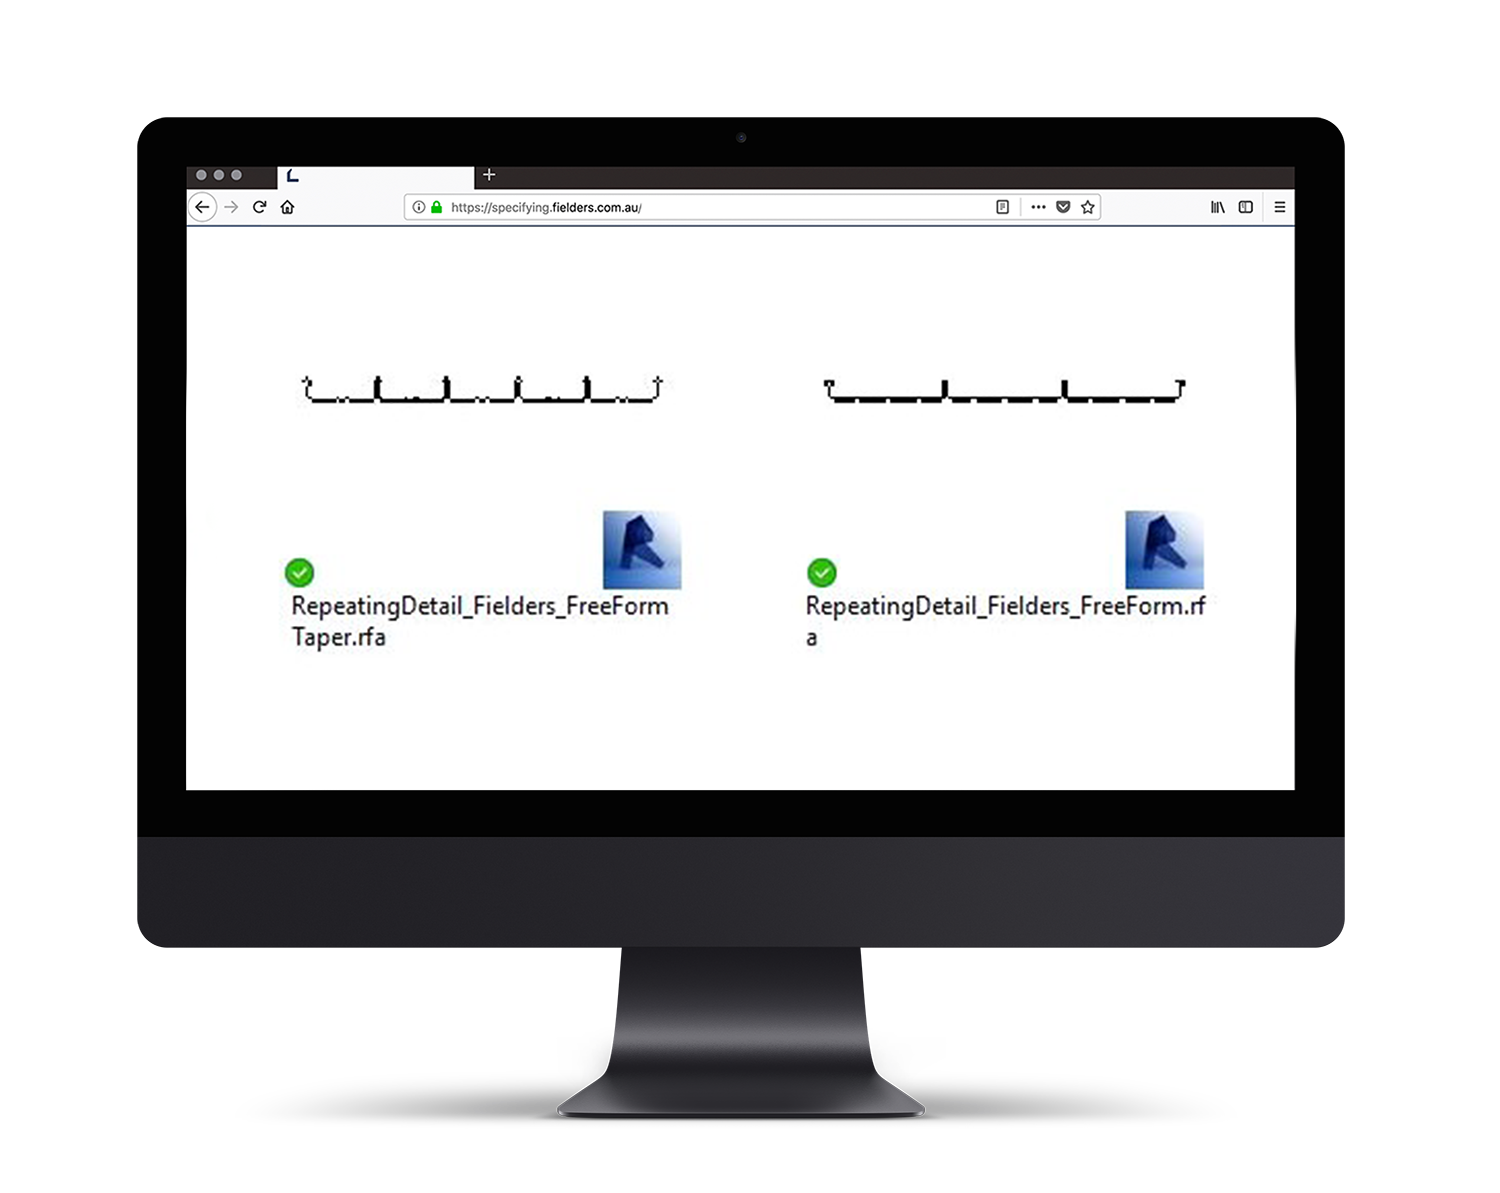
c. A 2D Repeating Detail Family can also be utilised.


Basic Wall System Family Insight

The Basic Wall and Roof System Families are simply modelled on the wall/roof thickness equal to the cladding thickness and include a hatch pattern to symbolise the cover width of the product.


Curtain Wall & Sloped Glazing System Family Insight

The Curtain Wall and Sloped Glazing (for applicable products) allow users to automatically create a wide variety of different Finesse product combinations. The standard profile sizes provided in the sample Revit project demonstrate the Maximum and Minimum Profile Sizes.

If sizes in-between the Min and Max are required, the steps outlined below can be followed. This process is demonstrated using Curtain Walls, however, the same principles apply to the supplied Sloped Glazing System Families (Note: this should only be applied to the Taper Freeform profiles):
1. Unpin one of the Curtain Wall Mullions

[Insert 4.4 – 1 Pic]

Step 1
Unpin one of the Curtain Wall Mullions

Step 2
Edit the Mullion, duplicate it and create a new Type to match the new Mullion size (ensure it is within the Min and Max Freeform specifications). Then click OK.

Step 3
Navigate to Profiles and create a new Type and label appropriately (ensure it is within the Min and Max Freeform specifications).

Step 4
Double click on the new Type created and update the Manufacturer_Overall_Width Parameter for the profile (ensure it is within the Min and Max Freeform specifications).

Step 5
Now click on the unpinned Mullion from step #1 and apply the new 350 Profile to the 350 Mullion Family. Click OK.

Step 6
Select the Curtain Wall in the project. Edit Type, Duplicate, rename to match the new 350 Type. Click OK.

Step 7
Now select the new Mullion and set the Spacing to be the Mullion cover width. Click OK. Re-pin the first panel to the Curtain Wall Mullion from Step 1.

Step 8
You have now updated the Freeform Taper product Curtain Wall to a 350mm Panel Size.

Adaptive Component Families Insight

The Adaptive Component system families allow users to automatically create unique shapes for both roof and wall. As complex roof and wall structures are becoming more popular it is important for the FreeForm® Revit content to adapt to these changes and make it as easy as possible for users to document these shapes. By following these simple steps, our Adaptive Component families have made it a lot easier to not only achieve good documentation, but also an accurate representation of their model.

Step 1
To start, open your project, or create as a separate conceptual mass. The following example has been done in the conceptual mass environment.

Step 2
Build your desired roof/wall shape using model lines, splines and reference planes, line as required.

Step 3
Divide your surface appropriately

Step 4
Ensure to setup the ‘U Grid’ and ‘V Grid’ according to the Freeform parameters

Step 5
Turn on ‘Nodes’

Step 6
Load 4 point Adaptive family into project/conceptual mass. (Note: use the ‘Fine’ level on smaller projects only as it takes a long time to load due to the true representation of the profile).

Step 7
Click on the 4 points of a rectangle. Ensure the correct order.

Step 8
Select the new profile and press the ‘repeat’ button. Let the model process as required and the FreeForm® profile will lay out over the model.

Closing Statement

The overarching goal in creating this Revit content library is to increase the ease in which Revit users can design, document and specify FreeForm® products within the Revit environment. Fielders is committed to the continued development of this Revit content library as the industry and BIM workflows evolve over time.

We welcome your feedback and insights to ensure we can continue to accommodate your Revit content requirements.